
it is possible to add customizable fields to the form to personalize your event's registration form.
This feature is useful for creating fields such as date/time, date, time, list, numeric, selection, and text.
You can add Smart Fields to customizable forms.
On this page:
-
Date/Time
-
Date
-
Time
-
List
-
Numeric
-
Selection
-
Text
Date/Time
In the Date/Time section, you customize the date and time field for your form.
Steps:
1 - Access the desired ticket - a screen with the data will be displayed.
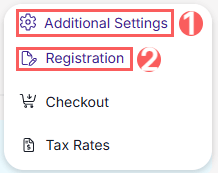
2 - Click on Additional Settings and then on Registration.
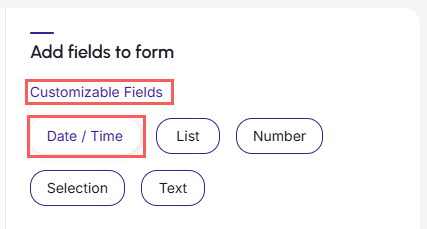
3 - In Customizable Fields, click on Date/Time.
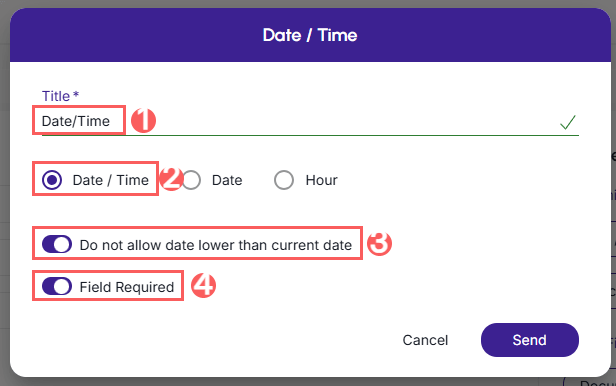
4 - In Date/Time, enter:
-
Title: enter a title for the field;
-
Date/Time: select the date/time field;
-
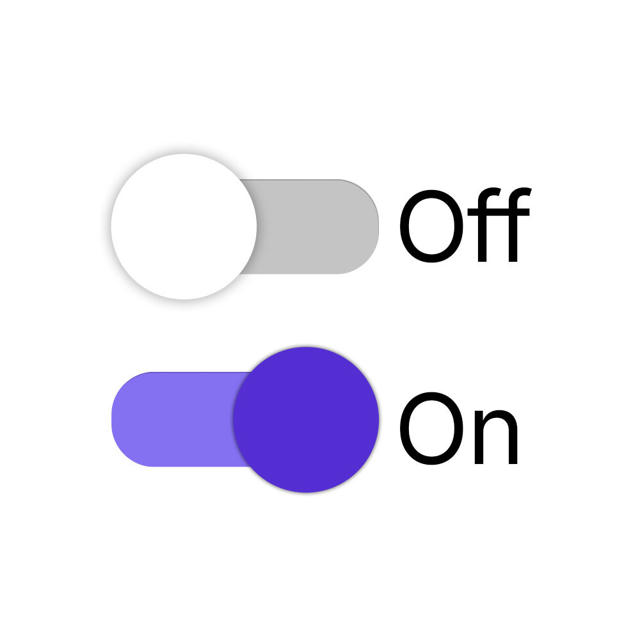
Do not allow date lower than current date: when enabled, does not allow entering a date earlier than the current date;
-
Field required: when enabled, the document field will appear as a mandatory field.
5 - Click on Send.
6 - Then, the field will be added to the form.
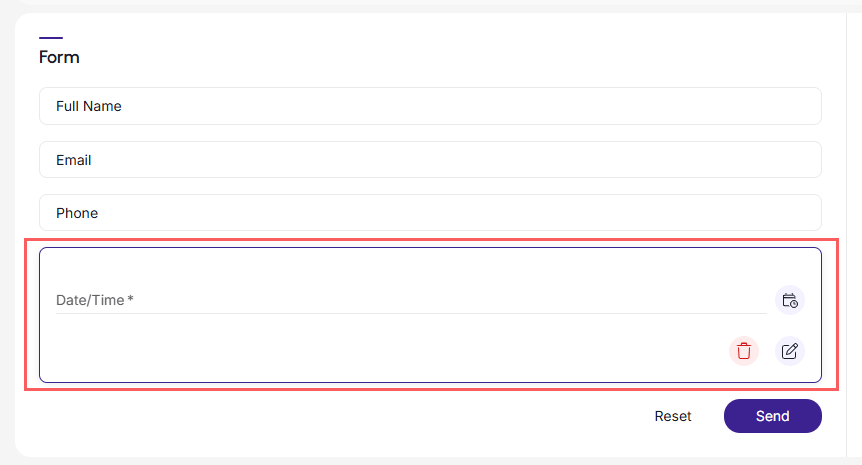
7 - Click on Send. To confirm that the field has been saved, a message will be displayed for a few seconds at the top right of the page.
You can update or remove the form fields.
Date
In the Date section, you customize the date field for your form.
Steps:
1 - Access the desired ticket - a screen with the data will be displayed.
2 - Click on Additional Settings and then on Registration.
3 - In Customizable Fields, click on Date/Time.
4 - In Date, enter:
-
Title: enter a title for the field;
-
Date: select the date field;
-
Do not allow date lower than current date: when enabled, does not allow entering a date earlier than the current date;
-
Field Required: when enabled, the document field will appear as a mandatory field.
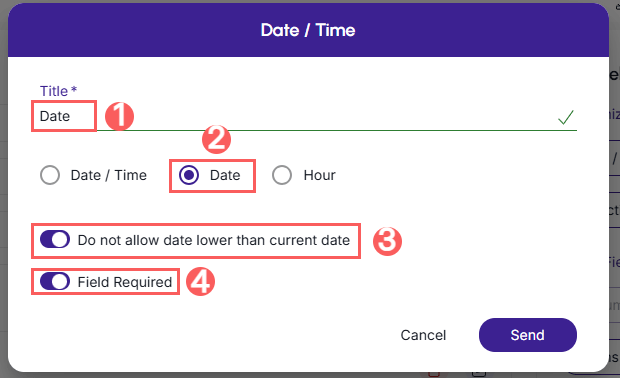
5 - Click on Send.
6 - Then, the field will be added to the form.
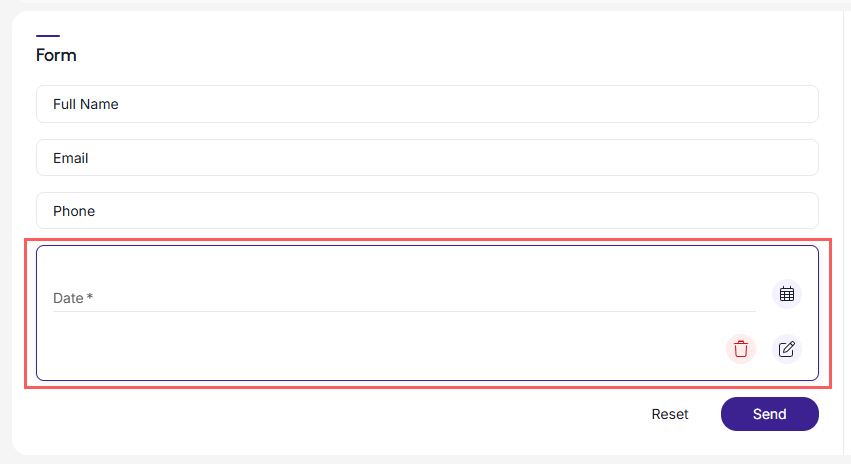
7 - Click on Send. To confirm that the field has been saved, a message will be displayed for a few seconds at the top right of the page.
You can update or remove the form fields.
Time
In the Time section, you customize the time field for your form.
Steps:
1 - Access the desired ticket - a screen with the data will be displayed.
2 - Click on Additional Settings and then on Registration.
3 - In Customizable Fields, click on Date/Time.
4 - In Time, enter:
-
Title: enter a title for the field;
-
Hour: select the time field;
-
Field Required: when enabled, the document field will appear as a mandatory field.
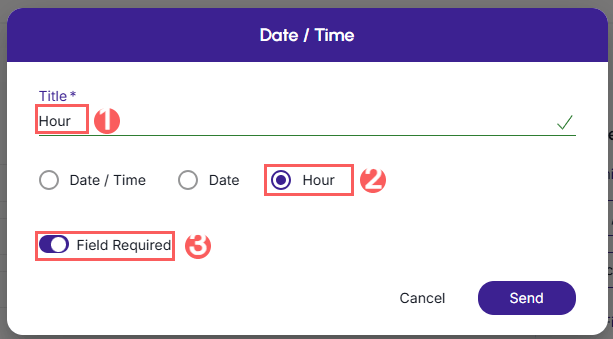
5 - Click on Send.
6 - Then, the field will be added to the form.
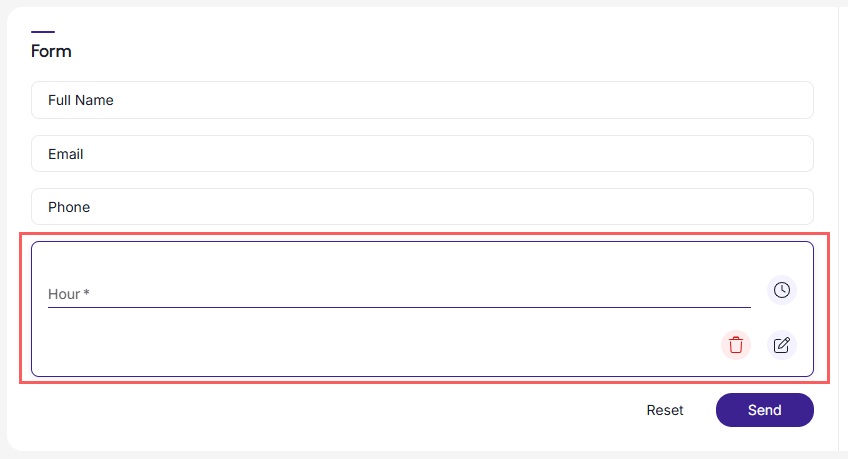
7 - Click on Send. To confirm that the field has been saved, a message will be displayed for a few seconds at the top right of the page.
You can update or remove the form fields.
List
In the List section, you customize the list field for your form.
Steps:
1 - Access the desired ticket - a screen with the data will be displayed.
2 - Click on Additional Settings and then on Registration.
3 - In Customizable Fields, click on List.
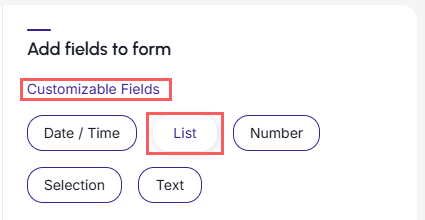
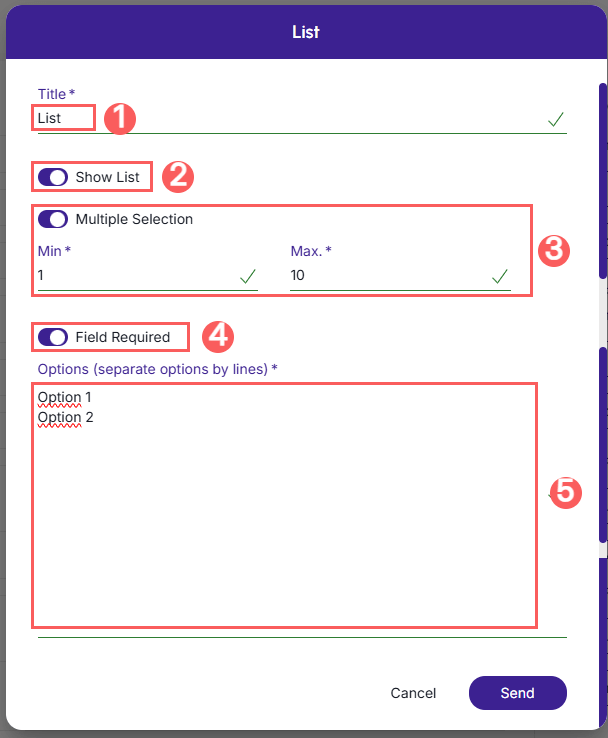
4 - In List, enter:
-
Title: enter a title for the field;
-
Show list: when enabled, displays the field's list;
-
Multiple selection: when enabled, displays the field's multiple selection - according to the list display - when activating this option, it is possible to inform the minimum and maximum value of the selection;
-
Field Required: when enabled, the document field will appear as a mandatory field;
-
Options: enter the options by line.
5 - Click on Send.
6 - Then, the field will be added to the form.
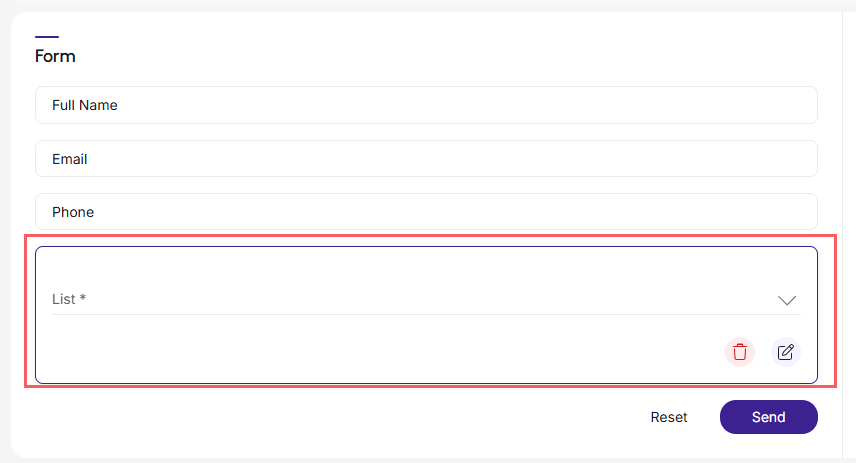
7 - Click on Send. To confirm that the field has been saved, a message will be displayed for a few seconds at the top right of the page.
You can update or remove the form fields.
Numeric
In the Numeric section, you customize the numeric field for your form.
Steps:
1 - Access the desired ticket - a screen with the data will be displayed.
2 - Click on Additional Settings and then on Registration.
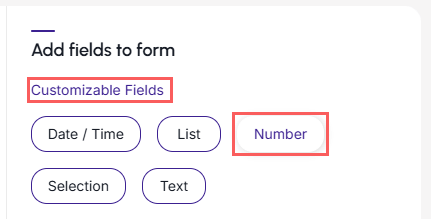
3 - In Customizable Fields, click on Numeric.
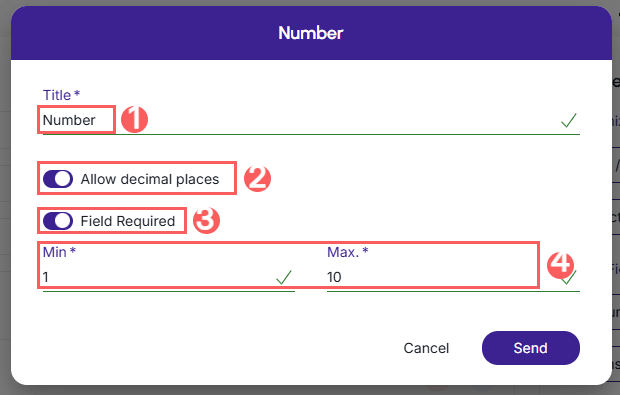
4 - In Numeric, enter:
-
Title: enter a title for the field;
-
Allows decimal places: when enabled, allows decimal places;
-
Field required: when enabled, the document field will appear as a mandatory field;
-
Min. Max: enter the minimum and maximum value of the numeric field - the min and max value refers to the field.
5 - Click on Send.
6 - Then, the field will be added to the form.
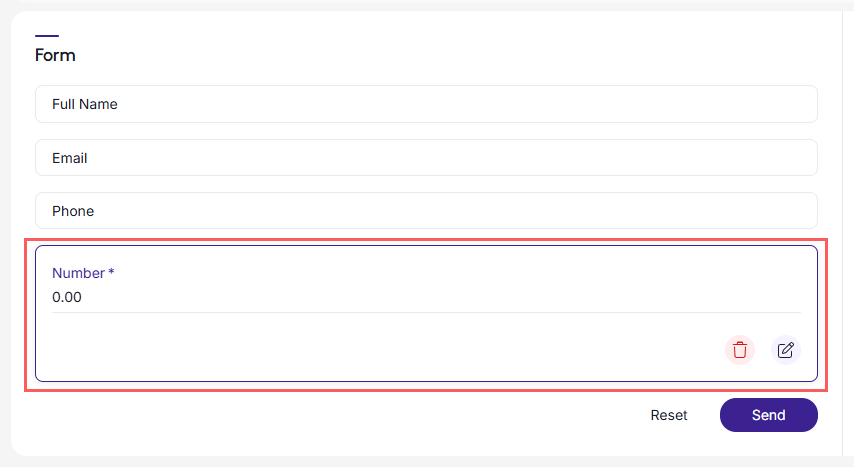
7 - Click on Send. To confirm that the field has been saved, a message will be displayed for a few seconds at the top right of the page.
You can update or remove the form fields.
Selection
In the Selection section, you customize the selection field for your form.
Steps:
1 - Access the desired ticket - a screen with the data will be displayed.
2 - Click on Additional Settings and then on Registration.
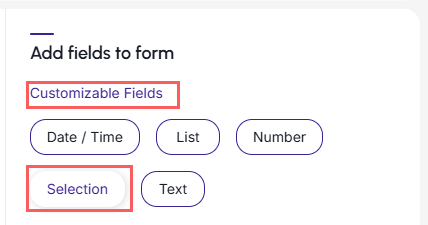
3 - In Customizable Fields, click on Selection.
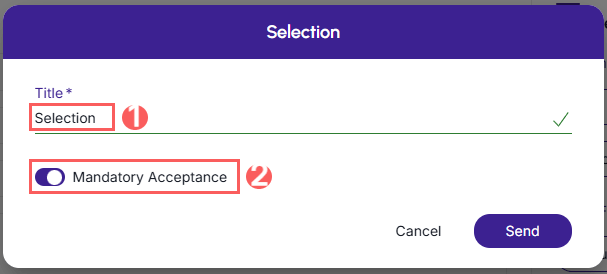
4 - In Selection, enter:
-
Title: enter a title for the field;
-
Mandatory acceptance: when enabled, it will be mandatory to activate the selection.
5 - Click on Send.
6 - Then, the field will be added to the form.
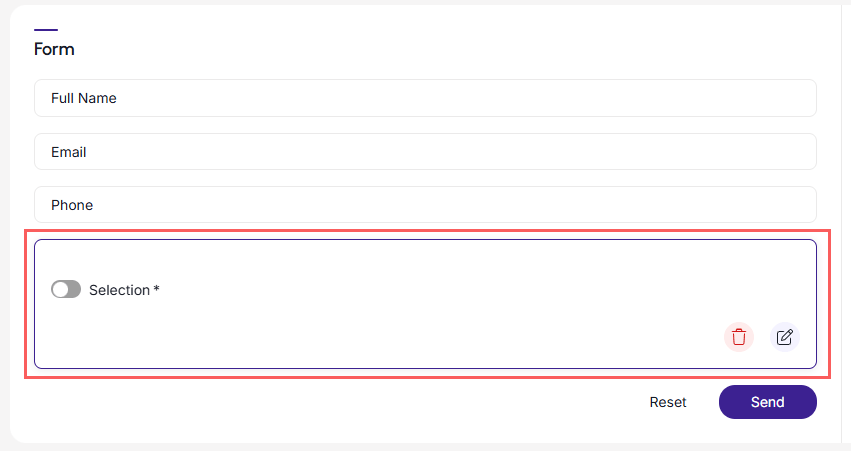
7 - Click on Send. To confirm that the field has been saved, a message will be displayed for a few seconds at the top right of the page.
You can update or remove the form fields.
Text
In the Text section, you customize the text field for your form.
Steps:
1 - Access the desired ticket - a screen with the data will be displayed.
2 - Click on Additional Settings and then on Registration.
3 - In Customizable Fields, click on Text.
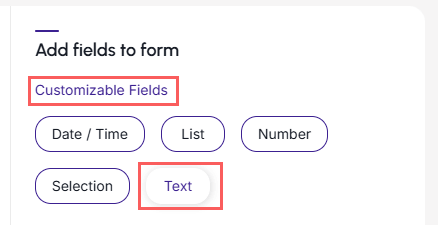
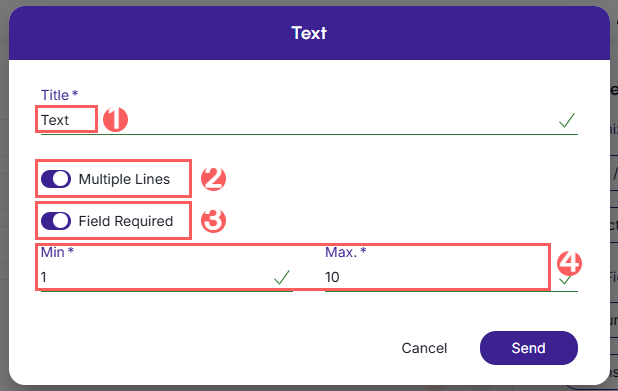
4 - In Text, enter:
-
Title: enter a title for the field;
-
Multiple lines: when enabled, displays multiple lines;
-
Field required : when enabled, the document field will appear as a required field;
-
Min. Max: enter the minimum and maximum value of the text field.
5 - Click on Send.
6 - Then, the field will be added to the form.
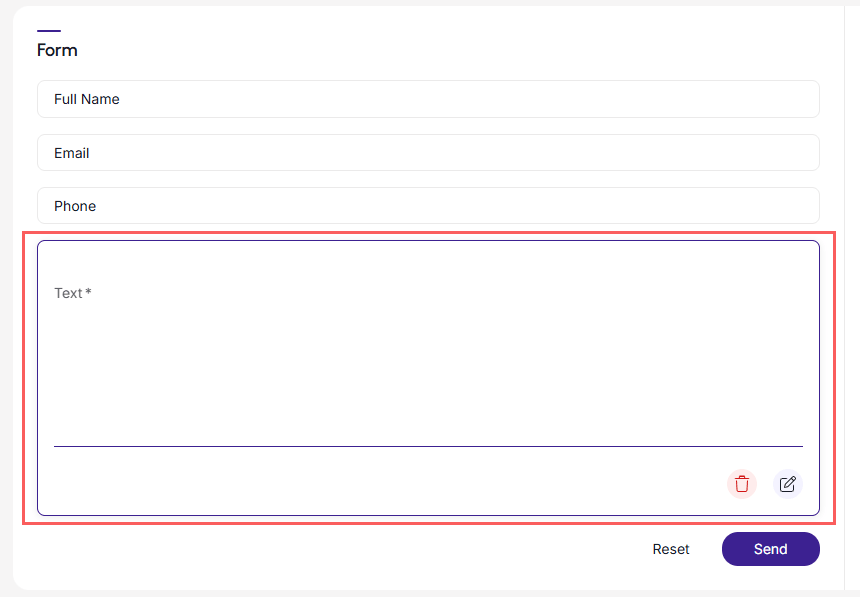
7 - Click on Send. To confirm that the field has been saved, a message will be displayed for a few seconds at the top right of the page.
You can update or remove the form fields.