
The Forms P.P.C.T. information section displays information such as the details of the created P.P.C.T.; autoresponders, statistics with lead information, daily clicks, among other information.
On this page:
-
Detail
-
Autoresponders
-
Statistics
-
Filter data from Forms P.P.C.T. Statistics
-
-
Leads
-
Daily Clicks
-
Audit
-
How to filter the Audit list
-
Detail
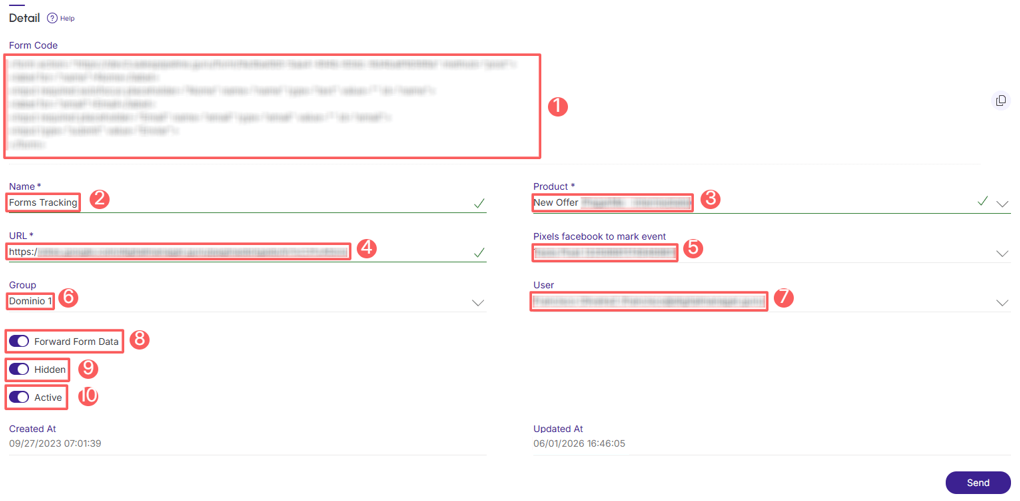
In the Detail section, you can view all P.P.C.T. information, such as disclosure URL, name, friendly URL, product, destination URL, field, origin, group, and user.
Steps:
1 - Select the Forms P.P.C.T. list - a screen with the data will be displayed.
2 - In Detail, the list displays the following information:
-
Form Code: capture tracking form code;
-
Name: name that identifies the tracking;
-
Product: the product that identifies the tracking;
-
Destination URL: Forms P.P.C.T. destination URL;
-
Pixels Facebook to mark event: the Facebook pixel(s) marked as an event;
-
Group: the tracking group you want to associate the tracking with (optional);
-
User: tracking owner;
-
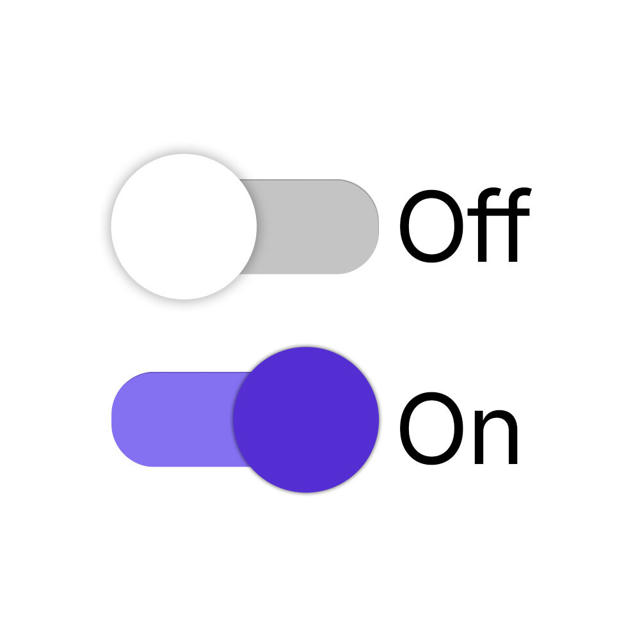
Forward Form Data: switch the button to the Active position if you want to send the captured data to the next page;
-
Hidden: when activated, hides the P.P.C.T. from the list - the disclosure URL will remain active;
-
Active: switch the button to the Active position to activate tracking.
Autoresponders
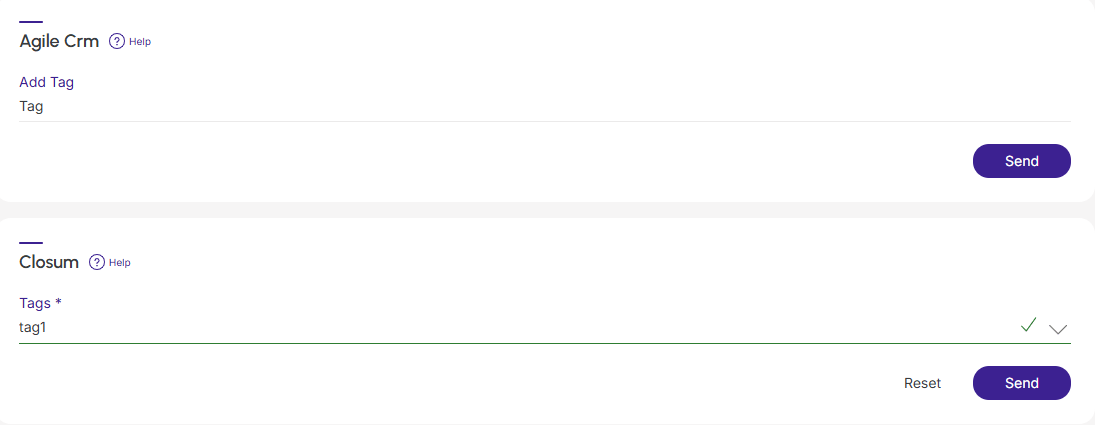
In the Autoresponders section, you can view the information of the autoresponder list integrated with Guru. In addition, you can define which ones you want to register the lead in, filling in the data for each autoresponder:
Steps:
1 - Select the Forms P.P.C.T. list - a screen with the data will be displayed.
2 - In Autoresponders, the list displays the integrated autoresponders:
Stats
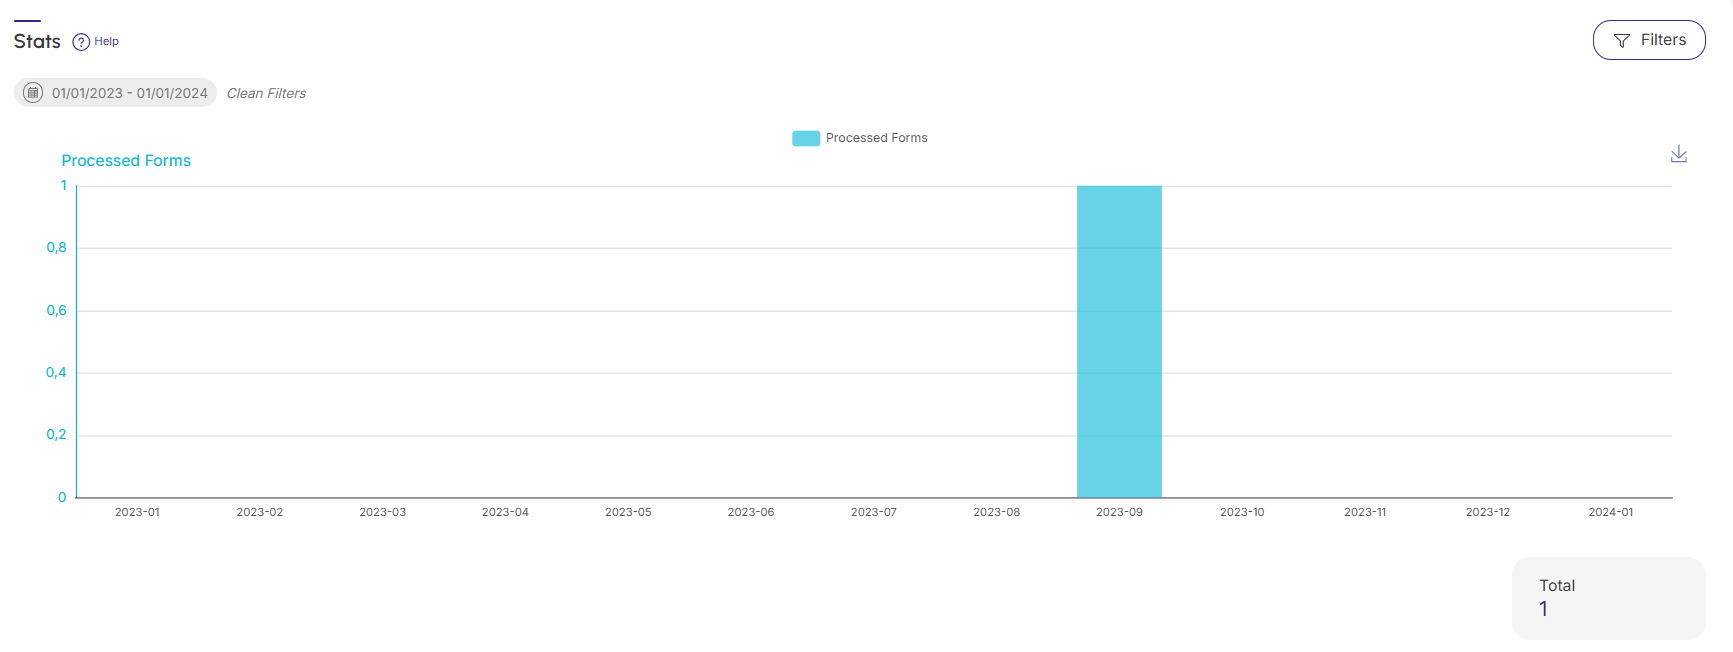
In the Stats section, you can view the daily conversion information of the capture form. In addition, you can use the filter to view a smaller subset of existing P.P.C.T.s. This feature is useful for finding specific P.P.C.T.s you want to view.
Steps:
1 - Select the Forms P.P.C.T. list - a screen with the data will be displayed.
2 - In Stats, the list displays the following information:
Filter data from Forms P.P.C.T. Statistics
You can filter the data using the Forms P.P.C.T. statistics.
Steps:
1 - Select the Forms P.P.C.T. list - a screen with the data will be displayed.
2 - In Statistics, click on Filters.
3 - Fill in one or more filter options:
-
Period: searches for trackings with start and end dates (the verified tracking field corresponds to the option selected in Created on) - if desired, use the predefined time range buttons.

4 - Click on Filter.
Leads
In the Leads section, you can view the information of captured leads, such as email and the lead creation date. This feature is useful for finding the leads captured in the tracking.
Steps:
1 - Select the Forms P.P.C.T. list - a screen with the data will be displayed.
2 - In Leads, the list displays the following information:
-
Email: email of the lead found in the tracking;
-
Created at: date the lead was created.

Daily Clicks
In the Daily Clicks section, you can consult the daily summary of trackings. This feature is useful for detailing the daily clicks of checkout tracking.
Steps:
1 - Select the Forms P.P.C.T. list - a screen with the data will be displayed.
2 - In Daily Clicks, the list displays the following information:
-
Date: displays the date the click was tracked;
-
Captures: displays the number of clicks tracked in the tracking;
-
Leads: displays the number of leads tracked in the tracking.

Audit
As a security measure, Guru stores a history of all operations performed in the integration, identifying the user, date/time of the operation, and other details.
Steps:
1 - Select the Forms P.P.C.T. list - a screen with the data will be displayed.
2 - Click on the Audit tab.
3 - Activities are displayed in a timeline (from most recent to oldest).

4 - If desired, you can view the activity detail by clicking on its title.

5 - Click on one of the available sections to view the data:
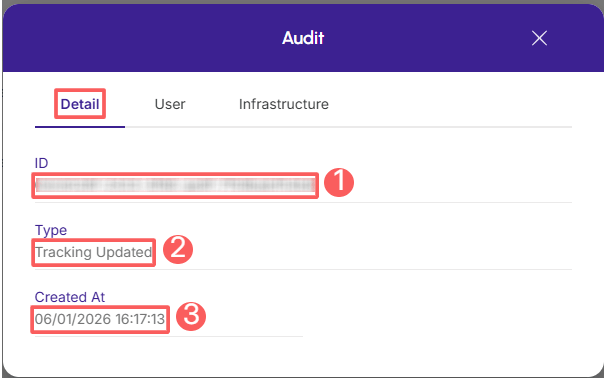
Detail
Displays detailed information about the activity in question.
-
ID: identification number (ID) of the update;
-
Type of change performed;
-
Created on: date of activity registration.
User
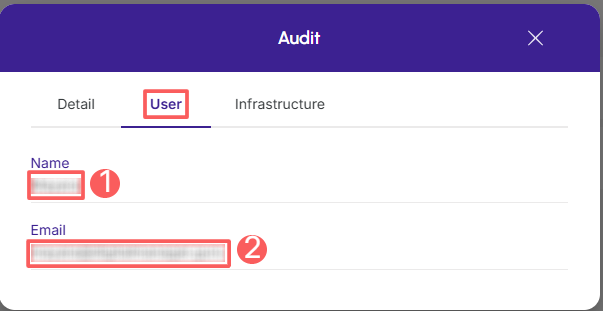
Displays information about the user who performed the action.
-
Name: name of the user who performed the operation;
-
Email: email of the user who performed the operation.
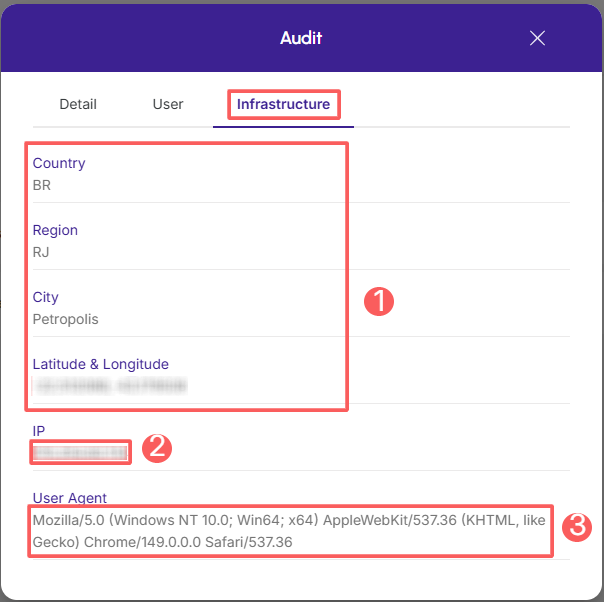
Infrastructure
Displays infrastructure information (country, IP, user agent…) of the related activity.
-
Country, Region, City, Latitude & Longitude: location of the device that performed the activity;
-
IP: device IP address;
-
User Agent: identification of the user agent that performed the operation.
How to filter the Audit list
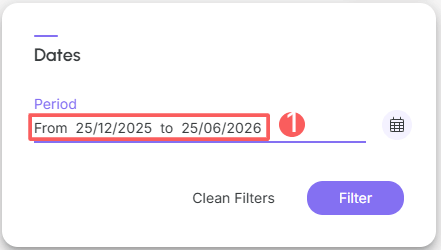
You can use the filters to view a smaller subset of existing audits. This feature is useful for finding specific audits you want to view.
By default, only records from the last 28 days will be shown, but the period can be changed in the filters, in the Period field.
Steps:
1 - Select the Forms P.P.C.T. list - a screen with the data will be displayed.
2 - Click on the Audit tab.
3 - In Audit, click on Filters.
4 - Fill in one or more filter options:
-
Period: searches for audits registered in the selected period - you can use the predefined time range buttons or select the date you want to view.
5 - Click on Filter.
You can view the number of applied filters, and by using them, you will be able to clear them without accessing the Filters icon again, facilitating the removal of the selection.
Protect your data. Increase your business security.
Create and manage users determining what each employee can see and do within the organization.