
The Forms P.P.C.T. uses a tracking form to capture leads on its page, which stores the complete history of interactions(1) of leads with your campaigns, where it counts direct conversions(2) and indirect(3) before passing the captured data to your autoresponder.
(1) Learn more at how to track leads.
(2) Conversions made immediately after registration (thank you page).
(3) When the lead did not convert on the thank you page, but converted in another campaign.
On this page:
-
Step 1: Create Forms P.P.C.T.
-
Step 2: Configure sending the lead to the Autoresponder (optional)
-
Step 3: Copy Form code
-
Step 4: Create Additional Fields (optional)
Before you start, you need to:
-
Have an active autoresponder integration.
-
Be an administrator or have permission to perform the following actions.
Step 1: Create Forms P.P.C.T.
In this step, you will create a Forms P.P.C.T. to register the captured leads.
Steps:
1 - Access the Guru admin with your username and password.
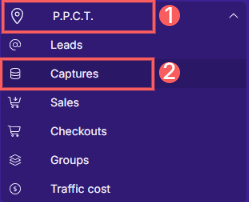
2 - In the side menu, go to P.P.C.T., and then click on Captures.
3 - Click on Add Tracking.
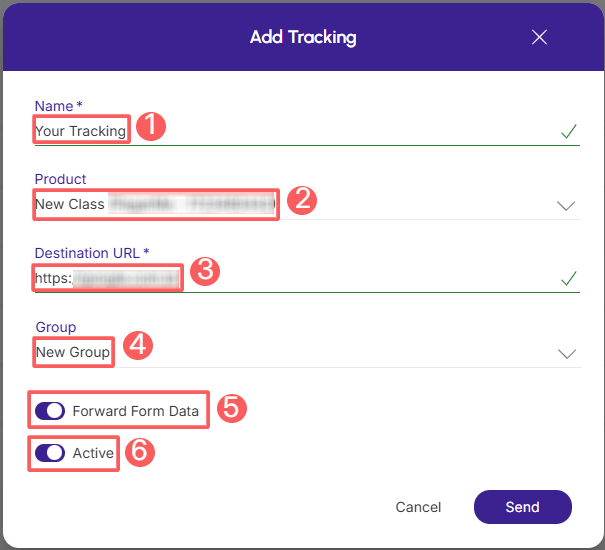
4 - In Create New Tracking, enter the following data:
-
Name: name or title to identify the tracking;
-
Product: select the product - we recommend choosing the Global Tracking product1;
-
Destination URL2: enter the destination page URL that will be displayed after clicking the link;
-
Group: select the tracking group you want to associate the tracking with (optional);
-
Forward form data3: change the button to the Active position if you want to send the captured data to the next page;
-
Active: to activate tracking, change the button to the active position.
(1) By default, always select the Global (Tracking) product for all elements (P.P.C.T.s) involved in tracking. If this product does not exist, create it in Products.
(2) Full URL of the destination page (advertorial, own/producer sales page or payment link)
(3) Leave in the on position to send the captured data to the next page. Example: display a message “Registration confirmed.”
5 - Click on Send.
The HTML form will be automatically available for use.
If you already have a Forms P.P.C.T. for a product, just duplicate an existing one and make the necessary changes. For more information, consult how to manage the Forms P.P.C.T..
Step 2: Configure sending the lead to the Autoresponder (optional)
In this step, you will fill in the data to receive the captured lead and perform segmentation in the autoresponder you want by filling in the data for each autoresponder.
Integration with the autoresponder must be previously activated. To activate the integration, consult the list of integrations available.
Steps:
1 - Select the list of Forms P.P.C.T.s - a screen with the data will be displayed.
2 - In Autoresponders, the list displays the integrated autoresponders.
3 - Fill in the data to receive the captured lead and how segmentation will be done in the autoresponder you want.
4 - Click on Send.
Repeat the steps above for the autoresponders where you want to receive the lead.
Step 3: Copy Form code
In this step, you will copy the form code within the created Forms P.P.C.T.
Steps:
1 - Access the Guru admin with your username and password.
2 - In the side menu, access P.P.C.T., and then click on Captures.
3 - Select the P.P.C.T. created that you want to Connect.
4 - In Detail, click on the Form Code to copy.
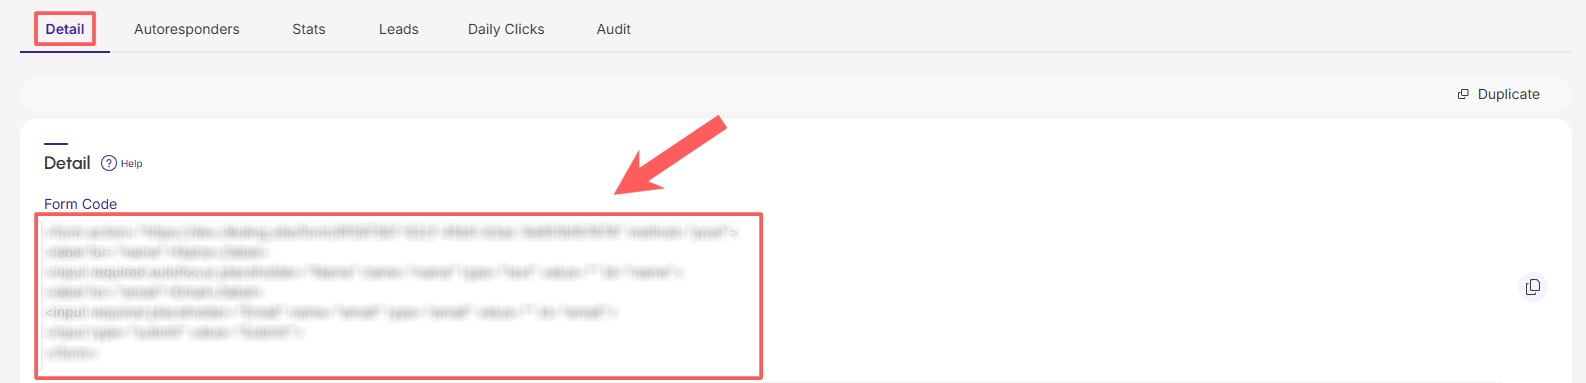
To confirm that the form code has been copied, you should see a notification in the upper right corner.
Step 4: Create Additional Fields (optional)
In this step, you will create the additional fields to insert into your capture page, using the same field name as in your email tool.
If you are using Infobip as an autoresponder in your Forms P.P.C.T., remember that the phone field must always include the country code, or alternatively send the contact's address country, otherwise the 55 country code will be added by default to the phone sent.
Steps:
1- Paste the Form Code in a Text Editor of your choice (e.g., notepad).
2 - Then, copy the 2 tags (lines) referring to the “name” field.

3 – Paste the content before the penultimate line of the form code.
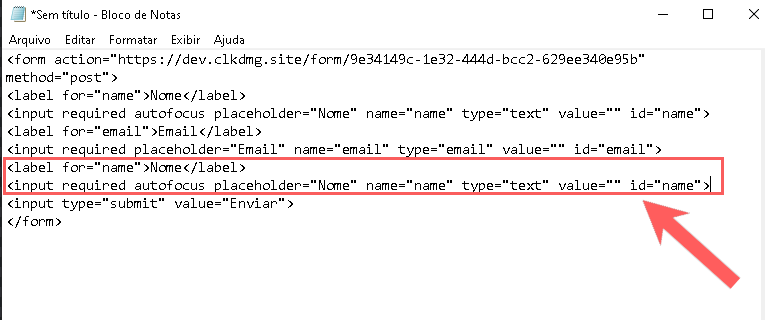
4 – Edit the attribute value:
-
Placeholder – “input” tag: text to display inside the field;
-
Id – “input” tag: name of the field in your email tool(1);
-
Name – “input” tag: name of the field in your email tool(1);
-
For – “label” tag: name of the field in your email tool(1);
(1) Access your email tool and copy the field name.
Special attention to the autoresponders listed below:
5 – Then, select the form and copy the content.
Some versions of Optimize. Press are incompatible with the Guru form and, instead of directing the user to the thank you page configured in the Forms P.P.C.T., they direct to a non-existent page.
To fix this problem, simply rename the value of the attribute “name” to “nome” as per the following video:
You can track the general and daily lead count of the corresponding Forms P.P.C.T.
More Resources