
You can create a Sales P.P.C.T., which allows you to know exactly where each sale came from through your traffic source to the landing page and monitor conversions (sales1)) and generate conversion and ROI statistics.
You must create a Sales P.P.C.T. for each traffic source.
On this page:
-
Add Sales P.P.C.T.
-
Duplicate Sales P.P.C.T.
-
Update Sales P.P.C.T.
-
Hide Sales P.P.C.T.
-
Deactivate Sales P.P.C.T.
-
Remove Sales P.P.C.T.
Add Sales P.P.C.T.
In this section, you will add a Sales P.P.C.T.
Steps:
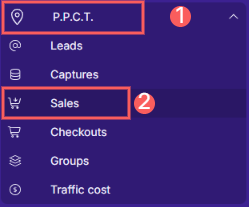
1 - In the side menu, go to P.P.C.T., and then click on Sales.
2 - In the upper right corner, click on Add Tracking.
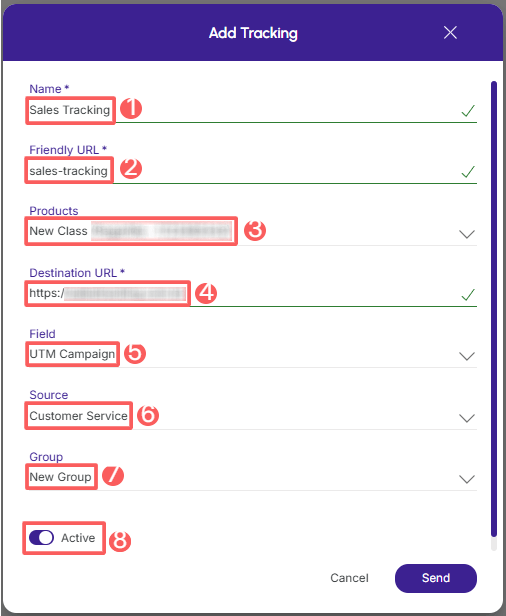
3 - In Add Tracking, enter the following data:
-
Name: name or title to identify the tracking;
-
Friendly URL: automatically generated from the tracking name, it is a simple text to remember or type that will appear at the end of the tracked URL - if desired, you can change it;
-
Products: select the product - we recommend choosing the Global Tracking product(1);
-
Destination URL(2): enter the destination page URL that will be displayed after clicking the link;
-
Field: select the field in the marketplace - select the field compatible with your payment platform;
-
Source: select the traffic source where you will use the tracking link;
-
Group: select the tracking group you want to associate the tracking with (optional);
-
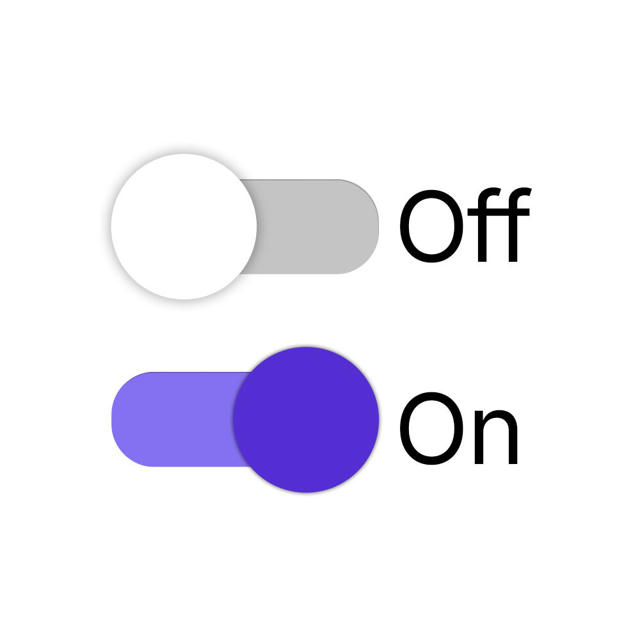
Active: to activate tracking, switch the button to the active position.
(1) By default, always select the Global (Tracking) product for all elements (P.P.C.T.s) involved in tracking. If this product does not exist, create it in Products.
(2) Full URL of the destination page (advertorial, own sales page/producer or payment link)
4 - Click on Send.
When creating the Sales P.P.C.T., a unique disclosure URL will be generated and automatically available for use.
Attention: after receiving the first click, it is not allowed to change or delete the P.P.C.T. Alternatively, you can activate or deactivate it.
Duplicate Sales P.P.C.T.
To save time, you can duplicate a similar Sales P.P.C.T. instead of adding a new one. This option is useful if you want to include options from an existing Sales P.P.C.T. such as field, source, and group.
When using the Duplicate feature, Guru will create a copy of the selected sales tracking with a new name and disclosure URL.
To duplicate an existing Sales P.P.C.T., follow the steps below.
Steps:
1 - In the side menu, go to P.P.C.T., and then click on Sales.
2 - Hover over the desired P.P.C.T. and click on Duplicate.

A message will be displayed for a few seconds in the upper right corner of the page, informing that the item has been successfully duplicated.
Update Sales P.P.C.T.
After creating a Sales P.P.C.T., you can edit it to change the name, product, URL, field, source, and other information.
Some fields become unavailable for alteration after the P.P.C.T. has received its first click.
To edit a Sales P.P.C.T., follow the steps below.
Steps:
1 - In the side menu, go to P.P.C.T., and then click on Sales.
2 - In the list of your Sales P.P.C.T.s, select the P.P.C.T. you want to update.

3 - Consult the sales P.P.C.T. information.
Hide Sales P.P.C.T.
You can hide a Sales P.P.C.T. from the P.P.C.T. display list. This option is useful when you do not want to use the tracking or it cannot be deleted because it has clicks. After hiding the P.P.C.T., it will only be visible when you show hidden P.P.C.T., reversing the action.
To hide an P.P.C.T., follow the steps below.
Steps:
1 - In the side menu, go to P.P.C.T., and then click on Sales.
2 - Click on the desired P.P.C.T.
3 - In Detail, activate the Hidden option.
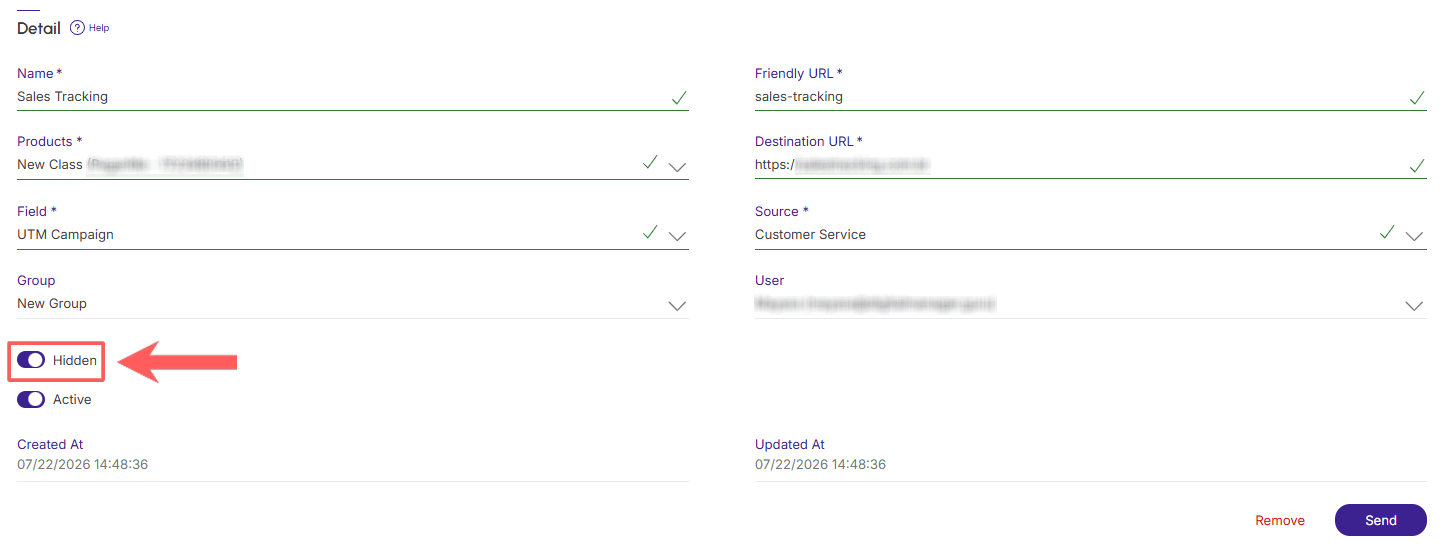
4 - Click on Send.
Deactivate Sales P.P.C.T.
You can deactivate a Sales P.P.C.T. at any time. When deactivating an P.P.C.T., the disclosure URL will no longer be available, meaning there will be no more redirection to the payment URL informed in the button.
This feature is useful when it is not possible to delete1 the Sales P.P.C.T. and you want to prevent the customer from making a purchase through the tracking link in question.
(1) it is possible to remove a Sales P.P.C.T., provided it has not received its first click.
To deactivate a Sales P.P.C.T.:
Steps:
1 - Access the list of P.P.C.T. in the registration of the desired P.P.C.T.
2 - Locate the desired Sales P.P.C.T. and change the selector to the desired position (deactivate).

If you want to activate a deactivated P.P.C.T., use the filter to search for inactive P.P.C.T.s.
Remove Sales P.P.C.T.
it is possible to remove a Sales P.P.C.T., provided it has not received its first click. When removing an P.P.C.T., the record is permanently removed and cannot be restored.
Alternatively, you can hide the Sales P.P.C.T. instead of removing it.
To remove a Sales P.P.C.T.:
Steps:
1 - In the side menu, go to P.P.C.T., and then click on Sales.
2 - Click on the P.P.C.T. you want to remove.
3 - In Detail, click on Remove1.
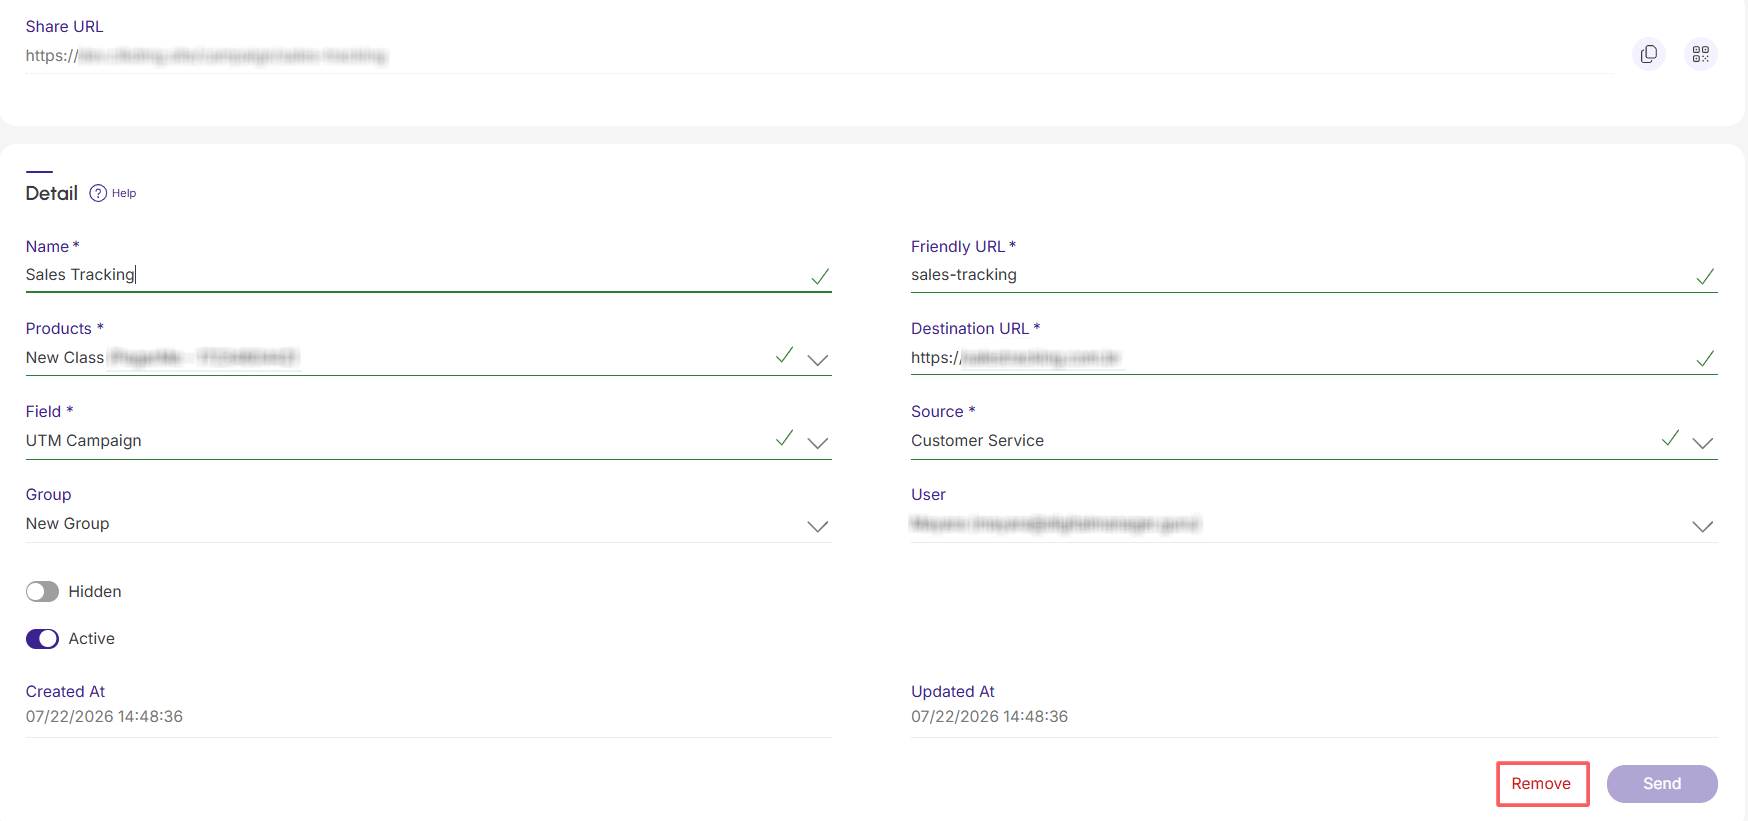
4 - A confirmation window is displayed. If you wish to proceed with the removal, click on Confirm.
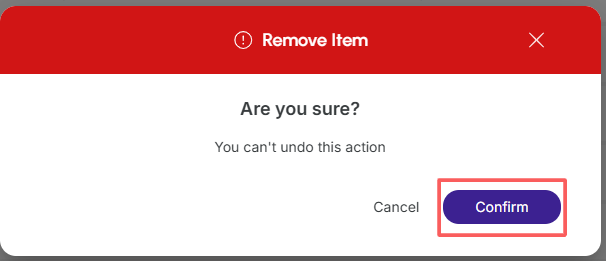
(1) It will not be allowed to change or delete a Capture P.P.C.T. tracking after it has received its first click.
More Resources