
Use sales status mapping to determine in which situations SMSEmpresa should trigger automatic messages to your customers.
You need to set the rule for each of the products in Guru with SMSEmpresa. This configuration is done through Status Mapping.
On this page:
-
Add sales/subscription status mapping for SMSEmpresa
-
View the Mappings list
-
Update Status Mapping
-
Delete Status Mapping
-
View Audit
-
View Audit filters
-
Before configuring, you need to:
-
Have a registered product in Guru.
Add sales/subscription status mapping for SMSEmpresa
Add a sales/subscription status mapping for SMSEmpresa.
Steps:
1 - Access the guru admin with your username and password.
2 - In the side menu, go to Settings > Integrations > SMS > SMSEmpresa.

3 - Click on Additional Settings and then on Status Mapping.
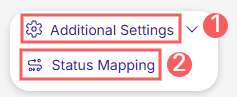
4 - According to the mapping you want to perform, select Subscriptions or Sales. Example: if you sell a subscription product, select the Subscriptions option.

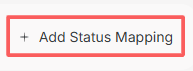
5 - Next, click on Add Status Mapping.
6 - Enter:
-
Status: select the transaction status to which you want to trigger the messages;
-
Product: select the product in Guru for which you want to configure the mapping rules;
-
Message: enter the text that will be sent in the message;
-
Subscription/transaction field (sales): select the subscription/sales field you want to associate with the number in the message;
-
Add: insert into the message the dynamic field you selected from the subscription/transaction (sales) (item 4).
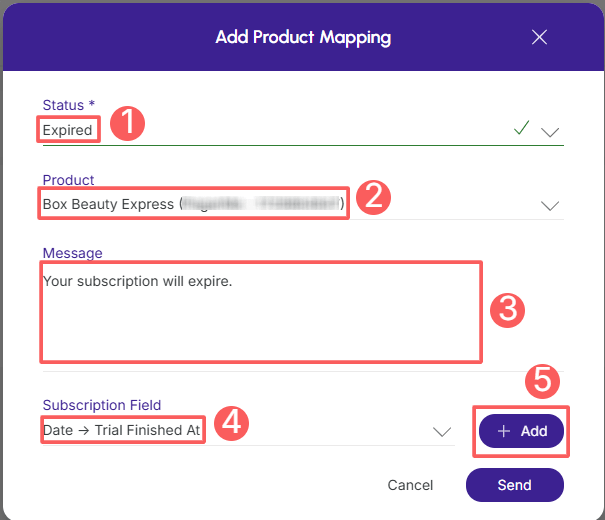
7 - Click on Send.
To confirm that the mapping was successfully created, you should see a notice in the upper right corner.
8 - Repeat steps 4 through 7 for each mapping you wish to perform.
View the Mappings list
By default, the mapping list is organized by creation date (from newest to oldest). For faster page loading speed, only the first records are displayed. If you wish to view the remaining items in the list, you can scroll to the bottom of the page and click See more in the bottom center of the screen.
Steps:
1 - Access the guru admin with your username and password.
2 - In the side menu, go to Settings > Integrations > SMS > SMSEmpresa.
3 - Click on Additional Settings and then on Status Mapping.
4 - According to the mapping you want to perform, select Subscriptions or Sales. Example: if you sell a subscription product, select the Subscriptions option.
5 - The list displays the following information:
-
Status: the transaction status to which you want to trigger the messages;
-
Product: the product in Guru for which you want to configure the mapping rules;
-
Message: the text that will be sent in the message.

Update Status Mapping
Once created, you can update a status mapping. This feature is useful when you need to change the trigger rule for a status in SMSEmpresa.
Steps:
1 – In the list, locate the desired product and click on it.

2 - Enter:
-
Status: select the transaction status to which you want to trigger the messages;
-
Product: select the product in Guru for which you want to configure the mapping rules;
-
Message: enter the text that will be sent in the message;
-
Subscription/transaction field (sales): select the subscription/sales field you want to associate with the number in the message;
-
Add: insert into the message the dynamic field you selected from the subscription/transaction (sales) (item 4).
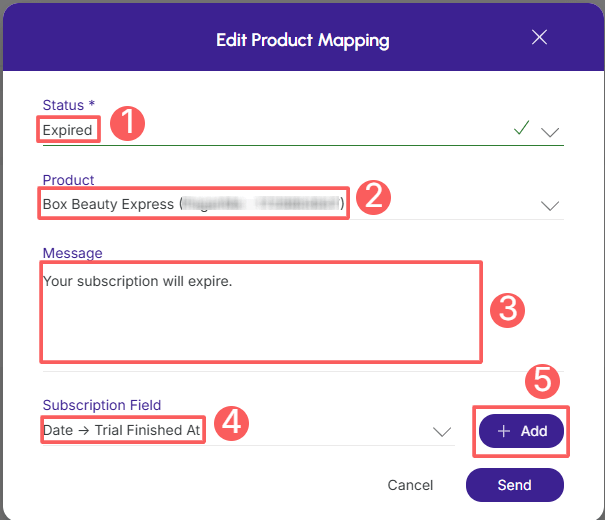
3 – Click on Send.
A message will be displayed indicating that the mapping was successfully updated.
Delete Status Mapping
Once created, you can remove a status mapping. This feature is useful when you no longer wish to map the status in SMSEmpresa when a sale of a product or subscription occurs in Guru.
Steps:
1 – In the list, locate the desired mapping and click the corresponding Remove button.

2 - Confirm if you want to proceed with the deletion. To confirm that the mapping was deleted, a message will be displayed for a few seconds in the top right corner of the page.
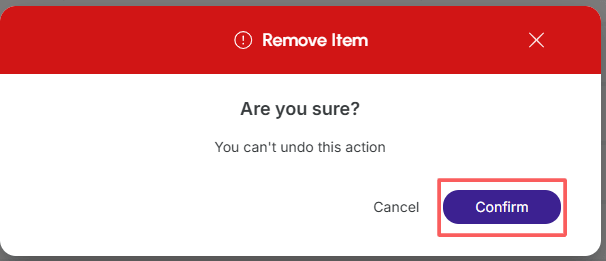
From that moment on, Guru will stop sending messages for the sales status mapping to SMSEmpresa.
View Audit
As a security measure, Guru maintains a history of all operations performed in product mapping, identifying user, date/time of the operation, and other details.
Steps:
1 - In the side menu, go to Settings > Integrations > SMS > SMSEmpresa.
2 - Click on Additional Settings and then on Status Mapping.
3 - Click on the Audit tab.
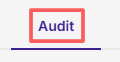
4 - Activities are displayed in a timeline (from most recent to oldest).

5 - If you wish, you can view the activity details by clicking on its title.

6 - Click on one of the available sections to view the data:
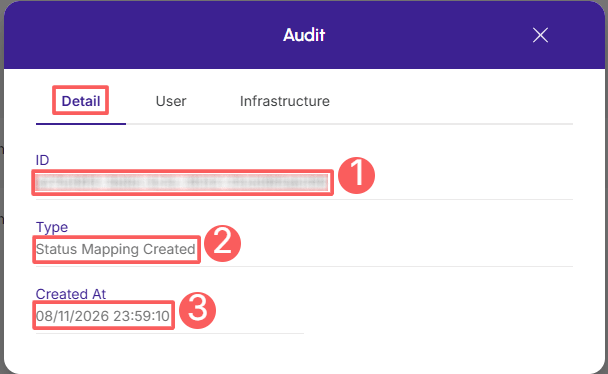
Detail
Displays detailed information about the activity in question.
-
ID: update identification number (ID);
-
Type of change made;
-
Created at: date of activity record.
User
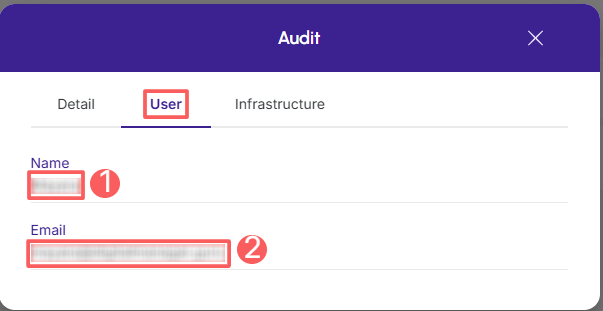
Displays information about the user who performed the action.
-
Name: name of the user who performed the operation;
-
Email: email of the user who performed the operation.
Infrastructure
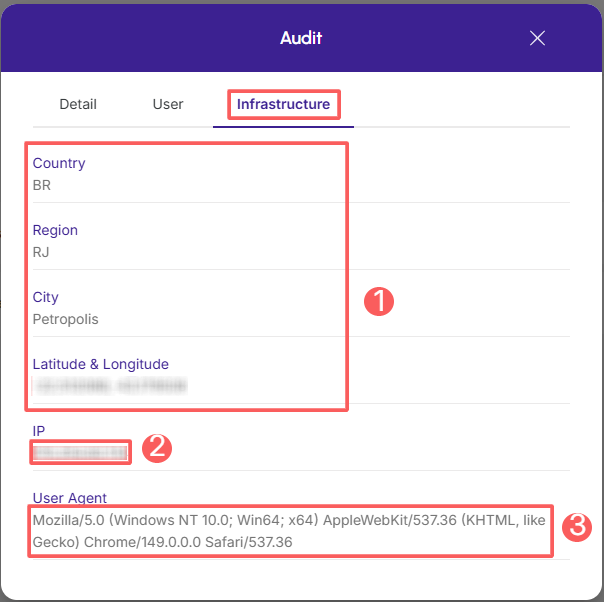
Displays infrastructure information (country, IP, user agent…) for the related activity.
-
Country, Region, City, Latitude & Longitude: location of the device that performed the activity;
-
IP: device IP address;
-
User Agent: identification of the user agent that performed the operation.
View Audit filters
You can use filters to view a smaller subset of existing audits. This feature is useful for finding specific audits you want to view.
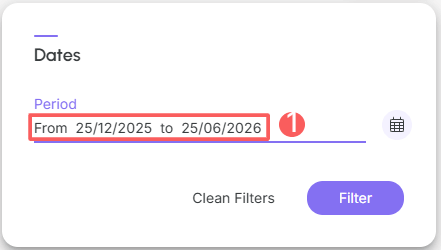
By default, only records from the last 28 days will be shown, but the time period can be changed in the filters using the Period.field.
Steps:
1 - In the side menu, go to Settings > Integrations > SMS > SMSEmpresa.
2 - Click on Additional Settings and then on Status Mapping.
3 - Click on the Audit tab.
4 - In Audit, click on Filters.
5 - Fill in one or more filter options:
-
Period: searches for audits registered in the selected period - you can use the predefined time range buttons or select the date you wish to view;
6 - Click on Filter.
You can view the amount of applied filters, and when using them, you can clear them without accessing the Filters icon again, making selection removal easier.
Protect your data. Increase your business security.
Create and manage users by determining what each team member can see and do within the organization.