
It is possible to add or update product information such as code, product type, name, illustrative image, and their respective offers.
When creating the product, you must link a payment processor (marketplace) that you intend to use in Checkout Guru and select the type corresponding to the desired sales modality:
-
Product: the single sale – a single charge will be made after checkout completion;
-
Subscription: the subscription / recurrence – recurring charges will be made after subscribing at checkout;
-
E-ticket: the single ticket sale – a single charge will be made after checkout completion.
Once the product is created, it is not possible to change the type or the payment processor (marketplace). If you wish to change the payment processor, you must add a new product.
1 It is not necessary to add or update a product sold through External Checkout. This is because it is automatically added/updated when each sale is received. Some registration information for these products is not available for editing, and the data may be overwritten with each new sale received via postback.
2 The integration with the payment processor must be previously activated before adding a product. To activate an integration, go to Settings » Integrations » Checkout Guru.
On this page:
-
Add product
-
Duplicate product
-
Import product
-
Update product
-
Hide product
-
Remove product
Before you start, you need to…
-
Be an administrator user or have permission to perform the following actions.
-
Have an active integration with a payment processor compatible with Checkout Guru.
Add product
In this section, you will add a product.
Steps:
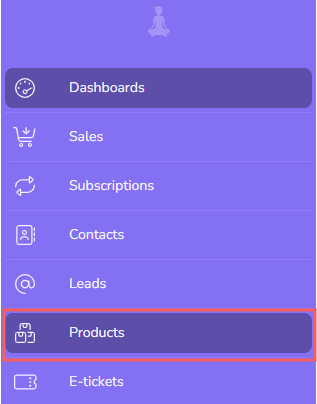
1 - In the side menu, go to Products.
2 - In Products, click on Add Product.
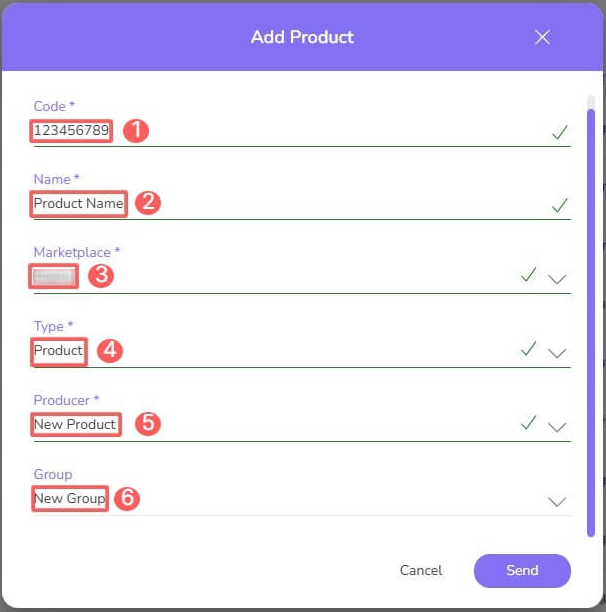
3 - In Add Product, enter the following data:
-
Code: a unique identification code1 of the product is automatically generated - if desired, you can change it;
-
Name: name or title of the product you want to show to customers;
-
Marketplace: select the processor where you will transact the payment - active integrations for Checkout Guru and External Checkout;
-
Type: select the option according to the sales modality that will be applied - Product (single charge), Subscription (recurring charge) or E-ticket (single charge);
-
Producer: select the content producer or manufacturer/distributor name - the list of producers registered;
-
Group: select the product group you want to associate.
4 - Click on Send.
5 - Then, fill in the remaining Product Information.
1 Products sold through External Checkout must have the same identification code as the checkout platform.
If you don't have an active marketplace, a message will appear informing you that you will need to activate it before creating a product.

Duplicate product
To save time, you can duplicate a similar product instead of adding a new product. This option is useful if you want to include product options such as color, size, or different subscription plans. Consult the material on best practices for creating products and offers to find out whether you should duplicate the product or add a new offer to an existing product.
When using the Duplicate feature, Guru copies all the original product information and creates another product with a different identification code and with the snippet “(Copy)” at the end of the name.
By default, it is not possible to change the Marketplace and Type fields of a duplicated product. If you want these fields to be different for the new product, use the Add product feature.
To duplicate an existing product, follow the steps below:
Steps:
1 - In the side menu, go to Products.
2 - Hover over the desired Product and click on Duplicate.

Important: When a product is duplicated, its offers are not automatically activated. Access the desired product offer and click to activate offer.
Import Products
If you use an e-commerce platform, you can import the product registration and then change or include the necessary information. This feature is useful for quickly creating products in Guru based on information obtained from the product registration on the e-commerce platform.
Before importing your products, you need to have an active integration with the e-commerce platform and an active integration with a payment processor (Guru Checkout or external checkout).
When performing an import, you must select a payment processor (marketplace) to link to the products. If you choose a marketplace compatible with Guru’s Checkout, you must also enter relevant information for creating offers, such as available payment methods and types of documents accepted at checkout. In these cases, products will be created with an offer and its respective checkout link.
According to the e-commerce platform, perform one of the steps below to import your products:
-
Import Products from Kapsula
-
Import Products from Magento
-
Import Products from Nuvemshop
-
Import Products from Shopify
-
Import Products from WiXeCommerce
-
Import Products from Woocommerce
After importing, you can locate and update the registered products.
Update product
After creating products, you can edit them to change name, image, offers, and other information.
It is not allowed to edit the Marketplace and Product Type fields. If you want these fields to be different for an existing product, you must add a new product and replace the old one with it.
To edit a product, follow the steps below:
Steps:
1 - In the side menu, go to Products.
2 - In the list of your Products, select the Product you want to update.

3 - Then, fill in the Product Information.
Hide product
You can hide a product from the product display list. This option is useful when a product is no longer marketed and cannot be deleted because it has associated sales. After hiding the product, it will only be visible when show hidden product, reversing the action.
To hide a product:
Steps:
1 - In the side menu, go to Products.
2 - Click on the Product desired.
3 - In Detail, activate the option Hidden.
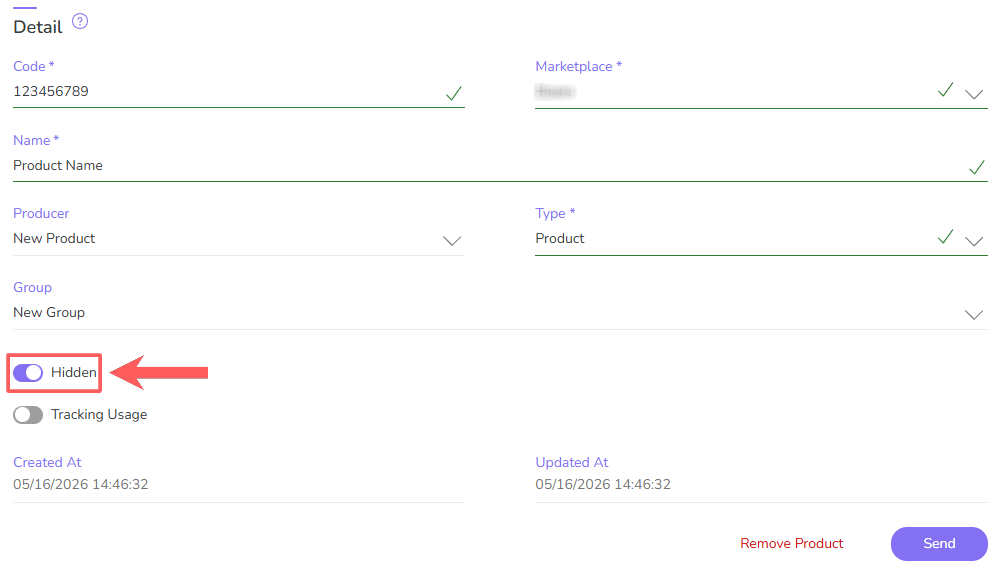
4 - Click on Send.
Remove product
It is possible to remove a product, provided it has no associated sales or offers. When a product is removed, the record is permanently deleted and cannot be restored.
Alternatively, you can hide the product instead of removing it.
To remove a product:
Steps:
1 - In the side menu, go to Products.
2 - Click on the Product you want to remove.
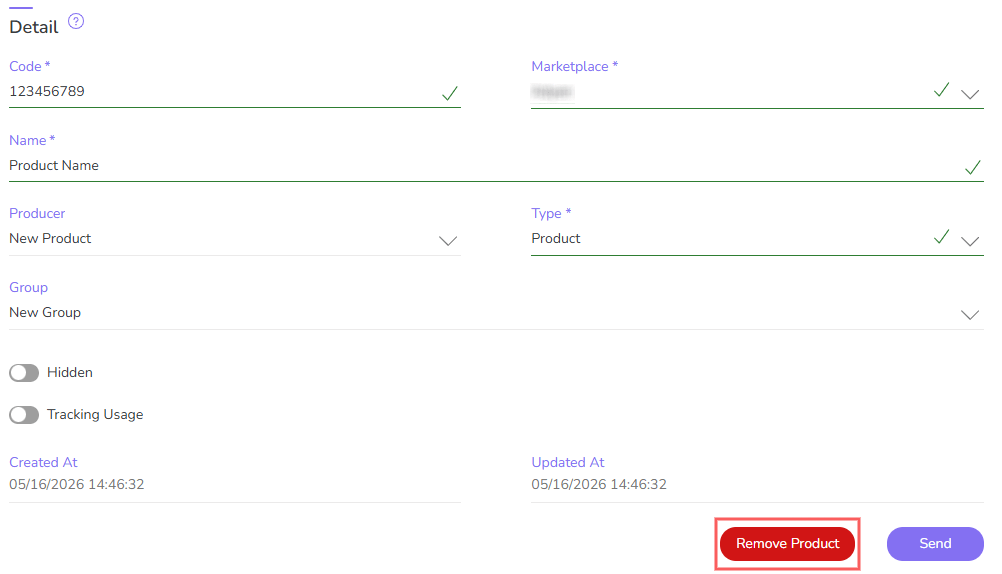
3 - In Detail, click on Remove Product1.
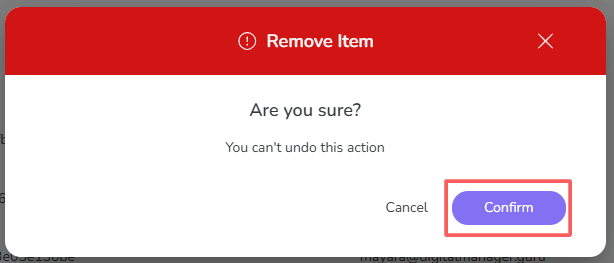
4 - A confirmation window is displayed. If you wish to proceed with the removal, click on Confirm.
1 The button is only visible if the product has no associated offers or sales.
More Resources