
When creating a role, you will be able to manage the profiles associated with your users in Guru. This includes the possibility of linking new members to each profile and customizing their access permissions individually.
On this page:
-
Update Role Name
-
Configure Role Users
-
Edit Role Permissions
Update Role Name
In this section, you can update the role name in Guru.
Steps:
1 - Access the guru admin with your username and password.
2 - In the side menu, click on Settings, then click on Roles.
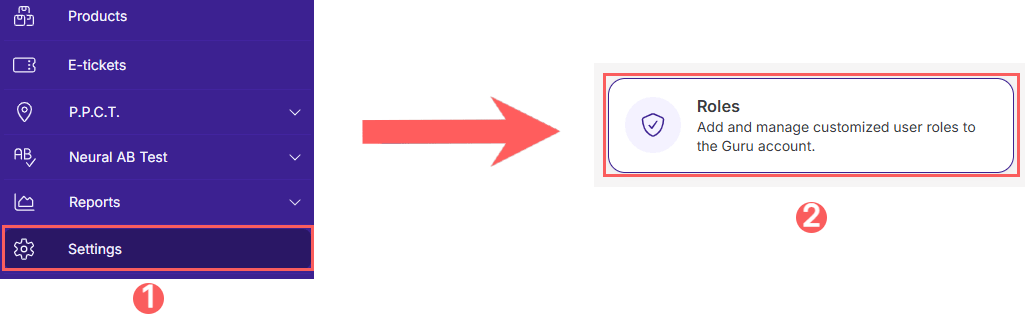
3 - In the list, locate the desired role and click on it.

4 - In Name, edit the role name:
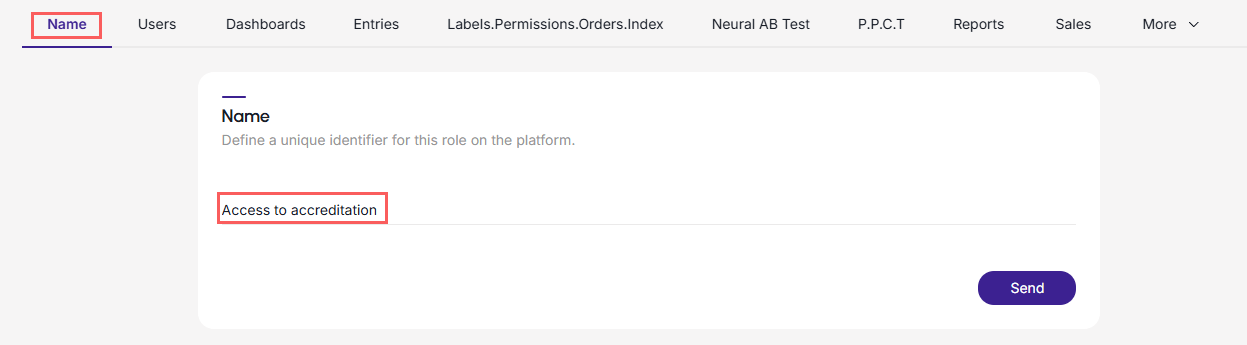
5 - Click on Send to update the role name.
Configure Role Users
In this section, you can configure users and their respective associated roles in Guru.
Steps:
1 - Access the guru admin with your username and password.
2 - In the side menu, click on Settings, then click on Roles.
3 - In the list, locate the desired role and click on it.
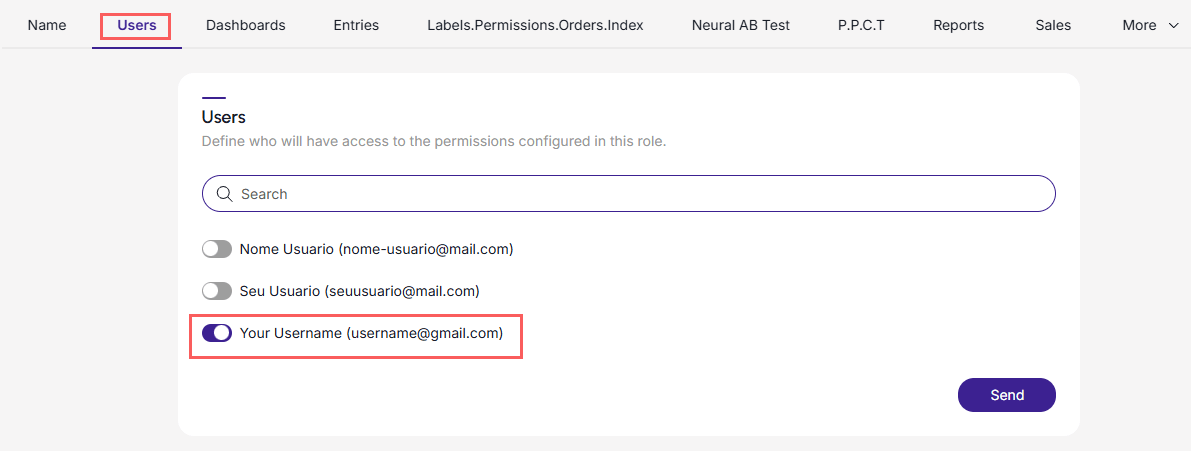
4 - In Users, activate the user you want to associate with the selected role or if you don't find them click to search for the user.
.jpg?cb=8837a4ea6a4e7db37d2e094edac9e7bf)
5 - Click on Send.
Edit Role Permissions
In this section, you can edit the granted permissions for the role in Guru.
Steps:
1 - Access the guru admin with your username and password.
2 - In the side menu, click on Settings, then click on Roles.
3 - In the list, locate the desired role and click on it.
4 - In the top menu, edit the role permissions:
-
Name
-
Users
-
Dashboards
-
Entries
-
Neural AB Test
-
P.P.C.T
-
Reports
-
Sales
-
Settings
-
Subaccounts
-
Subscriptions
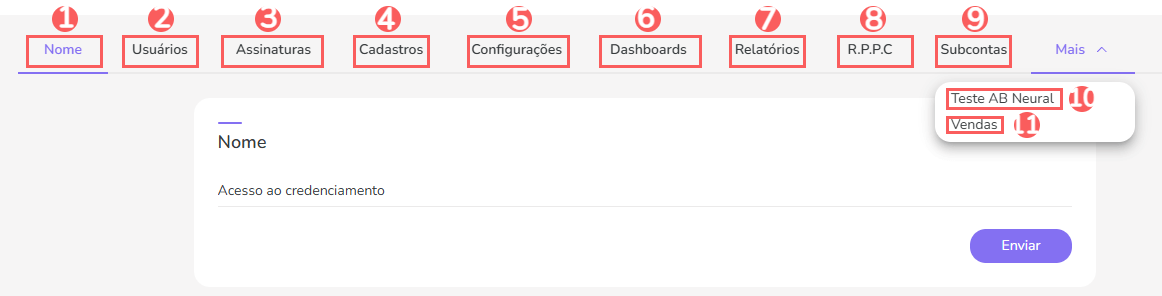
Access Activate Permissions, to learn more about the permissions you can grant.