
You can consult user information, as well as change information such as name and email, change language, customize email receipts, in addition to managing granted and received accesses, managing your tokens, and consulting profile activities and audit.
On this Page:
-
Edit user information
-
Consult user information
-
Consult and Update user name and email
-
Change user password
-
Change user roles
-
Change user account language
-
Activate dark theme
-
Customize email receipts
-
-
Manage Granted accesses
-
Manage Received accesses
-
Manage API Tokens
-
Create token
-
Delete token
-
-
Enable Two-Factor Authentication
-
Consult Profile activities
-
Audit
-
Edit user information
In this section, you can edit user information, such as changing the user's password; changing user roles; changing the user account language; activating the dark theme and customizing email receipts.
Consult user information
You can consult the information of the user registered in your Guru account, such as user details, granted accesses, received accesses, API tokens, two-factor authentication, activities and audit.
Consult and Update user name and email
You can consult and change your Guru account data, such as user name, email. To do this, follow the steps below:
Change user password
In the Detailsection, you can change the password of the user of your Guru account.
Steps:
1 - In Users, click on Detail.
2 - Then, in Password , enter:
-
Current password: enter the current password;
-
New password: enter the password you want to change for your account;
-
Confirm password: confirm the password you want to change for your account.
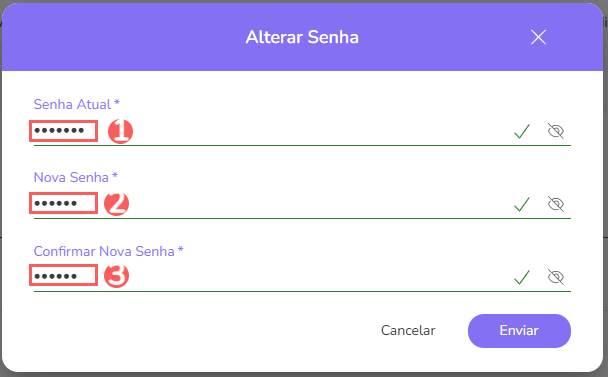
3 - Click on Send.
Change user roles
In the Detailsection, you change the user roles of your Guru account.
Steps:
1- In Users, click on Detail.
2 - In Roles, select which role you want to select for the user.

3 - Click on Send.
Change user account language
In the Detailsection, you change the user account language in Guru. Available languages: Spanish, English, Brazilian Portuguese or European Portuguese.
1 - In Language, select which language you want to configure in your account.

2 - Click on Send.
Activate dark theme
In the Detail section, you activate the dark theme of your Guru account.
Steps:
1 - If active, your profile in Guru will be in dark mode.


2 - Click on Send.
Customize email receipts
In the Detailsection, you customize the email receipts of your Guru account.
Steps:
1 - In Email Receipt, select the desired option:
-
Daily Statistics: receipt of daily statistics for your account;
-
Notification: Approved sale: email receipt of approved sales;
-
Notification: Sale (Pending Payment): email receipt of sales with pending payments.
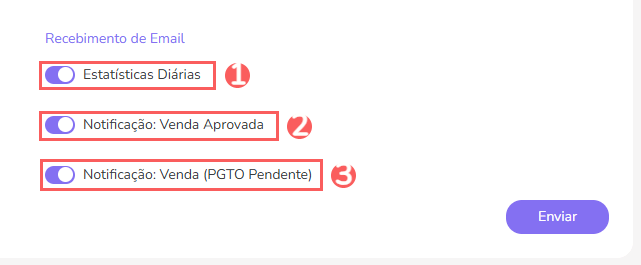
CUSTOMIZING email receipts only appears if "Administrator" is active.
2 - Click on Send.
Manage Granted accesses
In the manage granted accesses area, you can consult and delete accesses to your Guru account, as well as view the profiles and accounts of users who have access to your profile.
Consult:
Manage Received accesses
In the manage received accesses area, you can consult and delete accesses to your Guru account, as well as view the profiles and accounts of users who have granted you access.
Consult:
Manage API Tokens
In the manage API Tokens area, you can add, consult and delete tokens registered in the user's profile. To do this, follow the steps below:
Create token
In this section, you can create the API token in the user's profile in Guru.
THE API Token cannot be consulted again.
Steps:
1 - Access the guru admin with your username and password.
2 - In Users, click on Api Tokens.

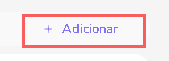
3 - Then, click on Add.
4 - Enter the name of the Api Token.
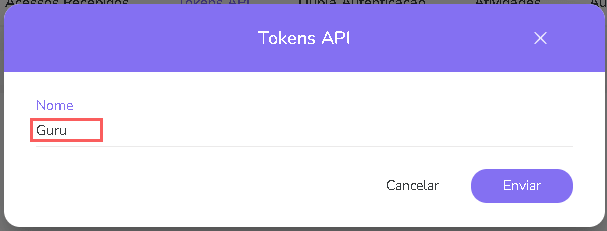
5 - Click on Send.
6 - Then, copy and store the Api Token.
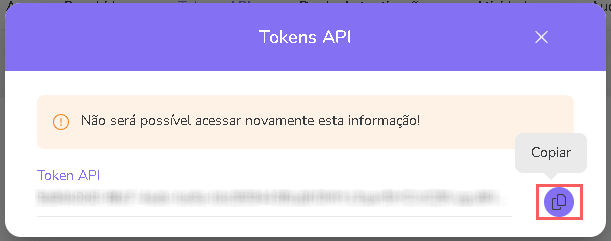
THE API Token can only be consulted once.
Delete token
In this section, you can remove the user token created in Guru.
Steps:
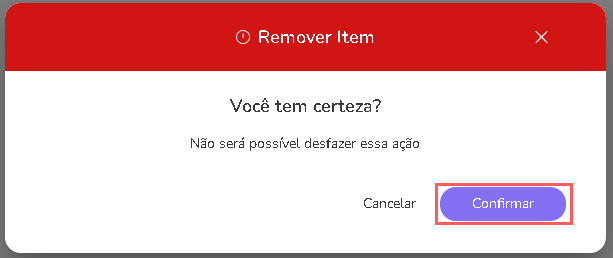
1 - In the listing, locate the desired API Token and click the Remove button corresponding to it.

2 - Confirm if you want to perform the deletion. To confirm that the API Token has been deleted, a message will be displayed for a few seconds at the top right of the page.
Enable Two-Factor Authentication
In the Enable Two-Factor Authentication area, you will enable 2-factor authentication in Guru.
Consult:
Enable Two-Factor Authentication
Consult Profile activities
In the User Activities area, you can consult the data that the user accessed, such as user login, updated integration configuration, created product, among others. To do this, follow the steps below:
Steps:
1 - Access the guru admin with your username and password.
2- In Users, click on Activities.

3 - Activities are displayed in a timeline (from most recent to oldest).
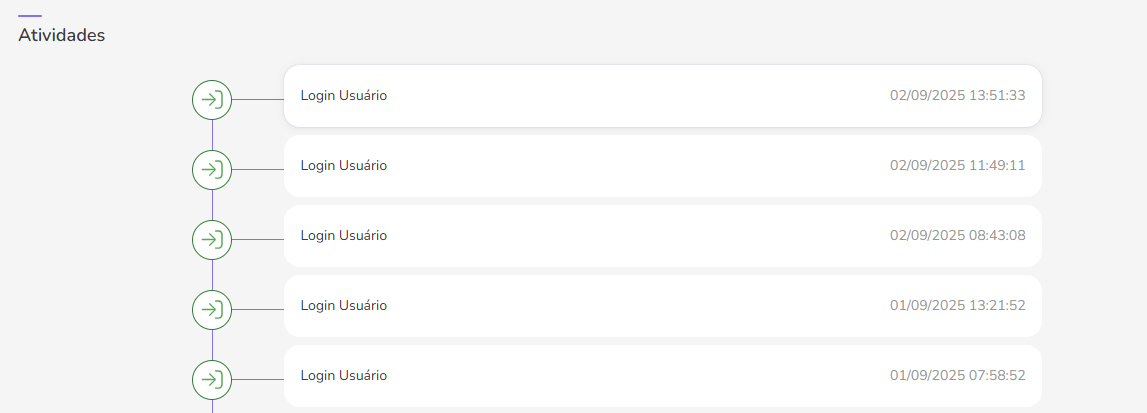
4 - If desired, you can view the activity detail by clicking on its title.
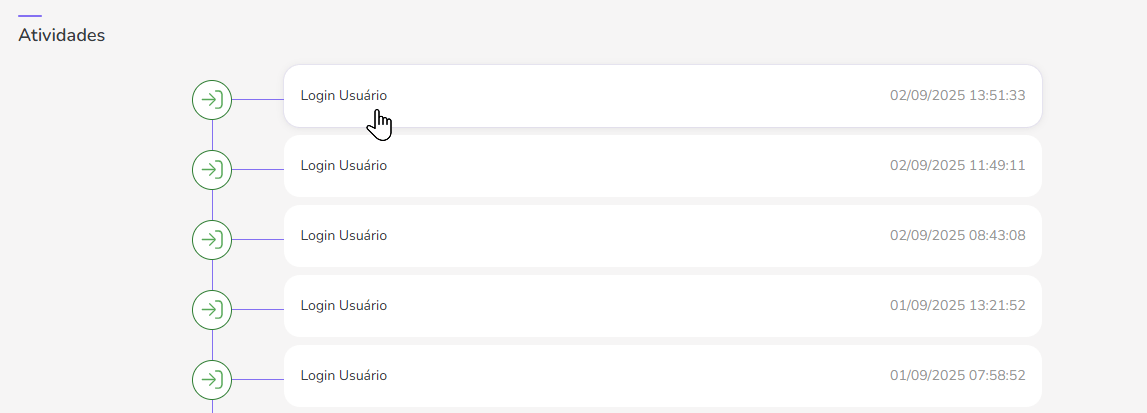
5 - Click on one of the available sections to view the data:
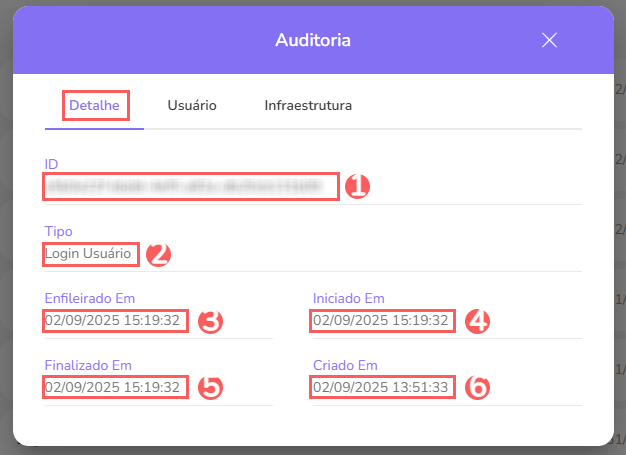
Detail
Displays the detailed information of the activity in question.
-
ID: identification number (ID) of the update;
-
Type: displays the type of change made;
-
Enqueued on: displays the date the record was enqueued;
-
Started on: displays the date the record was started;
-
Finished on: displays the date the record was finished;
-
Created on: date of activity record.
User
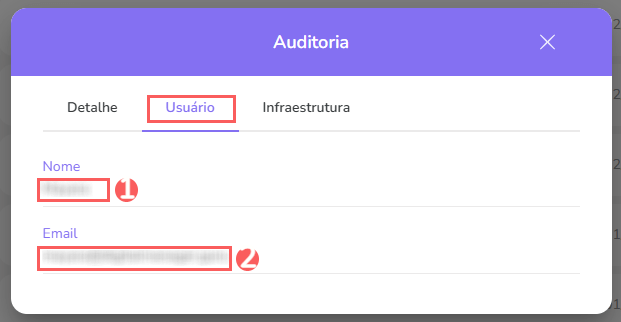
Displays the information of the user who performed the action.
-
Name: name of the user who performed the operation;
-
EMAIL: email of the user who performed the operation.
Infrastructure
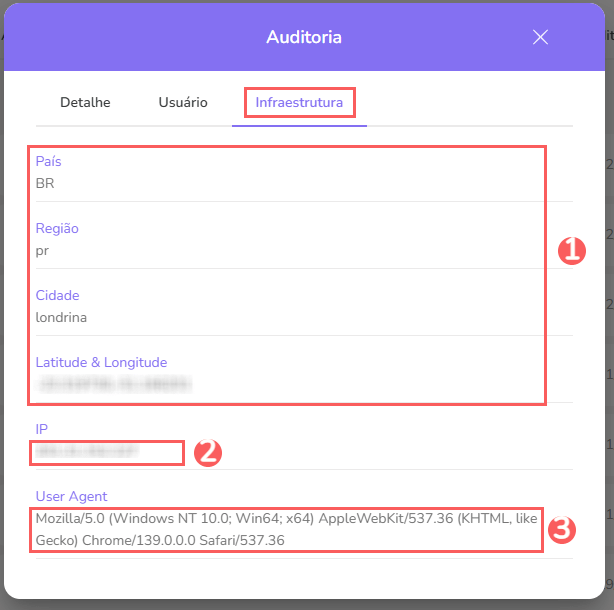
Displays infrastructure information (country, IP, user agent…) of the related activity.
-
Country, Region, City, Latitude & Longitude: location of the device that performed the activity.
-
IP: device IP address.
-
User Agent: identification of the user agent that performed the operation.
Audit
As a security measure, Guru stores history only for users who have access to the account in operations performed in the integration, identifying user, date/time of operation and other details.
Steps:
1 - Access the guru admin with your username and password.
2 - In Users, click on Audit.

3 - Activities are displayed in a timeline (from most recent to oldest)
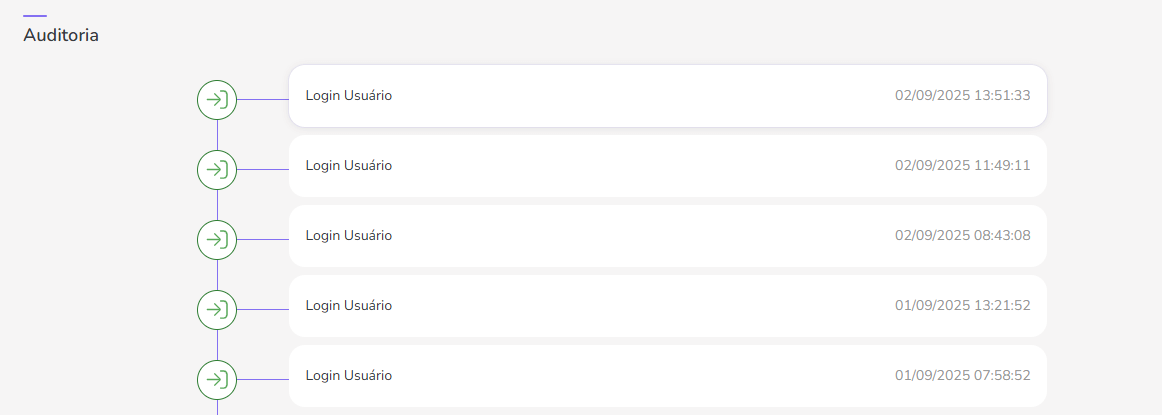
4 - If desired, you can view the activity detail by clicking on its title.
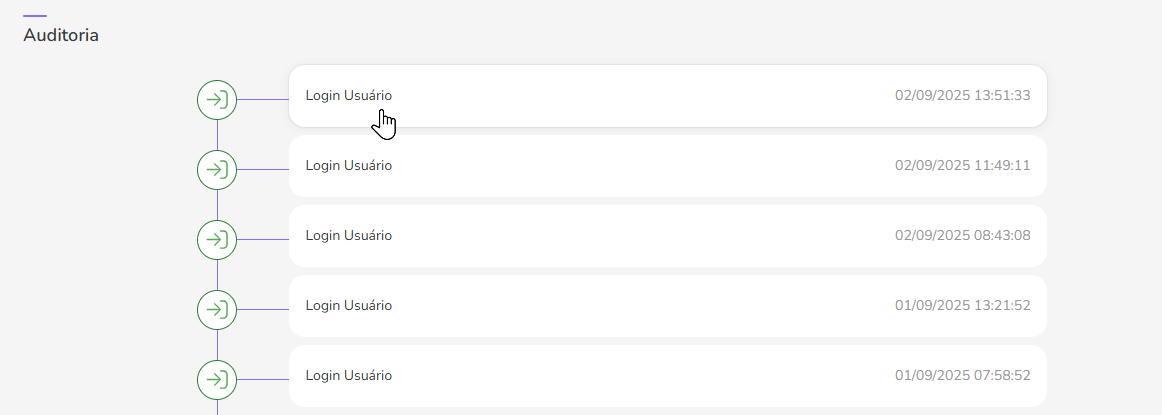
5 - Click on one of the available sections to view the data:
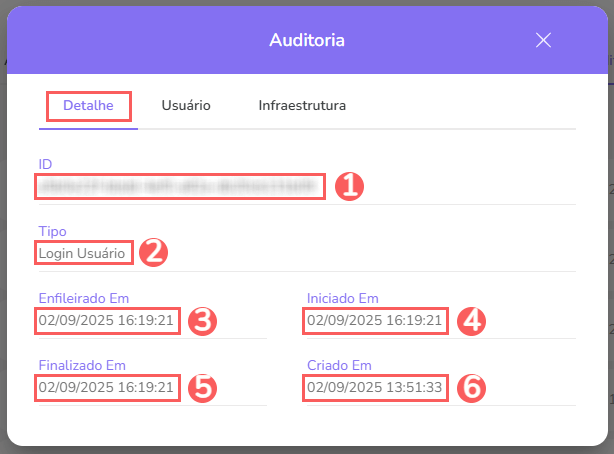
Detail
Displays the detailed information of the activity in question.
-
ID: identification number (ID) of the update;
-
Type: displays the type of change made;
-
Enqueued on: displays the date the record was enqueued;
-
Started on: displays the date the record was started;
-
Finished on: displays the date the record was finished;
-
Created on: date of activity record.
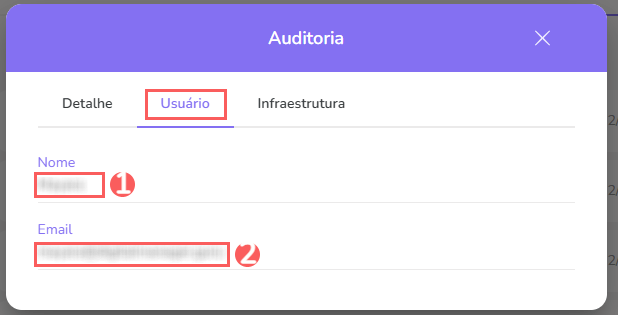
User
Displays the information of the user who performed the action.
-
Name: name of the user who performed the operation;
-
EMAIL: email of the user who performed the operation.
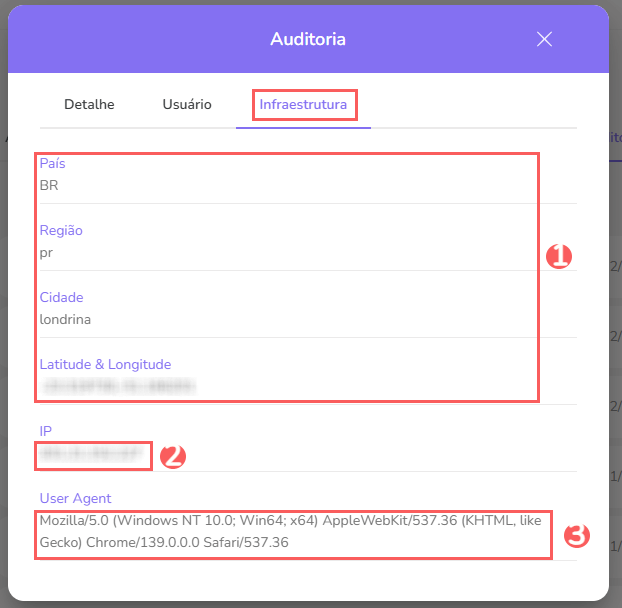
Infrastructure
Displays infrastructure information (country, IP, user agent…) of the related activity.
-
Country, Region, City, Latitude & Longitude: location of the device that performed the activity.
-
IP: device IP address.
-
User Agent: identification of the user agent that performed the operation.
Protect your data. Increase your business security.
Create and manage users determining what each collaborator can see and do within the organization.
More resources