
By integrating your Stripe account, you will be able to process your customers' payments through Checkout Guru and manage the entire business through our platform.
To activate the integration, you must access your Stripe account, obtain the production credentials, and then enter them in Guru. After activating the integration, you must add products and offers to get checkout links.
On this page:
-
Step 1: Activate integration
-
Step 2: Optional settings
-
WHAT to Do Next
Before you start you need:
-
Have an active production account on Stripe.
-
Be an administrator user or have permission to perform the following actions.
Step 1: Activate integration
In this step, you must access your Guru account to authorize the integration with Stripe.
Important: as of September 30, verifications for legal entities on Stripe will be updated. Access Stripe's support page for more details.
Steps:
1 - Access the guru admin with your username and password.
2 - In the side menu, access Settings > Integrations > Guru’s Checkout > Stripe

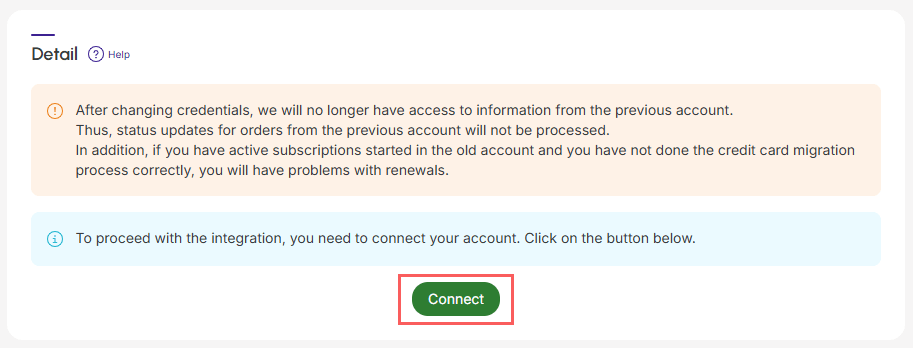
3 - In the Detail tab, click on Connect - you will be redirected to the Stripe login.
4 - Log in to your Stripe account with your username and password.
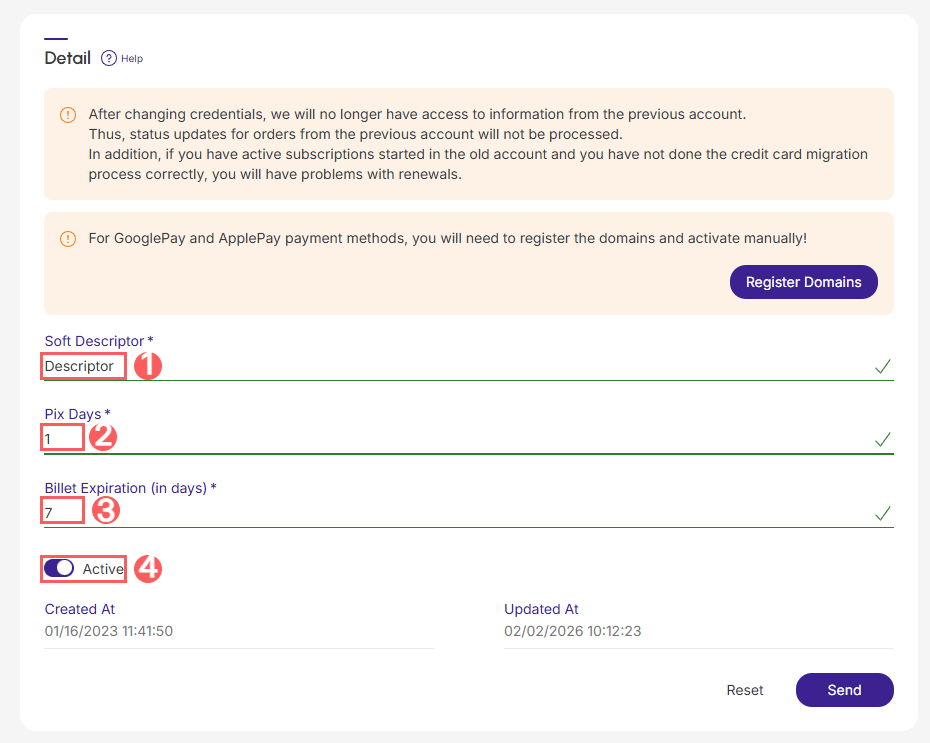
5 - Back in Guru, enter:
-
Soft Description: description to be displayed on the customer's card invoice - does not allow special characters;
-
Pix Term (in days)1: pix due date (in days);
-
Boleto Term (in days)1: bank Slip due date (in days);
-
Change the Active button to the on position.
(1) Pix and billet deadline (in days) maximum of 1 year (The billet and PIX options are only available on the checkout version for customers in Brazil).
.jpg?cb=8837a4ea6a4e7db37d2e094edac9e7bf)
4 - Click on Send.
To confirm that the integration is active, you should view your Stripe account data on the right side of the Details tab.
Step 2: Optional Settings
If desired, you can activate and use the optional features of Guru's integration with Stripe.
See the complete step-by-step guide:
Once the integration is active, optional settings can be configured at any time.
What to Do Next
Once the integration with Stripe is active, you must access the Products section to add products and their respective offers.
Remember to link the product to Stripe (field marketplace) and inform the type corresponding to the desired sales modality: product (single sale) or subscription (recurring charge). After adding an offer, the checkout link will be available for dissemination.
See the complete step-by-step guide:
Import products from your virtual store
If you use an e-commerce platform integrated with Guru, you can import your store's products. Then, update or add an offer to the product to generate the checkout link.
it is possible to display the final value, with a discount applied for sales in Europe, by activating this option in the products linked in Guru.