
The sales page is where your customer decides whether or not to buy, so that's where most sales triggers (or mental triggers) should be. The payment page (checkout) should provide a simple, fast, and objective shopping experience, avoiding creating any kind of doubt or distraction for the buyer.
Our philosophy is to offer a high-conversion checkout, and to guarantee this result, we eliminate any and all components that might increase page loading time or distract the buyer from what really matters: entering payment details and completing the checkout as quickly as possible.
Although our recommendation is a clean checkout free of additional components, alternatively, you can include external scripts to Checkout Guru for:
-
Chat button or chat or WhatsApp;
-
Mark conversion on TikTok (or another ad platform not integrated with Guru);
-
Sales triggers such as scarcity counter, notification, banner or pop-up.
Configuration and installation
The configuration and installation of components for chat button, scarcity counter, notification, banner, pop-up or any other external script to Checkout Guru is done through Google Tag Manager.
The script installation consists of configuring a Tag with custom HTML in GTM and publishing it. The script must be obtained from the desired plugin or component or written by a developer with skills to build scripts for GTM.
This is a complex configuration and should only be performed by an advanced user with programming knowledge!
The installed script can cause slowness or even prevent the checkout page from loading correctly. In the worst case, you can lose sales!
Guru is not responsible for slowness or failures in the checkout caused by the installation of third-party scripts.
On this page:
-
Step-by-step: Install Javascript code in Checkout Guru via GTM
-
Add the banner to Checkout Guru
Before you start, you need:
-
An active Google Tag Manager account.
-
Script you want to install (must be obtained from the plugin, component or developer).
Step-by-step: install Javascript code in Checkout Guru via GTM
To install an external script in Checkout Guru via Google Tag Manager, you must perform 3 steps:
Steps:
1 - Install GTM script on your website;
2 - Configure the tag; and add the trigger;
3 - Publish the tag.
This configuration involves platforms external to Guru. In case of doubts, request assistance from the platform in question. Guru Support only assists with configurations made within our Admin.
Step 1 - Install GTM Script on your website
Steps:
1 - Access your Google Tag Manager account.
2 - Click on Administrator.
3 - Then click on Install Google Tag Manager.
4 - Copy and install the Google Tag Manager Scripts on your sales page, following the instructions presented.
Step 2 - Configure Tag
Steps:
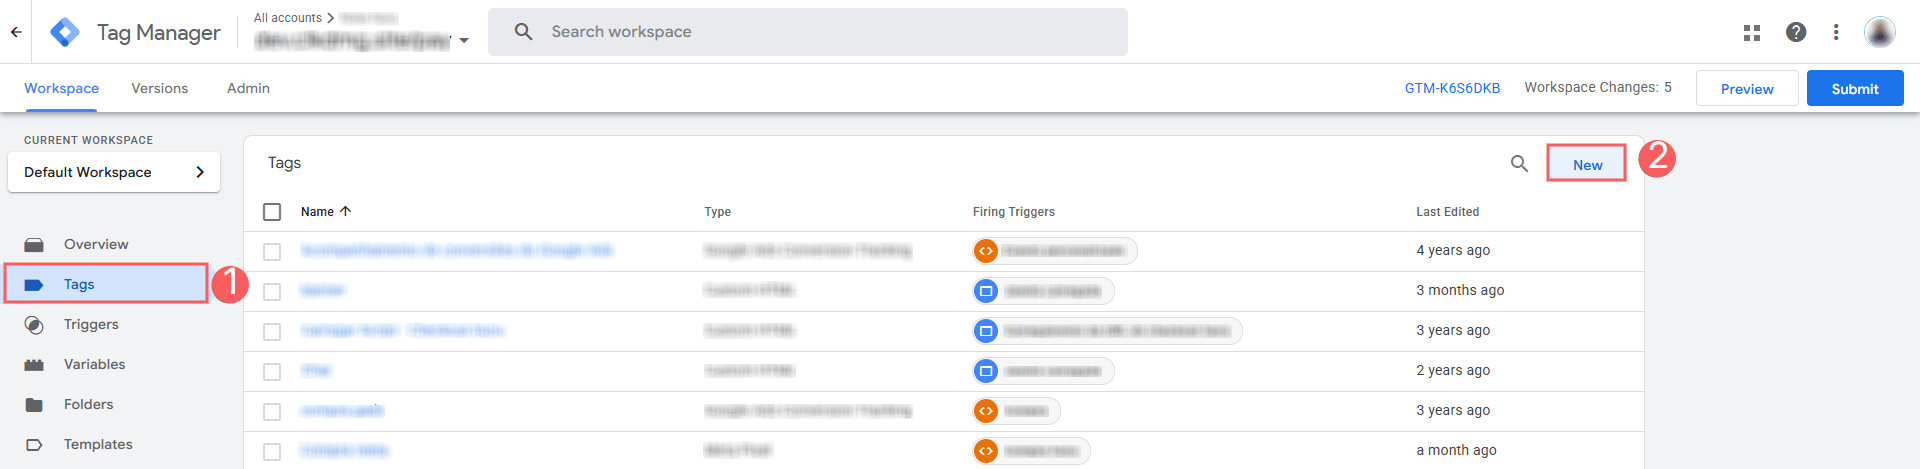
1 - Access the menu Tag and then click on New.
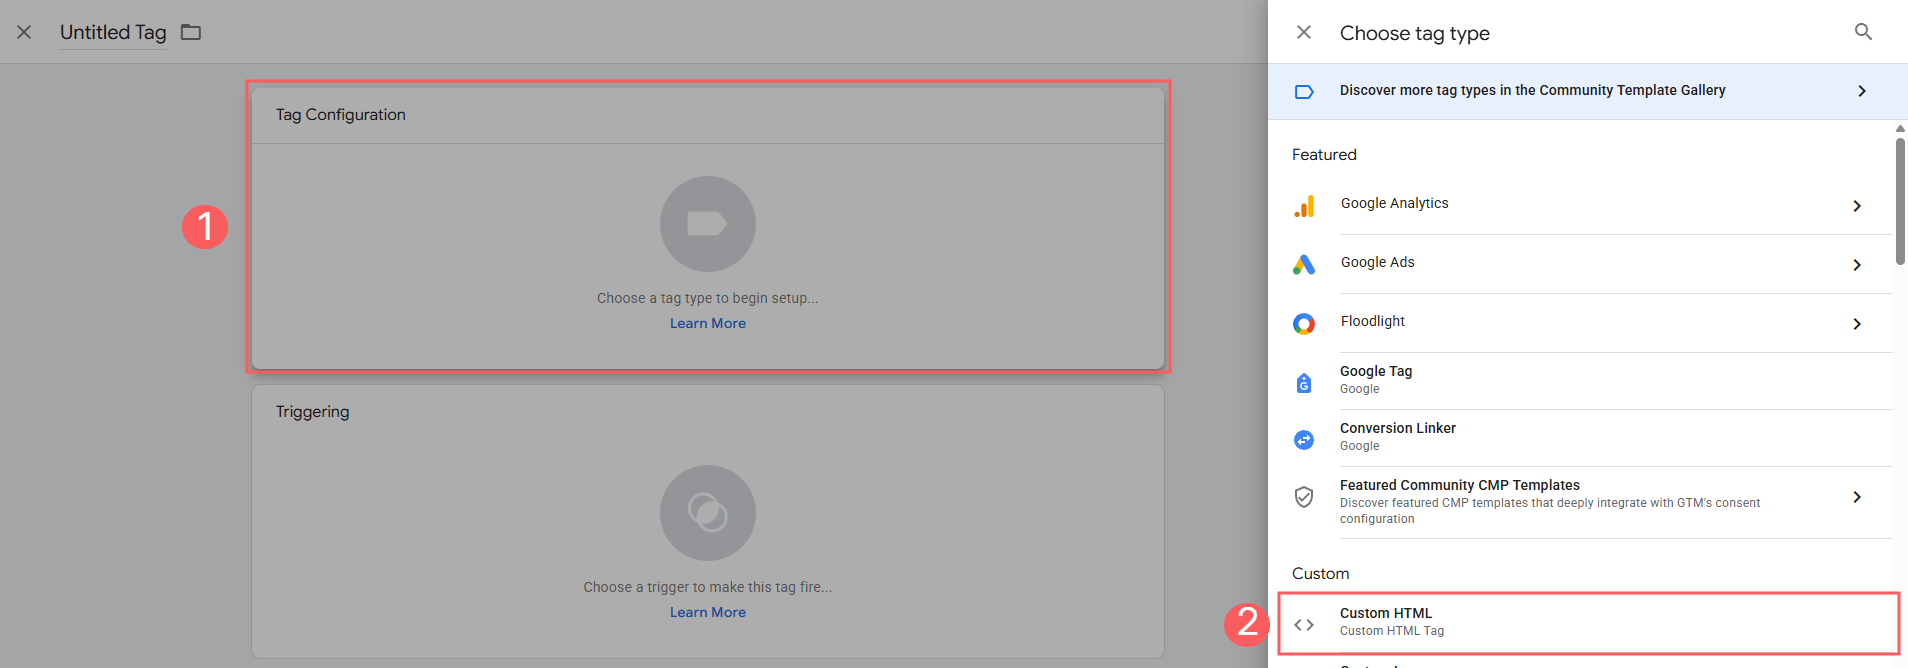
2 - Go to tag configuration, and then select the option Custom HTML.
3 - Insert the Script1 you want in the HTML field.
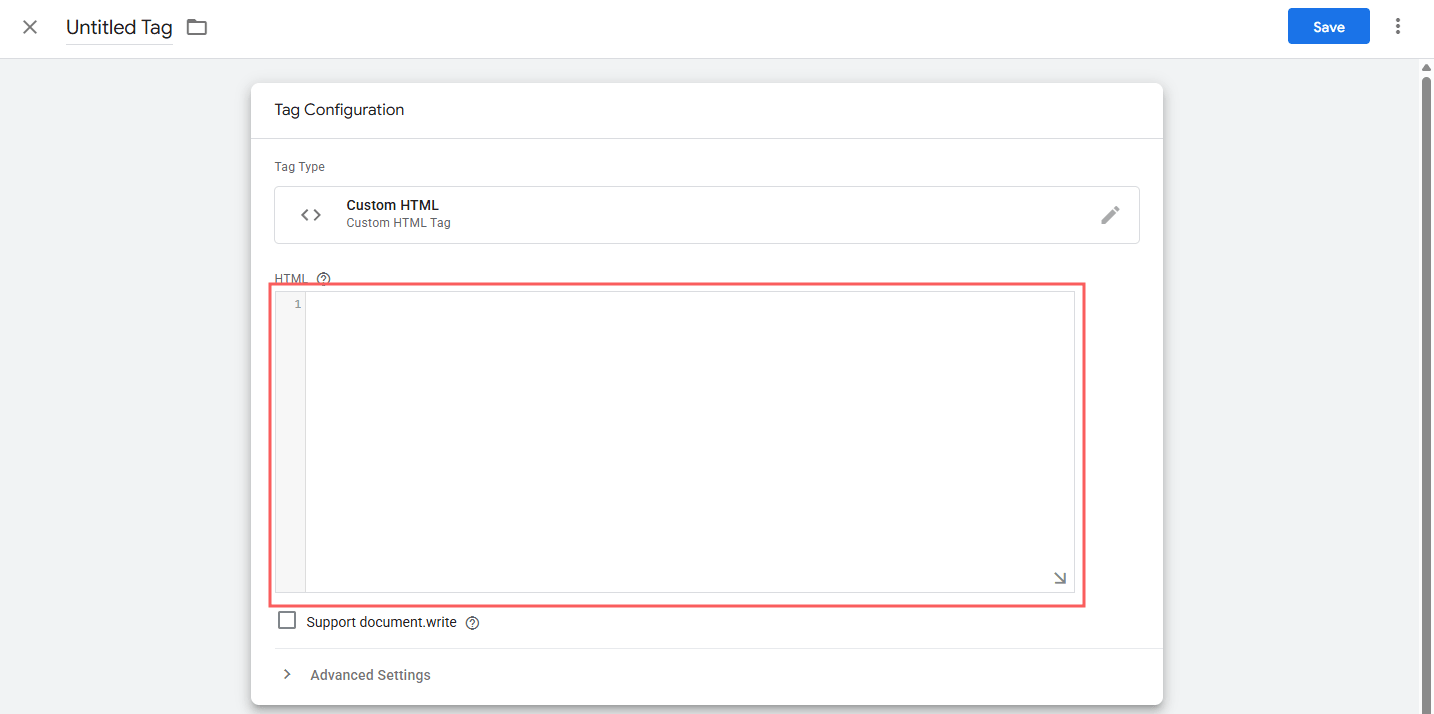
1 The desired script must be obtained from the plugin, component or developer.
4 - Click on Save.
Step 3 - Add a trigger
Steps:
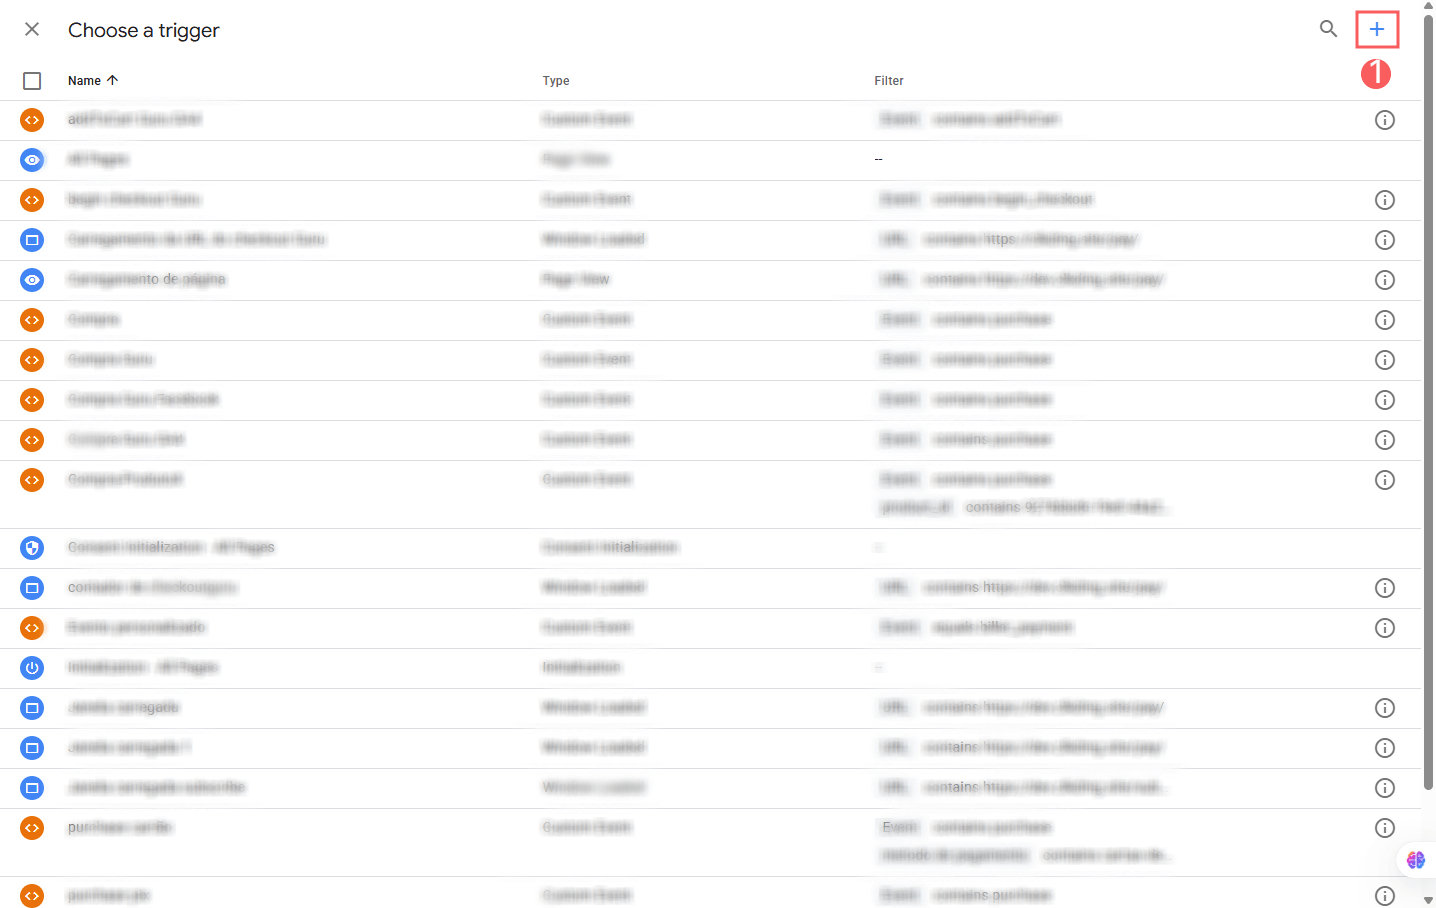
1 - In the field Triggering, click on Choose a Trigger.
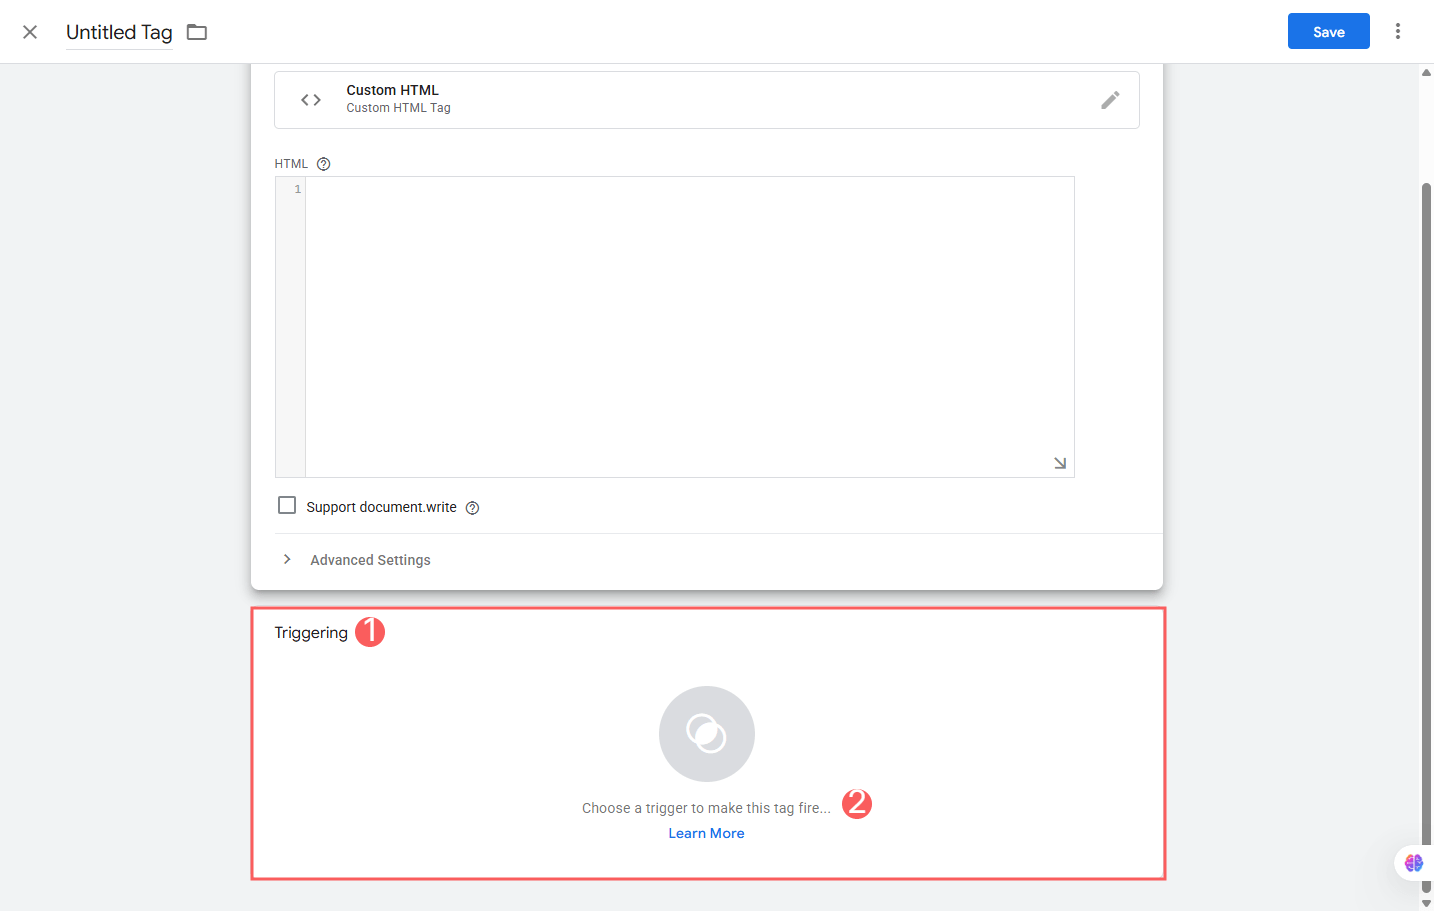
2 - Click to Add a New Trigger.
3 - Click on Trigger Configuration, and in Choose Trigger type, select the following trigger:
-
Window loaded
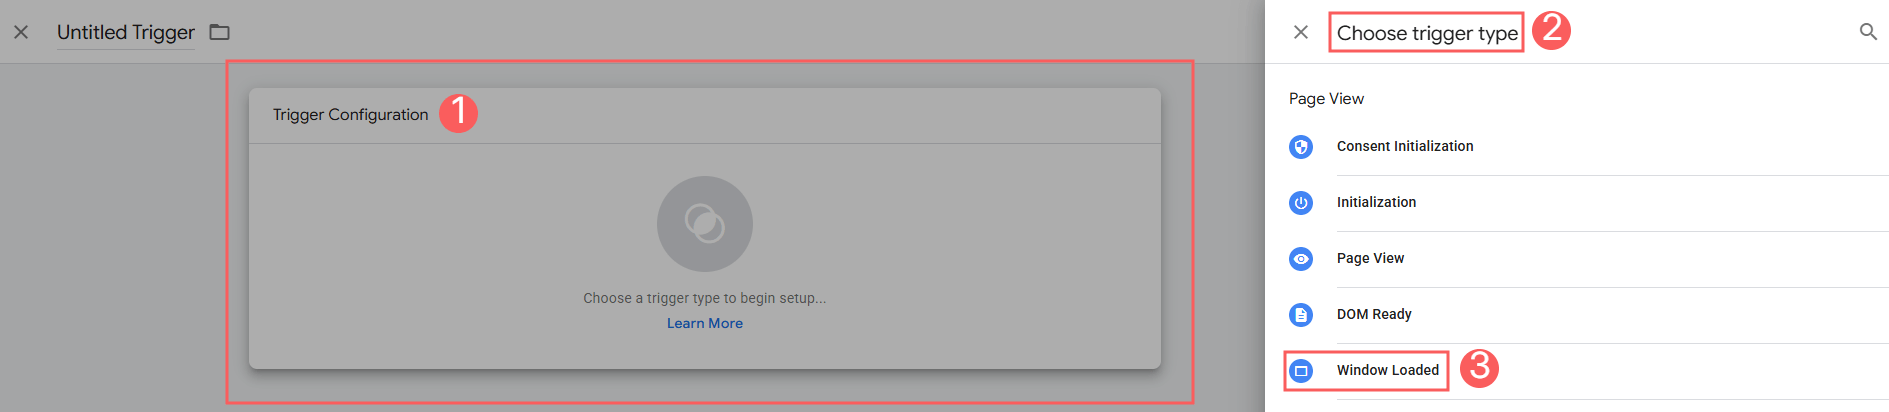
4 - Click on Submit.
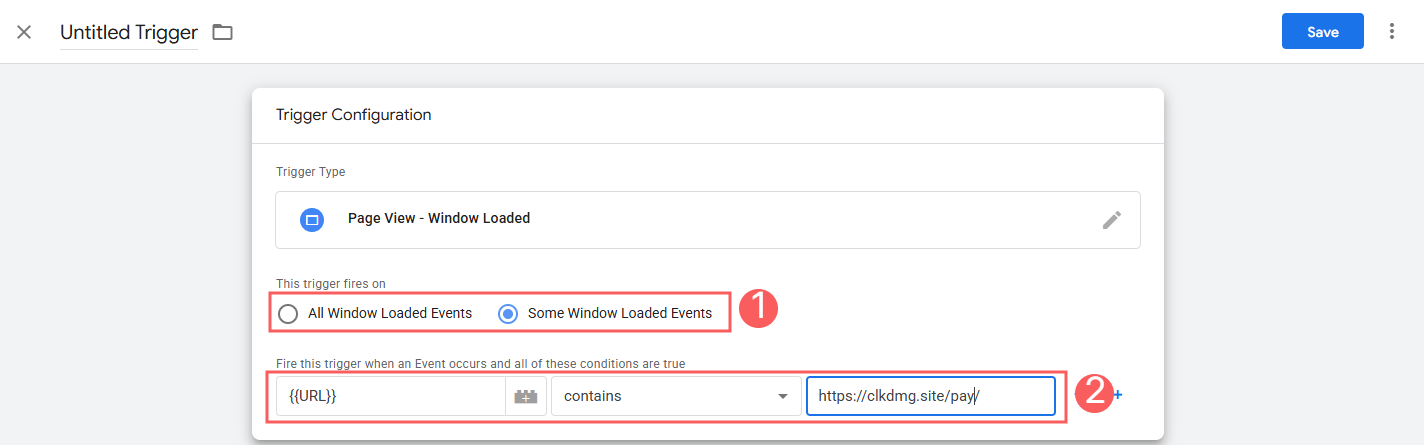
5 - In the Trigger Configuration, enter:
-
This trigger fires on: select the event you want to trigger;
-
Destination URL: enter the Checkout Guru URL (which starts with
https://clkdmg.site/subscribe/(one-time purchase) - if you use Guru's custom domain feature, replaceclkdmg.sitewith your domain).
6 - Click on Save.
7 - Enter the Name of the Trigger.
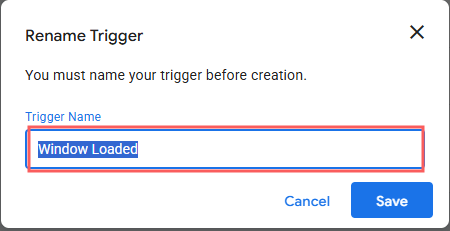
8 - Click on Save.
9 - Enter the Name of the Tag.
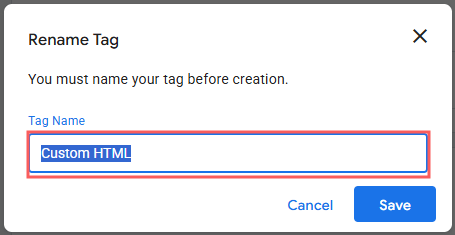
10 - Click on Save.
11 - Next, the Tag created will appear, and then click on Submit.

12 - In Submit Changes, enter the Version Name.
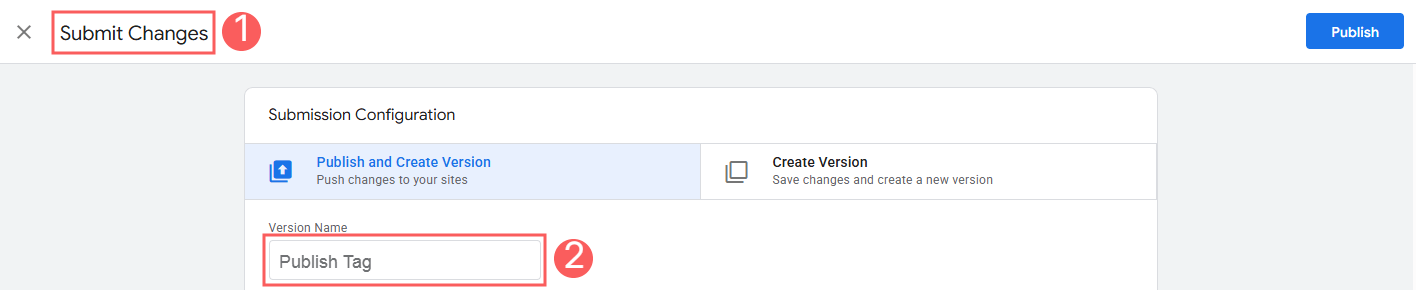
13 - Click on Publish.
14 - Open the Checkout Guru link in an incognito tab and check the loading time and make a test purchase to validate if everything is working correctly.
To learn more, consult the Google Tag Manager documentation for Checkout Guru.
Add the banner to Checkout Guru
Use the previous step-by-step to create the script for your Checkout page. If you wish, you can use a script created by Guru as a suggestion.
Both scripts have a variable named “link”, where you will need to provide the link to your image/video between the quotes.
The script templates to add to the banner are as follows:
More Resources