
Find answers to frequently asked questions and issues related to Checkout Guru.
On this page:
-
Checkout Configuration
-
Payments
-
Processing
Checkout Configuration
In this section, you will find answers to questions related to checkout configuration.
- How to embed the checkout on an external page?
It is not possible to embed Checkout Guru on an external page, for security reasons, as it would not be on a page under Guru's full domain and control.
As an alternative to maintain your business's visual identity, you can:
-
Customize the Checkout: it is allowed to change the checkout's appearance, including colors, logos and visual elements, so that they resemble your page or brand, providing a compatible customer experience; and
-
Publish Checkout Links: it is recommended to publish the checkout links on your external sales page through Buy buttons or hyperlinks.
Configure Checkout Guru according to your brand.
- Can I customize my Checkout Guru?
Yes, it is possible to change the appearance of your checkout and insert elements such as logo, icon, and contact channel data, through the checkout appearance settings.
You can customize the checkout to follow the visual identity of your website or sales page by changing the colors in Settings, then Checkout and Appearance:
-
Colors: change the colors of visual elements and texts - as you change the colors, you can monitor the adjustments in real time.
And in Settings, then Checkout and Content, update the information such as:
-
Logo: add your company's logo at the top of the page (visible in the desktop version);
-
Favicon: change the icon that appears in the browser tab; and
-
Content: definition of the store name, contact channels (WhatsApp, email and Telegram) and privacy policies.
You can configure your checkout globally, by product or by offer.
- Is it possible to change the appearance of my Checkout by inserting a banner, timer, and social proof?
If you wish to add Banner, Timer, and Social Proof , it is possible to add external tools, added via external scripts, such as:
-
Google Tag Manager (GTM): you must use GTM to install third-party Javascript codes in the checkout;
-
Supported elements: through custom HTML tags in GTM, you can include chat buttons, scarcity counters, notifications, pop-ups, or image and video banners; and
-
Script Templates: guru provides specific script templates for those who wish to insert images or videos in the checkout banner.
The installation of scripts via GTM is considered a complex configuration and should be done by advanced users or programmers, and external scripts can cause slowness or even prevent the correct loading of the page, which can lead to loss of sales.
- Is it possible to include a product description in the Checkout?
Yes, it is possible to include a product description in the Checkout, although how it is displayed depends on the configured element and the device used by the customer.
In practice, what are the ways to configure and display information in the Checkout?
-
Description in the Order Bump section: if you are offering complementary products through the Order Bump feature, it is possible to insert a personalized description for each additional offer, whether:
-
Title and General Description: you can define an explanatory text that appears before the presentation of Order Bump products, and
-
Description per Product: in the Order Bump registration, you define the specific description that will be displayed to attract the customer.
-
-
Using the Offer name as an identifier: a common strategy to make the checkout more descriptive is to activate the option Use the offer name instead of the product in the checkout.
-
This allows you to register a more detailed name in the offer - such as, for example, Excel Course so that it appears as the main title on the payment page, instead of just the generic product name.
-
For mobile devices, it is possible to configure the option Give more prominence to the product on Mobile. When this option is activated in the appearance settings, the checkout displays the product image and description at the top of the page, replacing the store name.
You can define the content displayed in the checkout at three hierarchical levels globally, by product or by offer, which allows you to customize descriptions and names specifically for different campaigns.
- Is it possible to include the terms of use?
Yes, it is possible to include the terms of use and privacy policy directly in your Checkout Guru.
To configure, access the Settingsmenu, then Checkout, and in Content configure the information with:
-
Insert the links: in the URL Terms of Use field and insert the address of your page where the document is hosted;
-
Mandatory acceptance: activate the option Require acceptance of Terms of Use - with this, the customer will be forced to check a consent checkbox to complete the payment; and
-
Checkout View: after configuring, the links will appear in the checkout page footer - if you add a "Legal Notice", it will be displayed just above the "Buy" button.
You can define the content displayed in the checkout at three hierarchical levels globally, by product or by offer, which allows you to customize descriptions and names specifically for different campaigns.
- How is currency conversion done for international purchases in Checkout Guru?
In Guru, currency conversion at checkout works in two distinct ways: one is visual conversion (simulation) to improve user experience, and the other is effective billing, which strictly depends on the payment processor used and your account's location (checkout opens in the user's IP country).
-
Visual Conversion (Simulation): guru has a feature Convert values to the currency of the selected country - when activated, if the customer changes the country in the checkout (e.g., from Brazil to the United States), the system automatically converts the product value to the local currency (Dollar), based on the daily exchange rate; and
-
Real Conversion (Billing): although the checkout shows the converted value, the currency in which the charge will be effectively processed on the customer's card depends on the type of processor you use, that is:
-
Cross-Border Processors (e.g., Ebanx): these processors specialize in exchange - if you use Ebanx, for example, the customer sees the value in Mexican Pesos or Dollars and is charged exactly in that currency, i.e., the processor performs the exchange and passes the value to you;
-
International Processors (standard): these processors accept international cards, but the billing rule is different, for example:
-
with Stripe (BR Account): you can even create the offer in Dollars or Euros in Guru to fix the price, and the customer will see the value in Dollars in the checkout, however, since your Stripe account is Brazilian, the final transaction sent to the customer's bank will be in Brazilian Reals (BRL), meaning the customer's bank will perform the final conversion on their statement;
-
with Asaas: accepts international sales, but billing is always done in your account's currency (Real) and the converted value displayed in the checkout is just a simulation for reference.
-
-
If desired, activate the option Convert values to the currency of the selected country.
- Is it possible to hide the visual information of the interval between subscription renewals (e.g., "automatically" text or "number of billing cycles") in the checkout?
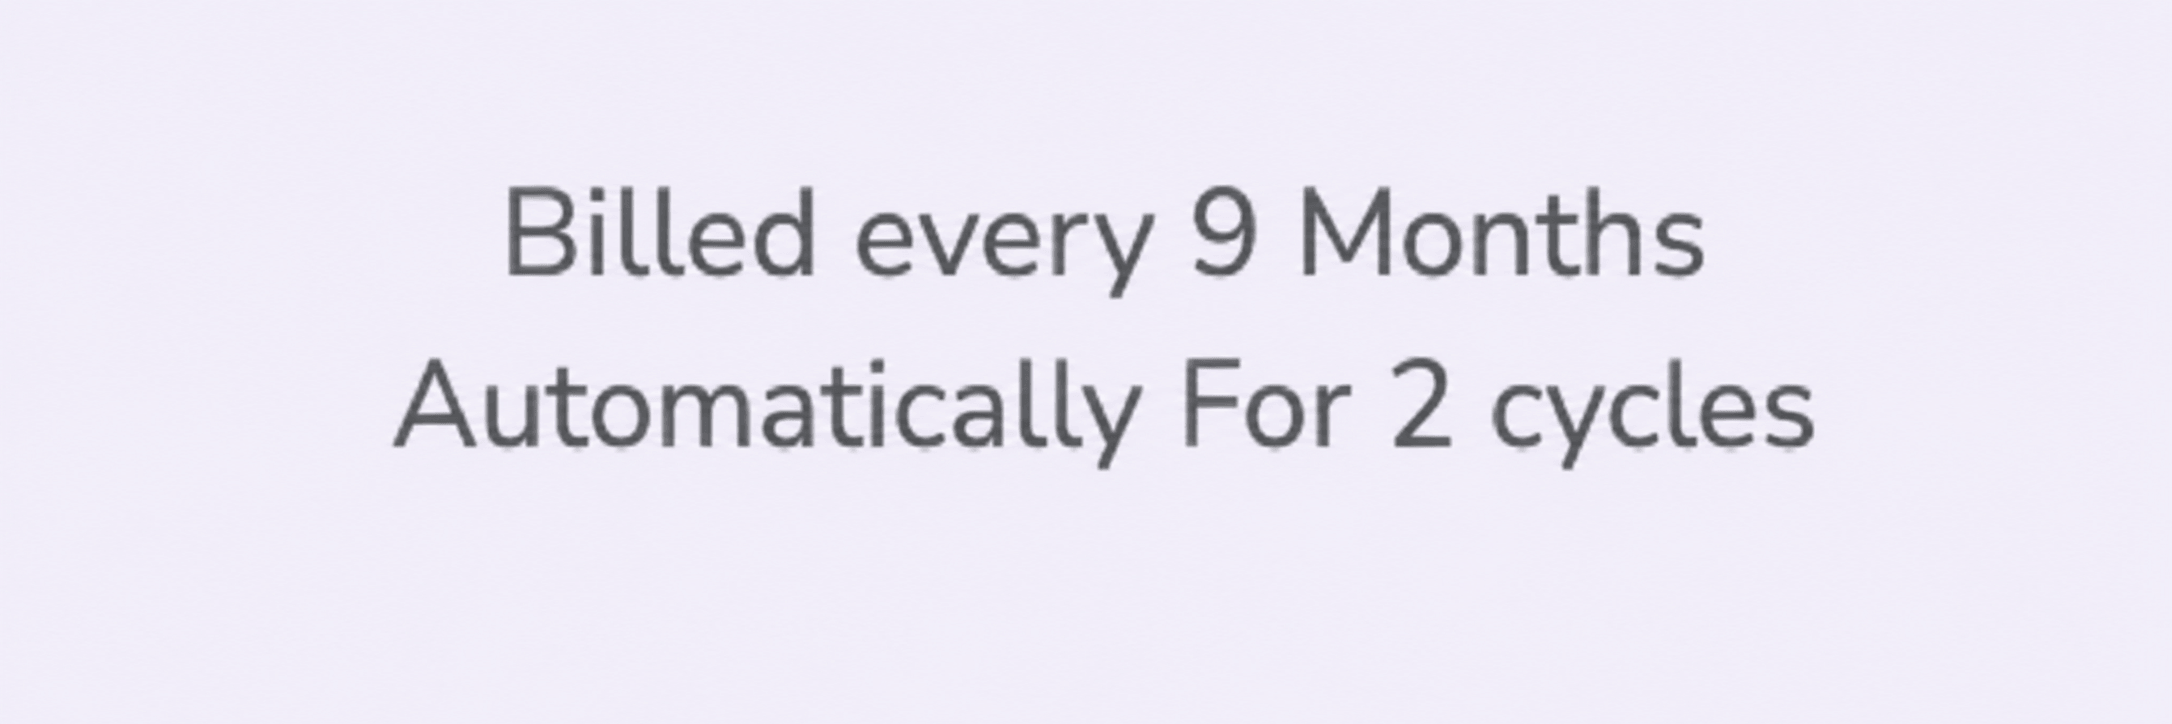
If you wish to customize the renewal information, that is, define how it will be presented in the Guru checkout, you will need to access the Settings menu, then Subscriptions and in Subscription Configuration deactivate the option Show interval between renewals on checkout.
By deactivating the option Show interval between renewals in checkout, information such as the text "Automatically" and "Number of cycles" will not appear in the checkout.
Payments
In this section, you will find answers to questions related to payments through the checkout.
- Is it possible to remove the interest rate information from the checkout?
It is not possible to remove the display of the interest percentage if your offer has interest configured in the installments, as the platform is obliged to display this information to the end customer for transparency reasons.
For the percentage or interest rate information not to appear, it is necessary to ensure that your offer does not have interest applied to the installment plan.
And how to configure the offer to adjust and remove the rate information?
-
Access the Products menu and select the desired product, click on the Offers tab and on the offer you wish to edit;
-
Adjust the Maximum Installment without Interest field to the total number of installments you wish to allow, for example, if you allow up to 12x, configure 12; and
-
Ensure that the Interest Rate field is set to 0 (zero).
Additionally, in the Checkout Appearance settings (Global, Product, or Offer level), you must verify that the option Display total value with interest is deactivated, if you do not want the final amount to include any visual financial increase.
- Can I make a test purchase without consuming my credits?
No. Every registered transaction consumes 1 account credit, regardless of the final payment status (whether it is approved, cancelled, abandoned or billet printed).
Since the credit debit occurs at the moment of transaction creation and not during its processing, it is not possible to make a test purchase in production accounts without consuming credits1.
(1) Check your account credit balance.
If you wish to make a test purchase, we recommend using a credit card for payment and immediately refunding the sale after the simulation.
During the test period (Trial) in the first 14 days after account creation, you can make unlimited sales. Although the credit is "spent" at the time of sale, the system automatically returns it to the account, allowing you to test all functionalities without exhausting your balance.
Guru's Tip: To avoid wasting credits on tests, ensure that your payment integrations and checkout settings are correct before performing the actual simulation.
- Is it possible to create my website/sales page in Guru?
No, Guru does not have its own website or sales page builder. Guru is a platform focused on providing an online sales structure, specializing in transparent checkouts, campaign tracking and post-sale automation integrations.
To sell using Guru, you must:
-
Create the external page: create your website or sales page in a page builder of your choice;
-
Payment Links: within Guru, you register your products and offers, which automatically generates a unique checkout URL for each offer;
-
Publication: on your external sales page, you insert action buttons (like "Buy Now") pointing to these Guru checkout links; and
-
Checkout Customization: although the sales page is external, you can customize the appearance of the payment page in Guru with your logo and colors, ensuring the customer has a visual experience compatible with your brand.
According to your sales strategies, choose one of the link types to promote, namely: standard checkout, 1-click purchase, and 1-click upgrade.
- Is Digital Manager Guru secure?
Digital Manager Guru has state-of-the-art infrastructure and technology, so that its service is active and fully available 24 hours a day. The structure already includes everything necessary to keep a checkout ready to sell 24 hours a day (even during peak periods).
Processing
In this section, you will find answers to questions related to the processing of transactions at checkout.
- Can the delivery time for integrations take long to be sent?
Yes, it can occasionally take a little longer for the sending to be triggered in exceptional cases, and this happens, for example, when many launches occur simultaneously.
Guru always tries to deliver in the shortest possible time, however, things like sudden integration overload or even the response time of another integration can affect this sending.