
The contact information section displays details such as personal data, address, associated sales, associated subscriptions, affiliations, among other information.
On this page:
-
Detail
-
Sales
-
Subscriptions
-
E-tickets
-
Recipients
-
Producers
-
Comments
-
Audit
-
How to filter the Audit list
-
Before you start, you need to…
-
Be an administrator user or have permission to perform the following actions;
-
Have one or more contacts registered.
Detail
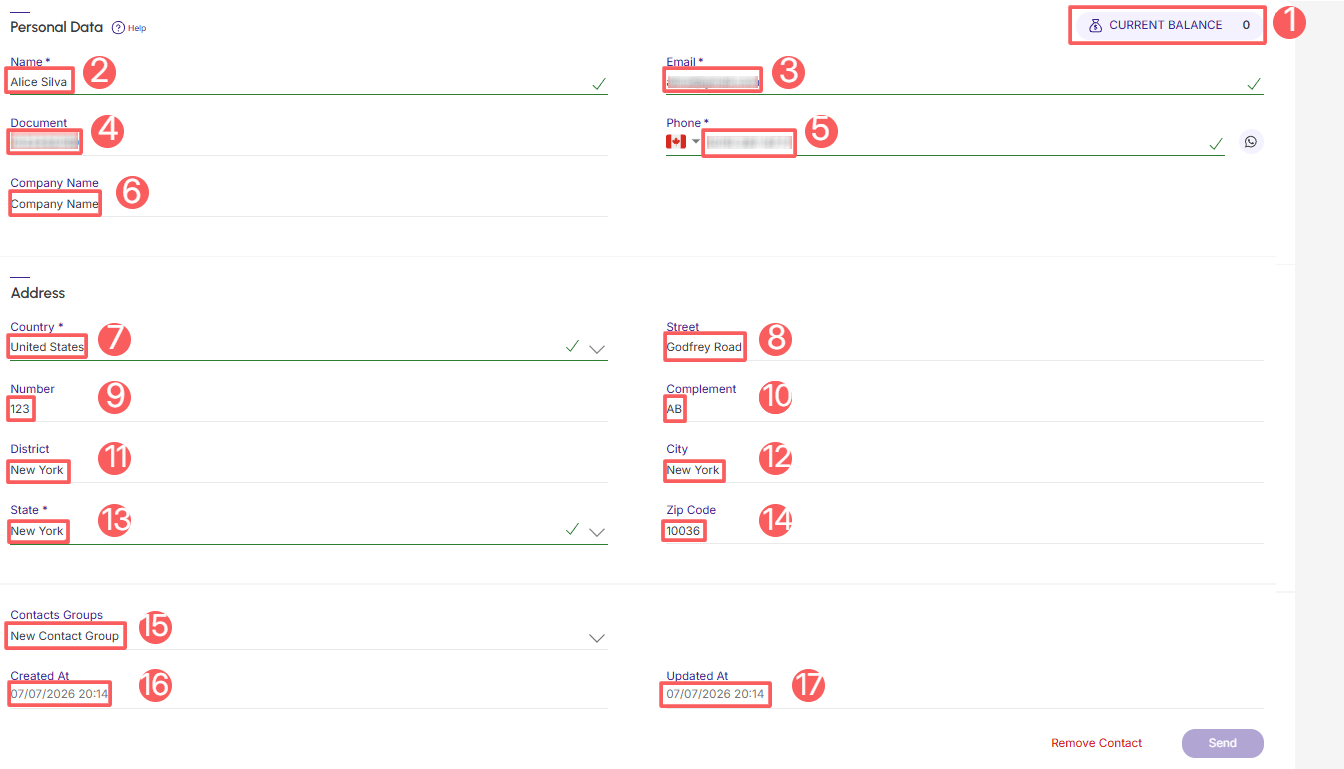
In the Detail section, you can view the contact's basic information such as personal data and address.
If necessary, you can access the actions menu to update contact data.
Steps:
1 - Select the desired contact - a screen with the data will be displayed.
2 - Click on the Detail tab.
The following information is available:
-
Current balance: contact's current credit balance;
-
Name: contact's full name;
-
Email: contact email;
-
Document: identification document number;
-
Phone: country code, city code (if applicable) and contact's mobile number;
-
Company Name: contact’s company name;
-
Country: contact's country of residence;
-
Street: contact's street of residence;
-
Number: contact's door number;
-
Complement: address complement;
-
District: contact's district of residence;
-
City: contact's city of residence;
-
State: contact's state of residence;
-
ZIP Code: contact’s Postal Code;
-
Contacts Groups: contact group to which the contact is related;
-
Created at: date the contact was created in the system;
-
Updated at: date the contact was last updated.
1 Only available if the contact has associated affiliations.
Sales
In the Salessection, you can view the list of sales (payment transactions) associated with the contact and can also export them to an XLS spreadsheet.
View Sales List
Steps:
1 - Select the desired contact - a screen with the data will be displayed.
2 - Access the Sales tab.
The list displays the following information:
-
Status: label of the current sale status - one of the possible sale statuses will be displayed.
-
Code: sale identification number.
-
Product: product associated with the sale in question.
-
Created on: transaction (sale) creation date.
-
Value: amount paid by the customer.
-
Payment method: icon indicating the payment method registered for charges - hover over the icon to view the label.
You can click on the record to view all sale information.

Export Sales of a Contact
Steps:
1 - Select the desired contact - a screen with the data will be displayed.
2 - Access the Sales tab.
3 - Click on XLS.
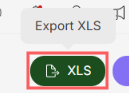
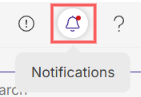
4 - After a few minutes, you will receive a notification in the Guru admin with the Download link. Click on the notification icon1 in red to view the list of notifications.
1 It may be necessary to reload the page in your browser (press CTRL+F5) for the notification icon to change color.
5 - Locate the corresponding notification and click on Download.
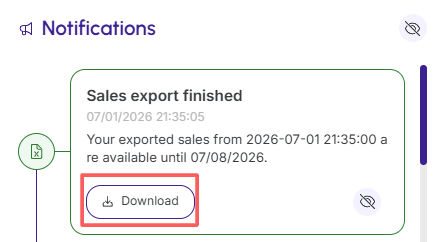
The Download link is also sent by email.
Subscriptions
In the Subscriptionssection, you can view the list of subscriptions (recurring payments) associated with the contact and can also export them to an XLS spreadsheet.
This section is only visible if there are subscription-type products registered.
View Subscriptions List
Steps:
1 - Select the desired contact - a screen with the data will be displayed.
2 - Access the Subscriptions tab.
3 - The list displays the following information:
-
Status: icon indicating the current subscription status - one of the possible subscription statuses will be displayed.
-
Code: subscription identification number.
-
Product: name of the product linked to the subscription.
-
Number of charges: displays the number of charges already made.
-
Started on: subscription start date - when the subscription is in a trial period, the start date when the customer activated the trial period will be displayed. Otherwise, the date of the 1st payment will be displayed.
-
Updated on: date of the last subscription status update.
-
Charged every: displays the subscription billing interval.
-
Payment method: icon indicating the payment method registered for charges - hover over the icon to view the label.

Export Subscriptions of a Contact
Steps:
1 - Select the desired contact - a screen with the data will be displayed.
2 - Access the Subscriptions tab.
3 - Click on XLS.
4 - After a few minutes, you will receive a notification in the Guru admin with the Download link. Click on the notification icon1 to view the list of notifications.
1 It may be necessary to reload the page in your browser (press CTRL+F5) for the notification icon to change color.
5 – Locate the corresponding notification and click on Download.
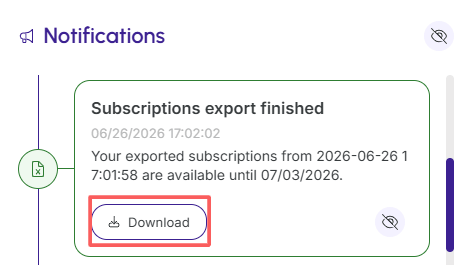
The Download link is also sent by email.
E-tickets
In the Contact Detail, you can view the tickets associated with the contact, and you can also filter the contact's information.
Before you start, you need to…
-
Have one or more e-ticket TYPE products registered.
View E-tickets List
Steps:
1 - Select the desired contact - a screen with the data will be displayed.
2 - Access the E-tickets tab.
3 - The list displays the following information:
-
Status: displays the current ticket status - one of the ticket statuses will be displayed, such as Open, Assigned, Invited, Checked-in, Canceled;
-
Code: ticket identification code;
-
Date: ticket creation date;
-
Product: name of the event linked to the ticket;
-
Participant: name of the participant who received the ticket invitation;
-
Email: email of the participant who received the ticket invitation;
-
Mobile: contact number of the participant who received the ticket invitation.

Filter E-tickets from a Contact
Steps:
1 - Select the desired contact - a screen with the data will be displayed.
2 -Access the tab E-tickets.
3 - Click on Filters.
4 - The list displays the following information:
-
Period: searches for tickets with start and end dates - if desired, use the pre-defined time range buttons;
-
Code: searches for the ticket with the informed identification code;
-
Products: searches for the name of the events linked to the ticket;
-
Email: searches for tickets where the participant's (contact's) email is associated.
-
Status: searches for tickets with statuses corresponding to those selected (Open, Assigned, Canceled, Checked-in or Invited) - if you want to filter all tickets regardless of status, just select all.
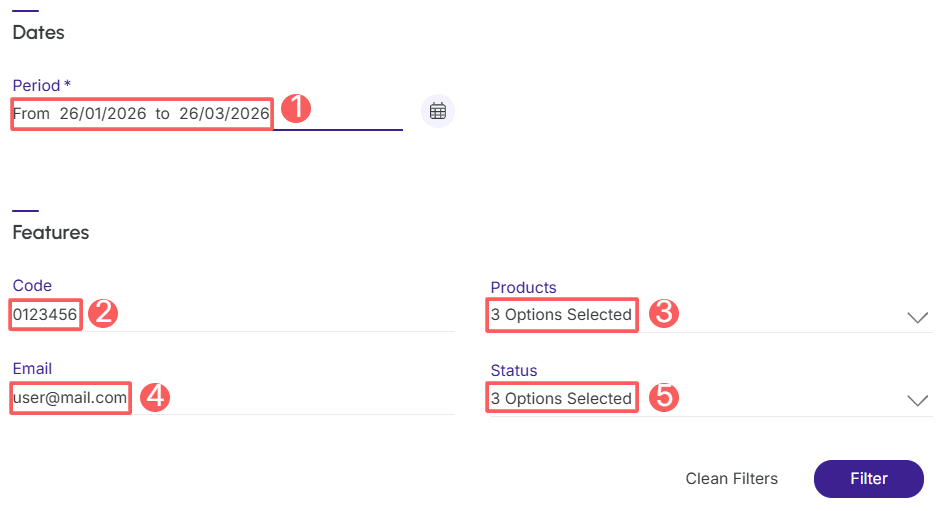
5 - Click on Filter.
If you want to filter all tickets regardless of the date, just leave this field empty.
To remove the applied filters, just click on Clean Filters.
Recipients
In the Recipients, you can consult the partner's recipient registrations in the respective payment processors you use in your business.
This section appears visible only if you have a payment processor with active split.
Steps:
1 - Select the desired contact - a screen with the data will be displayed.
2 - Access the tab Recipients.
The following information is available:
-
Marketplace: payment processor name;
-
Marketplace ID: recipient registration identification number in the payment processor;
-
Recipient Name: full name of the recipient;
-
Email: contact email;
-
Created at: recipient creation date;
-
Status: On (purple) or Off (gray). When off, it indicates that the partner is not being commissioned for any sale transacted in the respective payment processor, even if their affiliation for the product is activated.

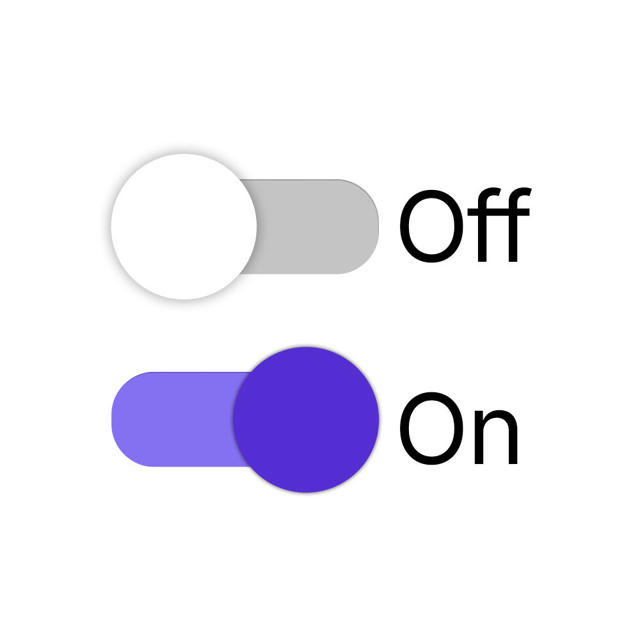
Activate or deactivate the recipient's registration by changing the selector's position.
Click an item in the list to edit edit the recipient's registration.
Producers
In the Producers section, you can consult the producers associated with the contact.
Steps:
1 - Select the desired contact - a screen with the data will be displayed.
2 - Access the tab Producers.
The following information is available:
-
Code: producer identifier;
-
Name: producer name;
-
Marketplace: payment processor associated with the producer.

Click an item in the list to edit the recipient's registration.
To remove the producer's link, just click Remove (trash can icon).
Manage Comments
You can add, edit, or remove a contact's comments. This option is useful for sharing important information about the contact with other team members.
Add Comment
Steps:
1 - Select the desired contact - a screen with the data will be displayed.
2 - Click on Comments.
3 - Then, click on Add Comment - an editing screen will be displayed.
4 - Type the desired comment.
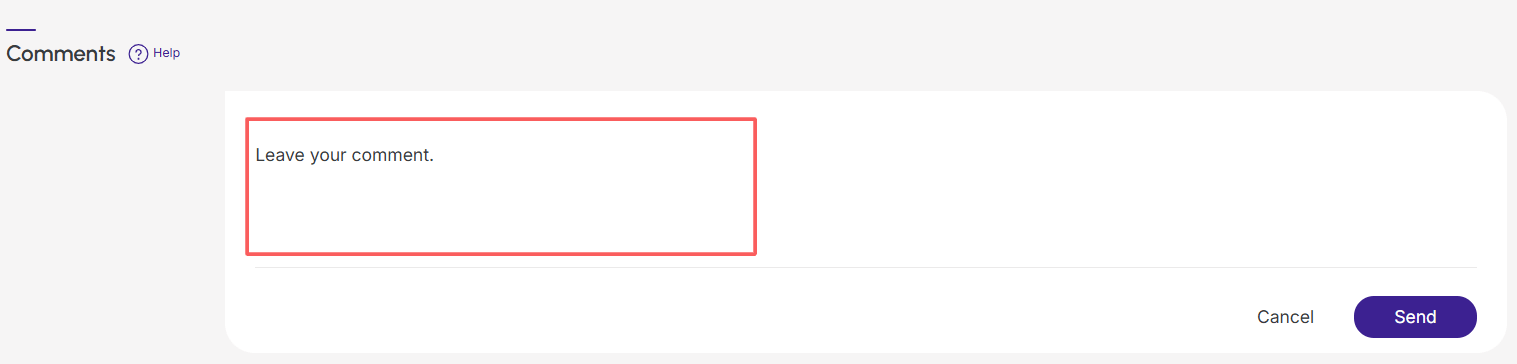
5 - Click on Send.
Update Comment
Steps:
1 - In the desired comment, click on Edit (pencil icon).
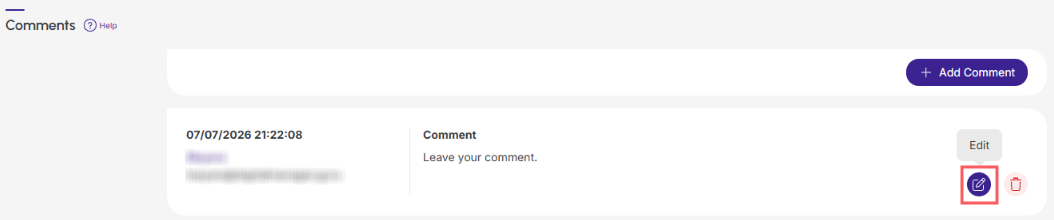
2 - Edit the comment.
3 - Click on Send.
Remove Comment
Steps:
1 - In the desired comment, click on Remove (trash can icon).
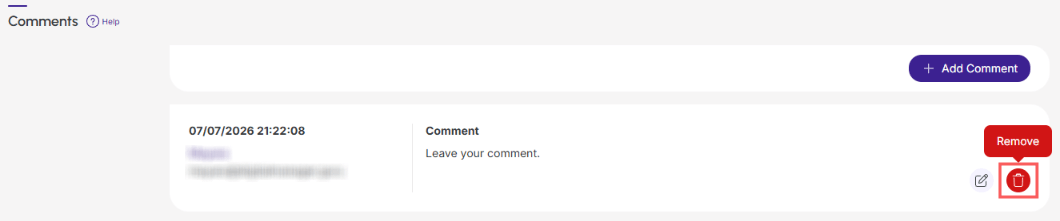
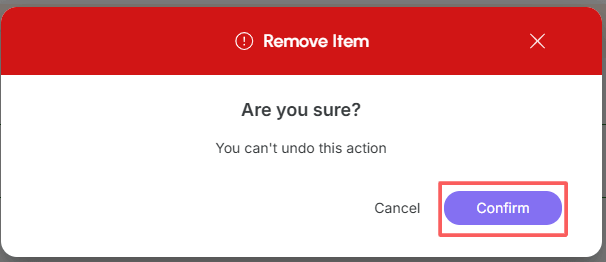
2 - A confirmation window is displayed. If you wish to proceed with the removal, click on Confirm.
Audit
For data security and transparency, Guru stores a history of all events associated with the contact, identifying the event type, user1 involved and infrastructure data1.
(1) Displayed only when applicable.
Steps:
1 - Select the desired contact - a screen with the data will be displayed.
2 - Click on the Audit tab.
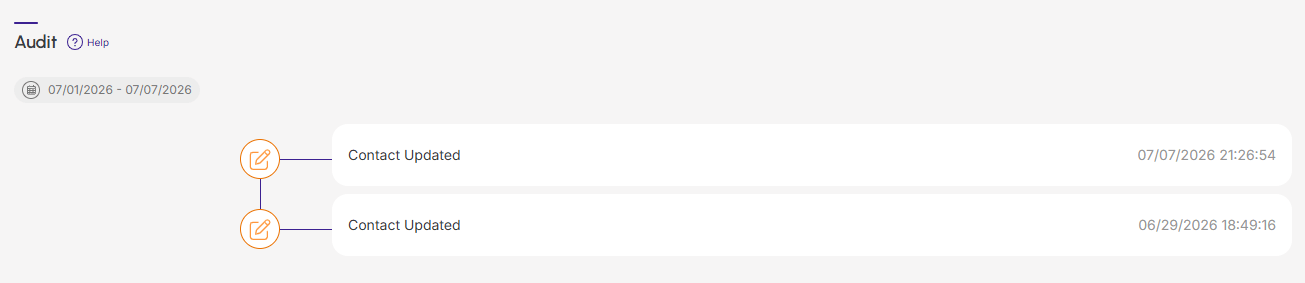
3 - Activities are displayed in a timeline (from most recent to oldest).
4 - If desired, you can view the activity details by clicking on its title.

5 - Click on one of the available sections to view the data:
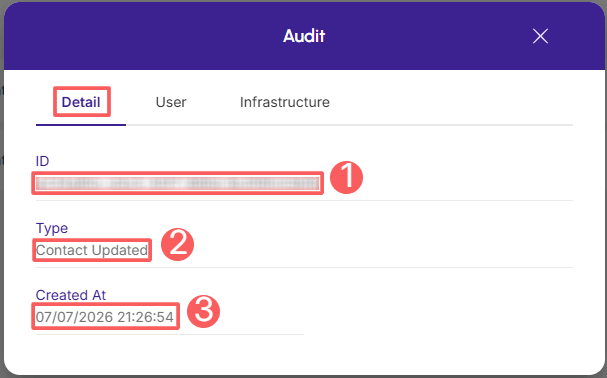
Detail
Displays detailed information about the selected event.
-
Type of change performed;
-
ID: identification number (ID) of the update;
-
Created at: date of activity registration.
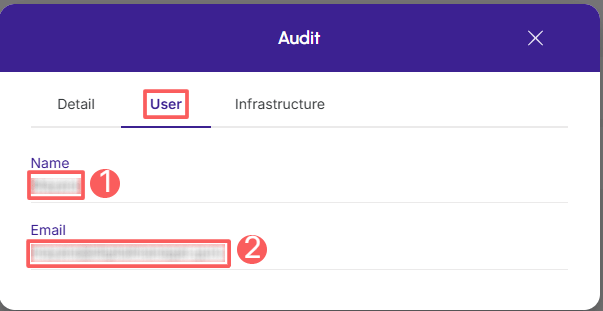
User
Displays the information of the user who performed the action - displayed only for events involving a user's action.
-
Name: name of the related user.
-
E-mail: e-mail of the related user.
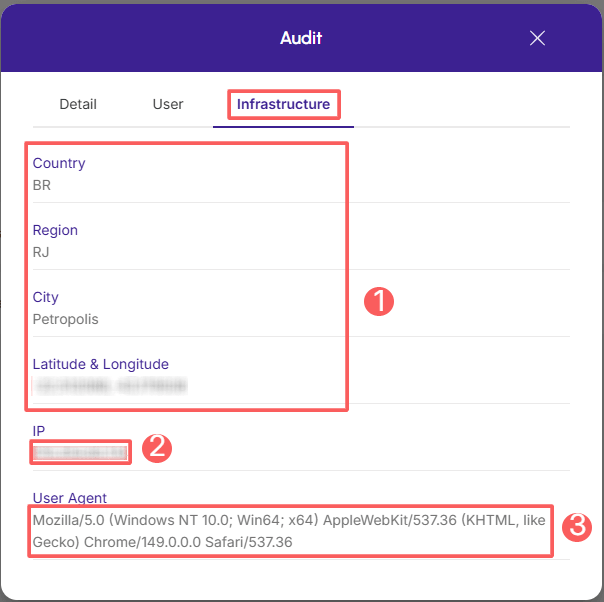
Infrastructure
Displays the infrastructure information (country, IP, user agent…) of the related activity - displayed only for events involving a user's action.
-
Country, Region, City, Latitude & Longitude: location of the device where the activity was performed.
-
IP Adress: ip address of the device.
-
User Agent: identification of the user agent that performed the operation.
How to filter the Audit list
You can use filters to view a smaller subset of existing audits. This feature is useful for finding specific audits you want to view.
By default, only records from the last 28 days will be shown, but the period can be changed in the filters, in the Period.field.
Steps:
1 - Select the desired contact - a screen with the data will be displayed.
2 - Click on the tab Audit.
3 - In Audit, click on Filters.
4 - Fill in one or more filter options:
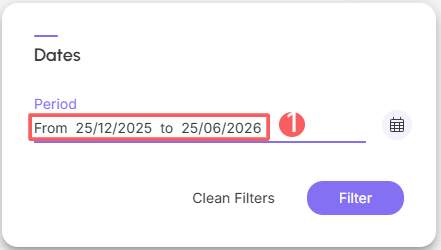
-
Period: searches for audits registered in the selected period - you can use the predefined time interval buttons or select the date you want to view.
5 - Click on Filter.
You can view the number of applied filters, and when using them, it will be possible to clear them without accessing the Filters icon again, facilitating the removal of the selection.
Protect your data. Increase your business security.
Create and manage users determining what each employee can see and do within the organization.
More Resources