
By integrating your Ebanx account, you will be able to process payments from customers in other countries through Checkout Guru and manage the entire business through our platform.
To activate the integration, you must access your Ebanx account, obtain the production credentials, and then enter them in Guru. After activating the integration, you must add products and offers to get checkout links.
On this page:
-
Step 1: Obtain Credentials
-
Step 2: Activate Integration
-
What to Do Next
Before you start, you need:
-
Have an active production account with Ebanx.
-
Be an administrator or have permission to perform the following actions.
Step 1: Obtain Credentials
In this step, you must obtain the integration credentials for your Ebanx account.
Steps:
1 - Access your Ebanx account with your username and password.
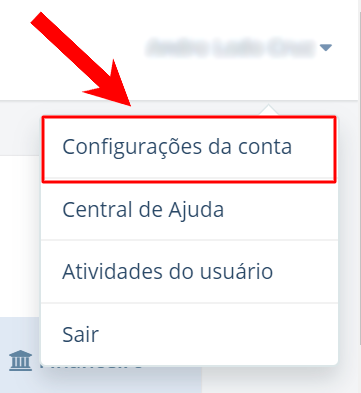
2 - Click on the username (top right corner).

3 - Click on Account Settings.
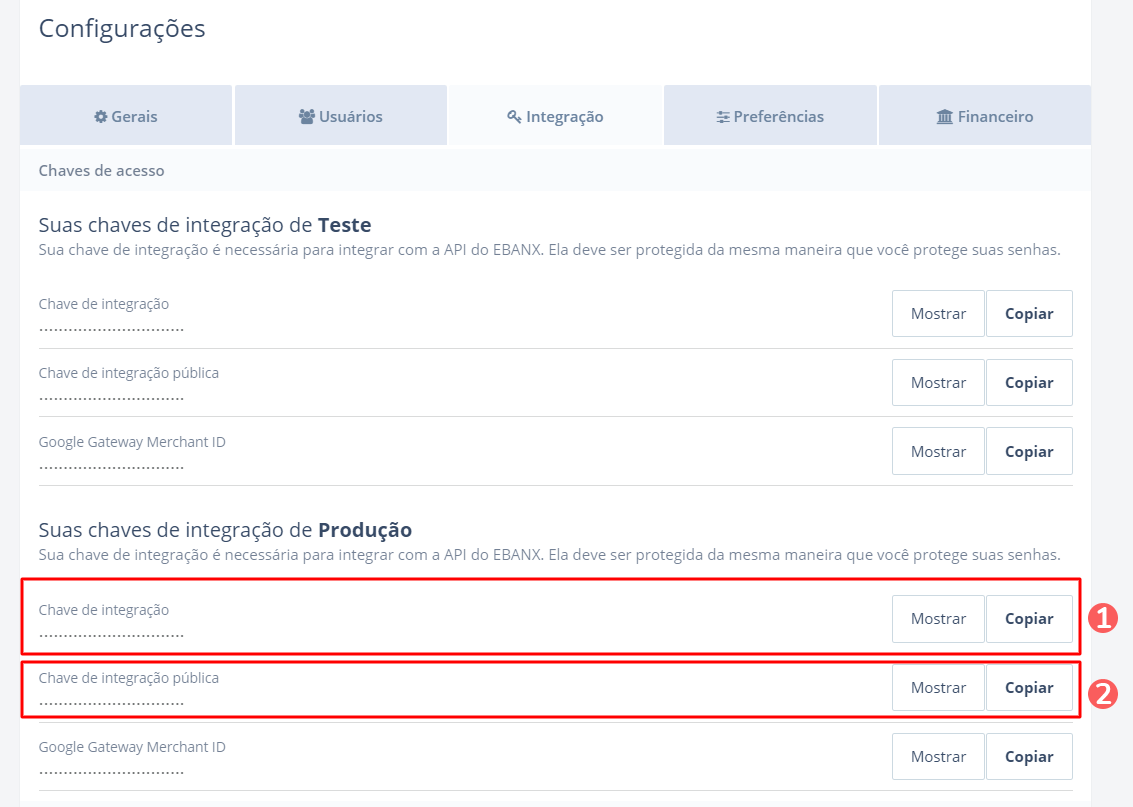
4 - Go to the Integration tab.

5 - In the Your production integration keyssection, locate the line corresponding to:
-
Integration Key: click on Copy and store the copied value;
-
Public Integration Key: click on Copy and store the copied value.
Step 2: Activate Integration
In this step, you must enter your Ebanx integration credentials in the Guru admin.
The API key will not be available after saving the integration. If you change the API key, it will no longer be valid, and you will need to return to the Ebanx environment to obtain the key.
This change will bring greater security to your account, making it impossible to view the integration data.
Steps:
1 - Access the guru admin with your username and password.
2 - In the side menu, access Settings > Integrations > Guru’s Checkout > Ebanx

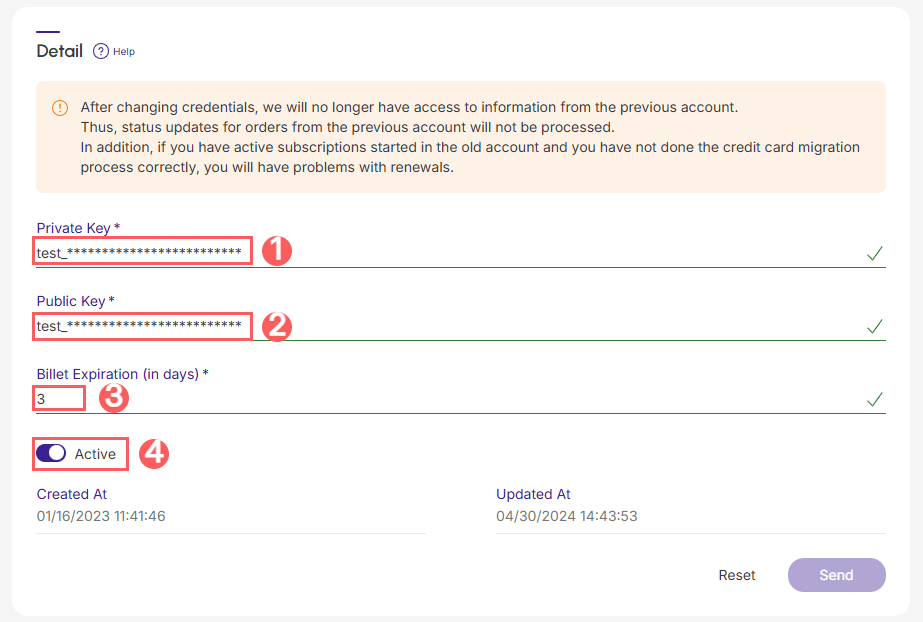
3 - In the Detail tab, enter:
-
Private Key: your integration key obtained in step 1 - item 5;
-
Public Key: your public integration key obtained in step 1 - item 5;
-
Billet Expiration (in days)1: due date for the Billet (in days);
-
Active: switch the button to the on position.
(1) Billet deadline (in days) maximum of 1 year (The billet options are only available on the checkout version for customers in Brazil).
.jpg?cb=8837a4ea6a4e7db37d2e094edac9e7bf)
4 - Click on Send.
To confirm that the integration is active, you should see a notification in the top right corner.
What to Do Next
Once the integration with Ebanx is active, you must access the Products section to add products and their respective offers.
Remember to link the product to Ebanx (field marketplace) and inform the type corresponding to the desired sales modality: product (single sale) or subscription (recurring billing). After adding an offer, the checkout link will be available for promotion.
If you are selling subscriptions with Ebanx, you need to meet a set of requirements. Consult the guide on Best practices for selling subscriptions with Ebanx to learn more.
Consult the complete step-by-step guide:
Import products from your virtual store
If you use an e-commerce platform integrated with Guru, you can import products from your store. Then, update or add an offer to the product to generate the checkout link.
More Resources