
The Guru is a flexible and powerful platform. With it, you can manage all parts of your sales operation, such as payment, campaign tracking, tool integrations, metrics, and much more.
There are countless possibilities, as you can choose who will process the payment, where you will issue the invoice, which carrier you will use to deliver the order, and so on.
But don't worry, you only need to take a few simple actions to start selling online. In this "Getting Started" guide, we will help you kick off and be ready today to receive payments through Checkout Guru.
Getting Started
With administrator permissions, you have the ability to lay the groundwork for a solid online sales operation. Here are the different platform features we will guide you through:
-
Checkout Guru integrated with a payment processor of your choice, to process your customers' payments, whether for subscriptions or one-off sales;
-
Register Product and Offer to link to a payment processor by selecting the type according to the desired sale, product for one-off sales, e-ticket product or subscription for recurring charges, and
-
Disclose the Checkout link upon completing the offer registration, sending it to customers or publishing it on a sales page.
To strengthen the security of your Guru account, you must activate 2-Factor Authentication (2FA) only once. With it active, each new login will require a random code generated by an authenticator.
At Guru, 2FA is mandatory and can be done via email (default option) or by app (recommended option).
On this page:
-
Integrate the Payment Processor
-
Register product
-
Add offer to product
-
Disclose the checkout link
Before you start, you need to…
-
Be an administrator user or have permission to perform the following actions.
-
Have the production account credentials for the payment processor you intend to use.
Integrate the Payment Processor
In this step, you will activate payment integrations , then register your first product and offer and, finally, generate the checkout link to start selling.
The first step is to activate a Payment processor, that is, a gateway or processor that will transact all payments made through Checkout Guru.
To perform this step, you must access:
Step 1:
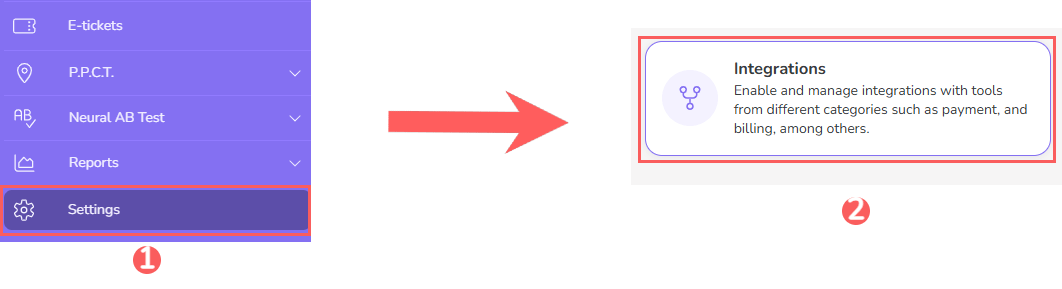
1 - In the left sidebar menu, click on Settings, and then on Integrations.
2 - Then, click on Checkout Guru and choose the processor you intend to use to transact your customers' payments.
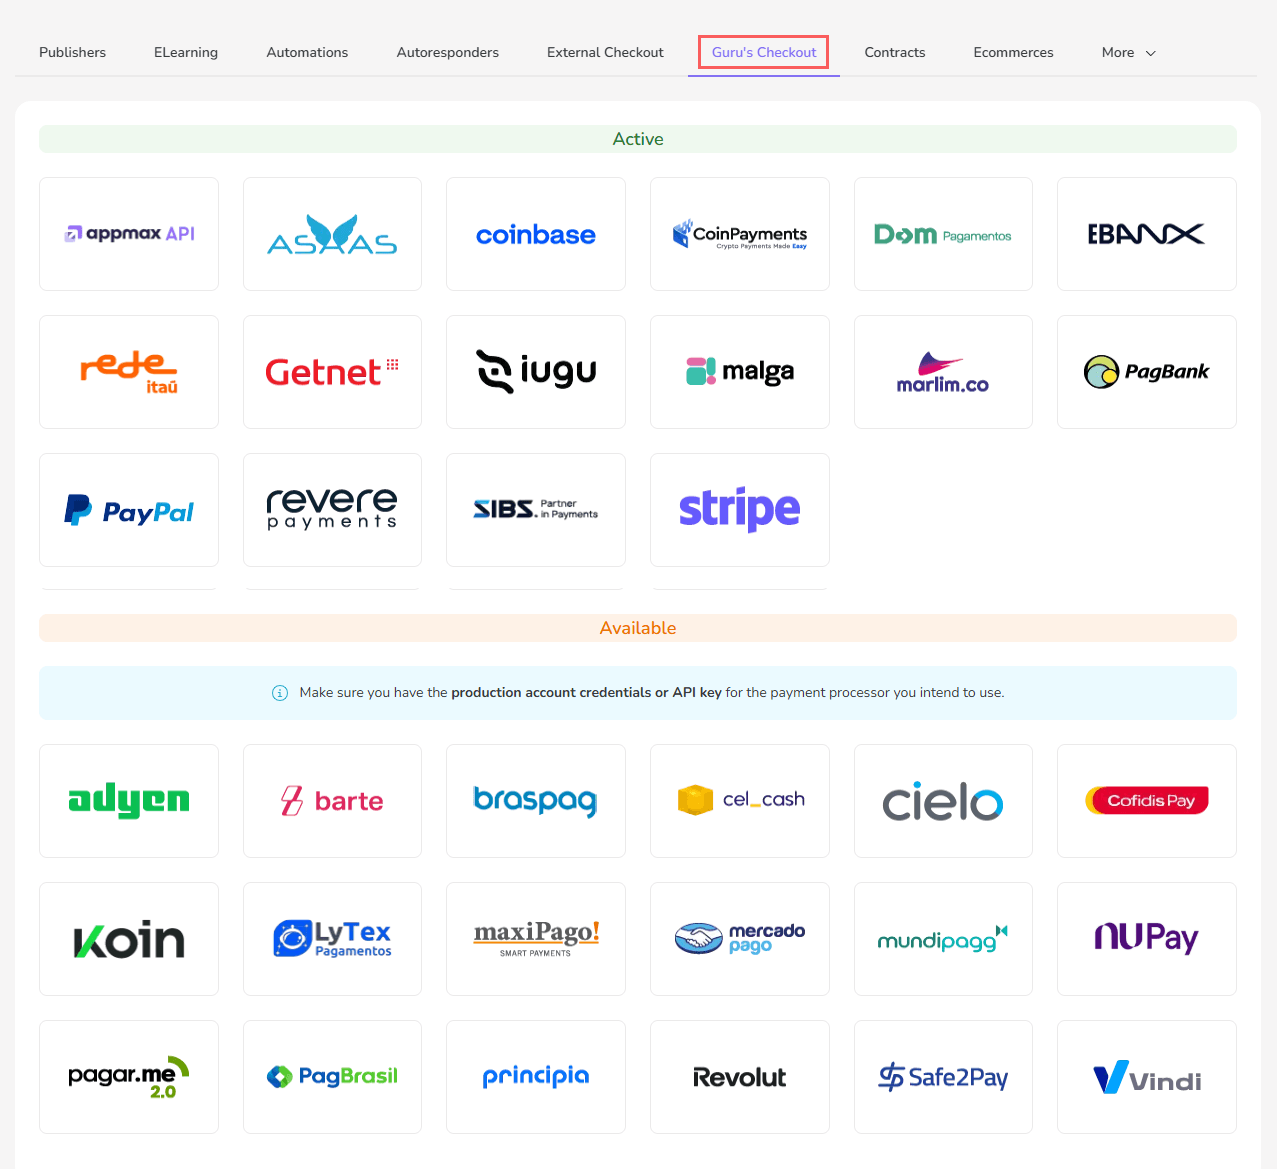
3 - To activate the integration, click on the desired option and enter your production account credentials in the selected payment processor.
Access now and see the complete step-by-step guide on how to Activate integration with a payment processor.
Register product
After activating the integration with the payment processor of your choice, the next step is to register products and offers to then generate the checkout links.
Register product
The next step is to register your product in Guru. When adding it, you must link the payment processor1 (in the marketplace field) and select the type according to the desired sales modality:
-
Productsfor one-off sales; -
E-ticketsfor one-off sales; -
Subscriptionsfor recurring charges.
To register a product, you must access:
Steps:
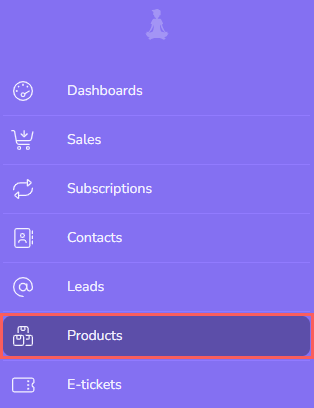
1 - In the sidebar menu, access Products.
2 - In Products, click on Add Product.
3 - In Create Product, enter the following data:
-
Code: a unique identification code1 for the product is automatically generated - if desired, you can change it;
-
Name: name or title of the product you want to show to customers;
-
Marketplace: select the processor where the payment will be transacted - will be listed active integrations for Checkout Guru and External Checkout;
-
Product Type: select the option according to the sales modality that will be applied - Product (single charge), Subscription (recurring charge) or E-ticket (single charge);
-
Producer: select the content producer or manufacturer/distributor name - the list of registered producers will be displayed;
-
Product Group: select the product group you want to associate.
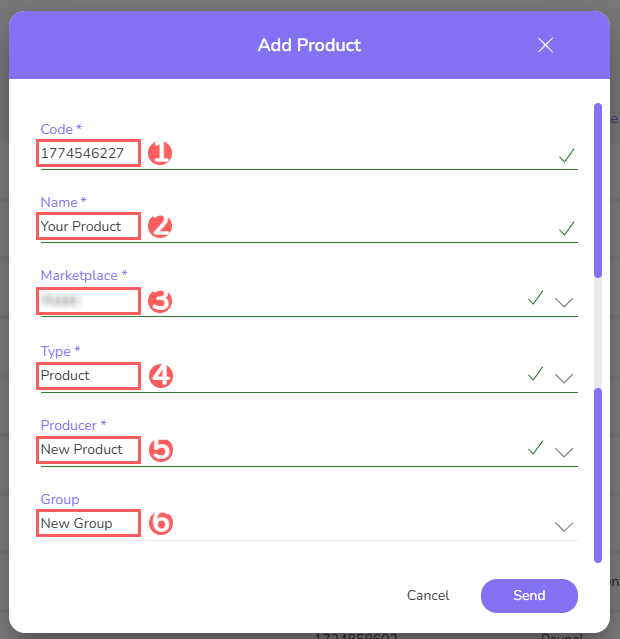
4 - Click on Send.
(1) The payment processors activated in Settings » Integrations » Checkout Guru will be displayed.
Add offer to product
In the product registration, you must add an offer to define components such as: price, discount, payment methods, installment options, shipping, and others.
You can also add complementary product(s) for order bump, configure specific discounts and also define intervals1 and cycles1 of recurring charges, in addition to options for upgrade1/downgrade1 of plan.
To add an offer to the product, you must access:
Steps:
1 - Access the offer list in the desired product registration.
2 - In Offers, click on Create Offer.
3 - Fill in the offer information.
Fill in the offer information according to the type of product, e-tickets or subscriptions.
(1) Settings available only for subscription / recurring charge products.
Disclose the checkout link
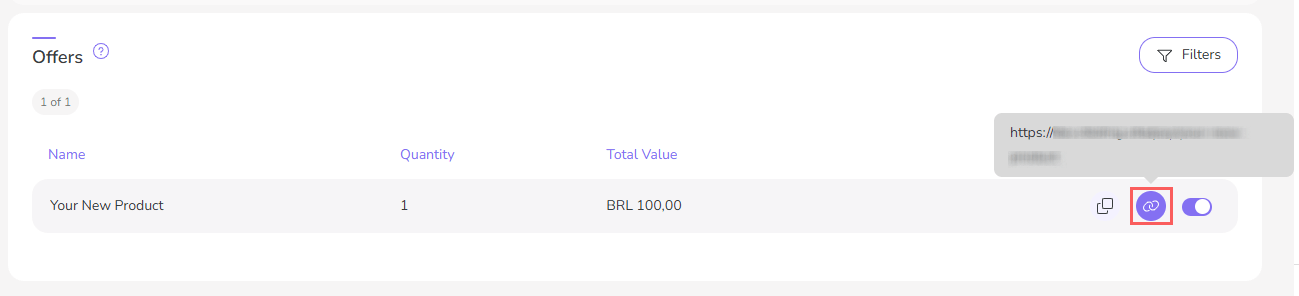
After activating the payment processor, registering the product, and adding the offer, the checkout link will be automatically generated.
To disclose it, simply copy the checkout link available in the offer and send it to your customers or publish it on a sales page.
We recommend making a test purchase to validate if everything is working as expected.
To get the checkout link, you must access:
Steps:
1 - In the sidebar menu, access Products.
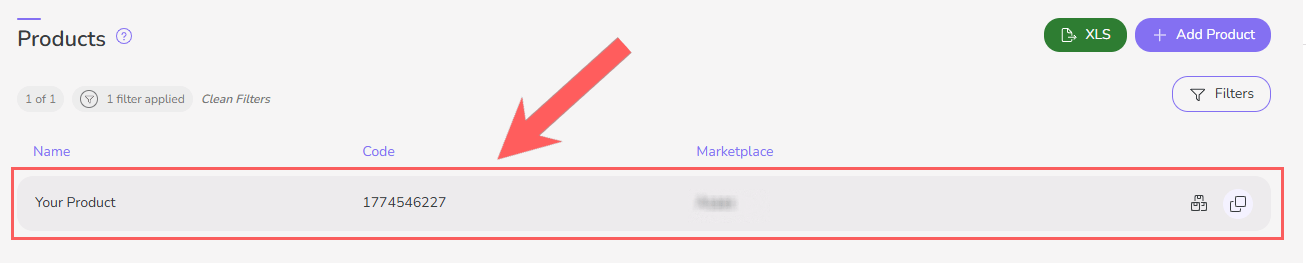
2 - Click on the Desired Product .
3 - Click on the Offers tab.
4 - Hover over the Offer and click on the Link icon to copy the checkout URL.
Access and learn how to get a checkout link through the export of the product list or in the offer detail.