
At Guru, we seek continuous evolution and have recently updated our infrastructure to an even more robust and secure model.
If you use a custom domain on the platform, you will need to perform a brief configuration in your panel to ensure the stability and security of your service. This guide provides a step-by-step for this transition, which is simple and quick.
How will the migration be?
The migration will be carried out directly in your Guru admin, and for this, you must access the desired custom domain, click on Migrate Custom Domain and follow the instructions displayed on the screen.
We recommend that the migration be carried out by april 3rd (Friday). By choosing the best time for the transition, you ensure that the process occurs immediately and without interruptions.
It is essential to complete this process as soon as possible, because as soon as the old infrastructure is shut down, sales will be interrupted until the migration is completed.
Attention: Do not remove the old CNAME records from your hosting at any time.
If you have any questions about performing the migration, please contact the team via platform support.
On this page:
-
Custom Domain Migration
Custom Domain Migration
In this step, you must access your Guru account and perform the custom domain migration.
Attention: Do not remove the old CNAME records from your hosting at any time.
To ensure sales stability, domain migration should not coincide with launch periods.
Steps:
1 - Access the Guru admin with your username and password.
2 - In the side menu, click on Settings, and then click on Custom Domains.
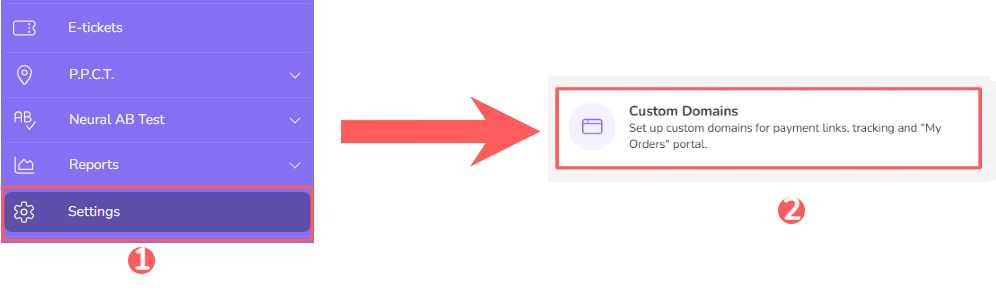
3 - In the Custom Domain that appears in the list, click on Migrate Domain.

4 - When clicking on Migrate Domain, a box with instructions about the migration will appear on the screen.
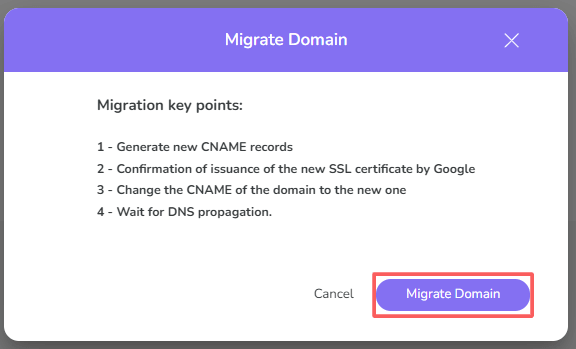
Read the instructions carefully before proceeding with the migration.
5 - Click on Migrate Domain in the instructions box, to start the migration.
Done! A message will appear in the upper right corner of the screen, indicating that the migration has started.
6 - Next, the system will display the data, which must be entered into your domain's DNS records.
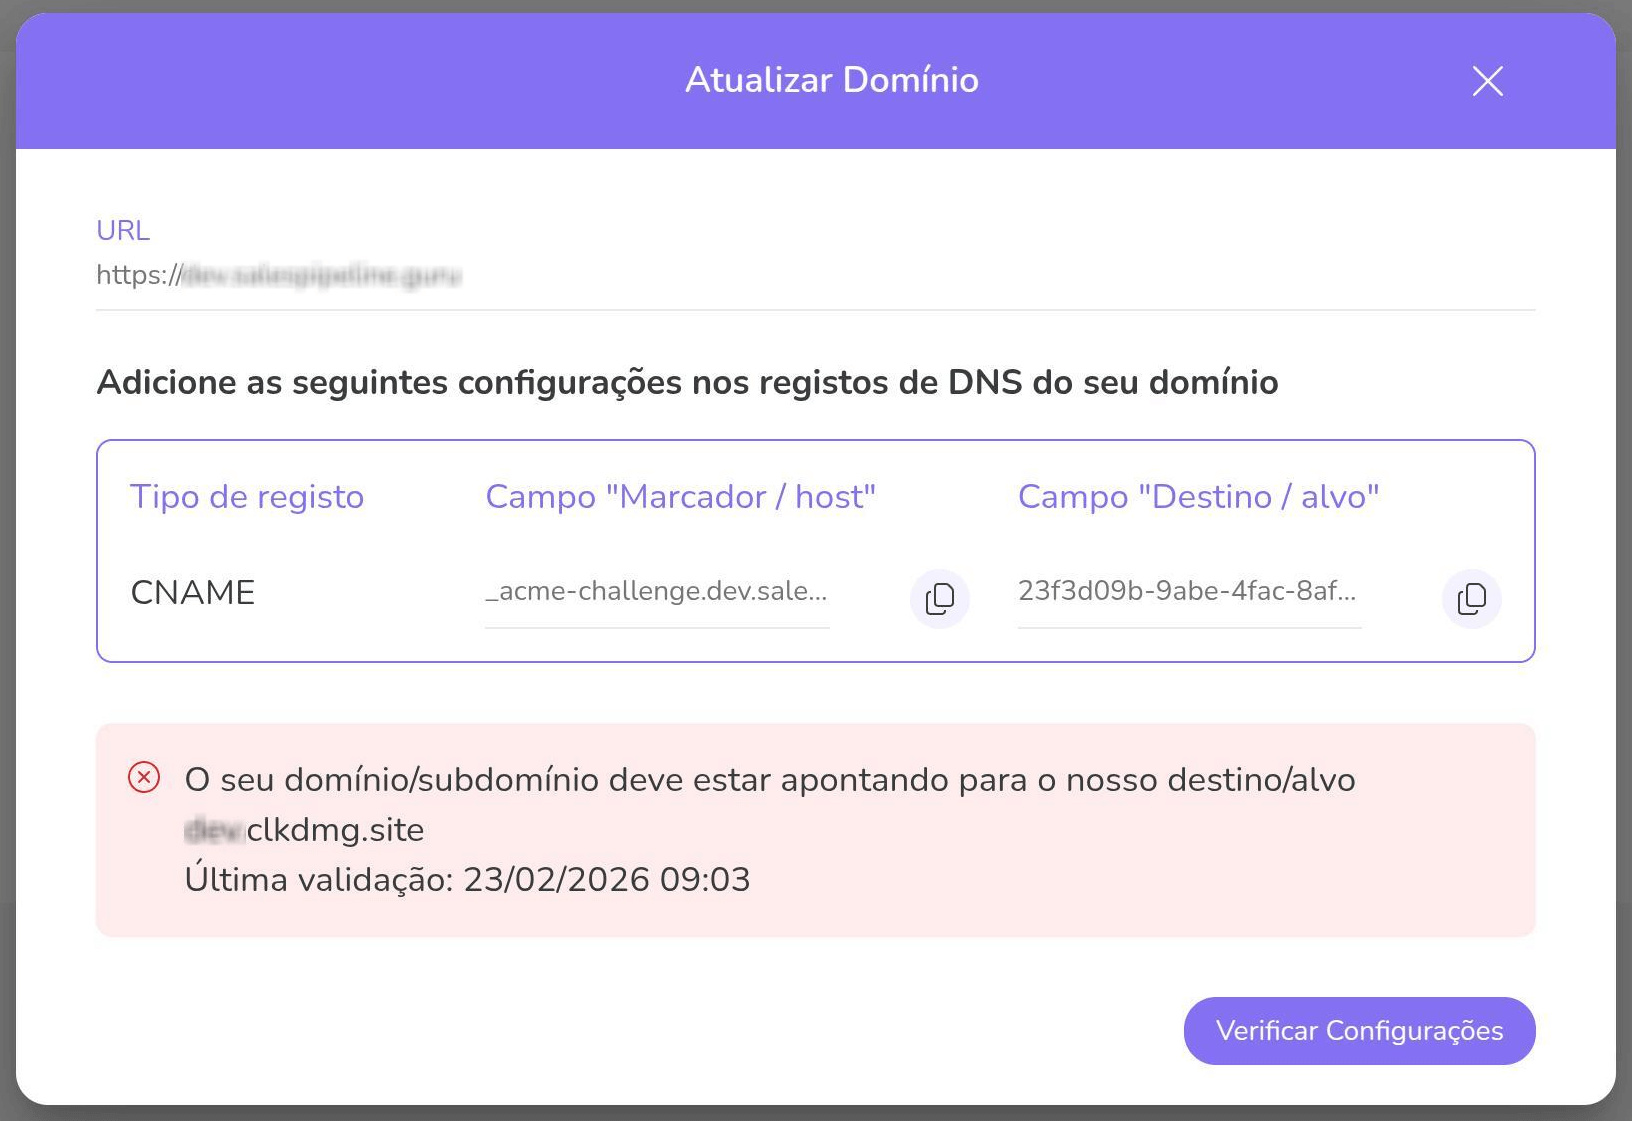
7 - Access your hosting control panel with your username and password (or ask your site administrator to do this) and create a new cname type. record.
Attention: The first record is for SSL issuance, which can take more than 30 minutes to generate.
8 - Return to Guru, and click on Verify Settings.
Attention: The first record is for SSL issuance, which can take more than 30 minutes to generate.
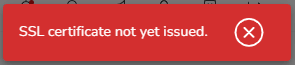
If a certificate error occurs, wait 30 minutes and return to Guru, and click again on Verify Settings.
9 - After Verifying the Settings, return to your hosting control panel and change the old record that had as destinationhosted.clkdmg.site to hosted2.clkdmg.site.
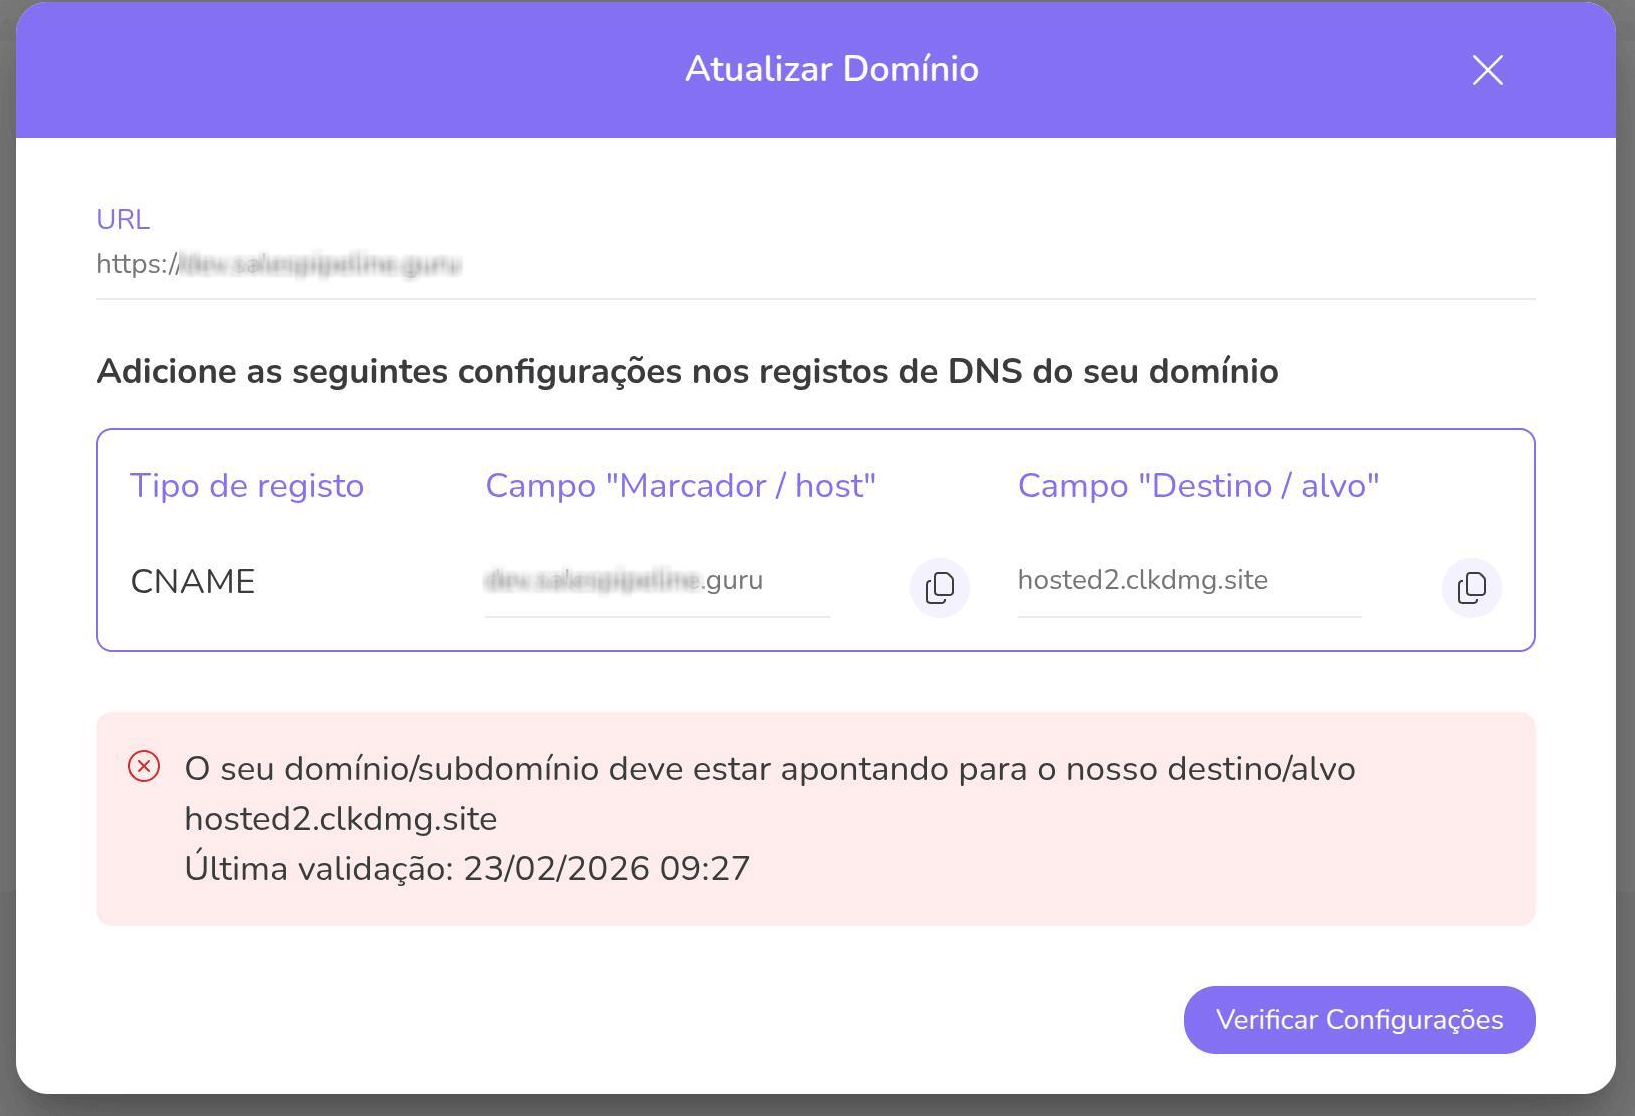
You will notice that the Destination/target field will appear as hosted2.clkdmg.site .
10 - After changing the record configuration in your panel, return to Guru and click on Verify Settings.
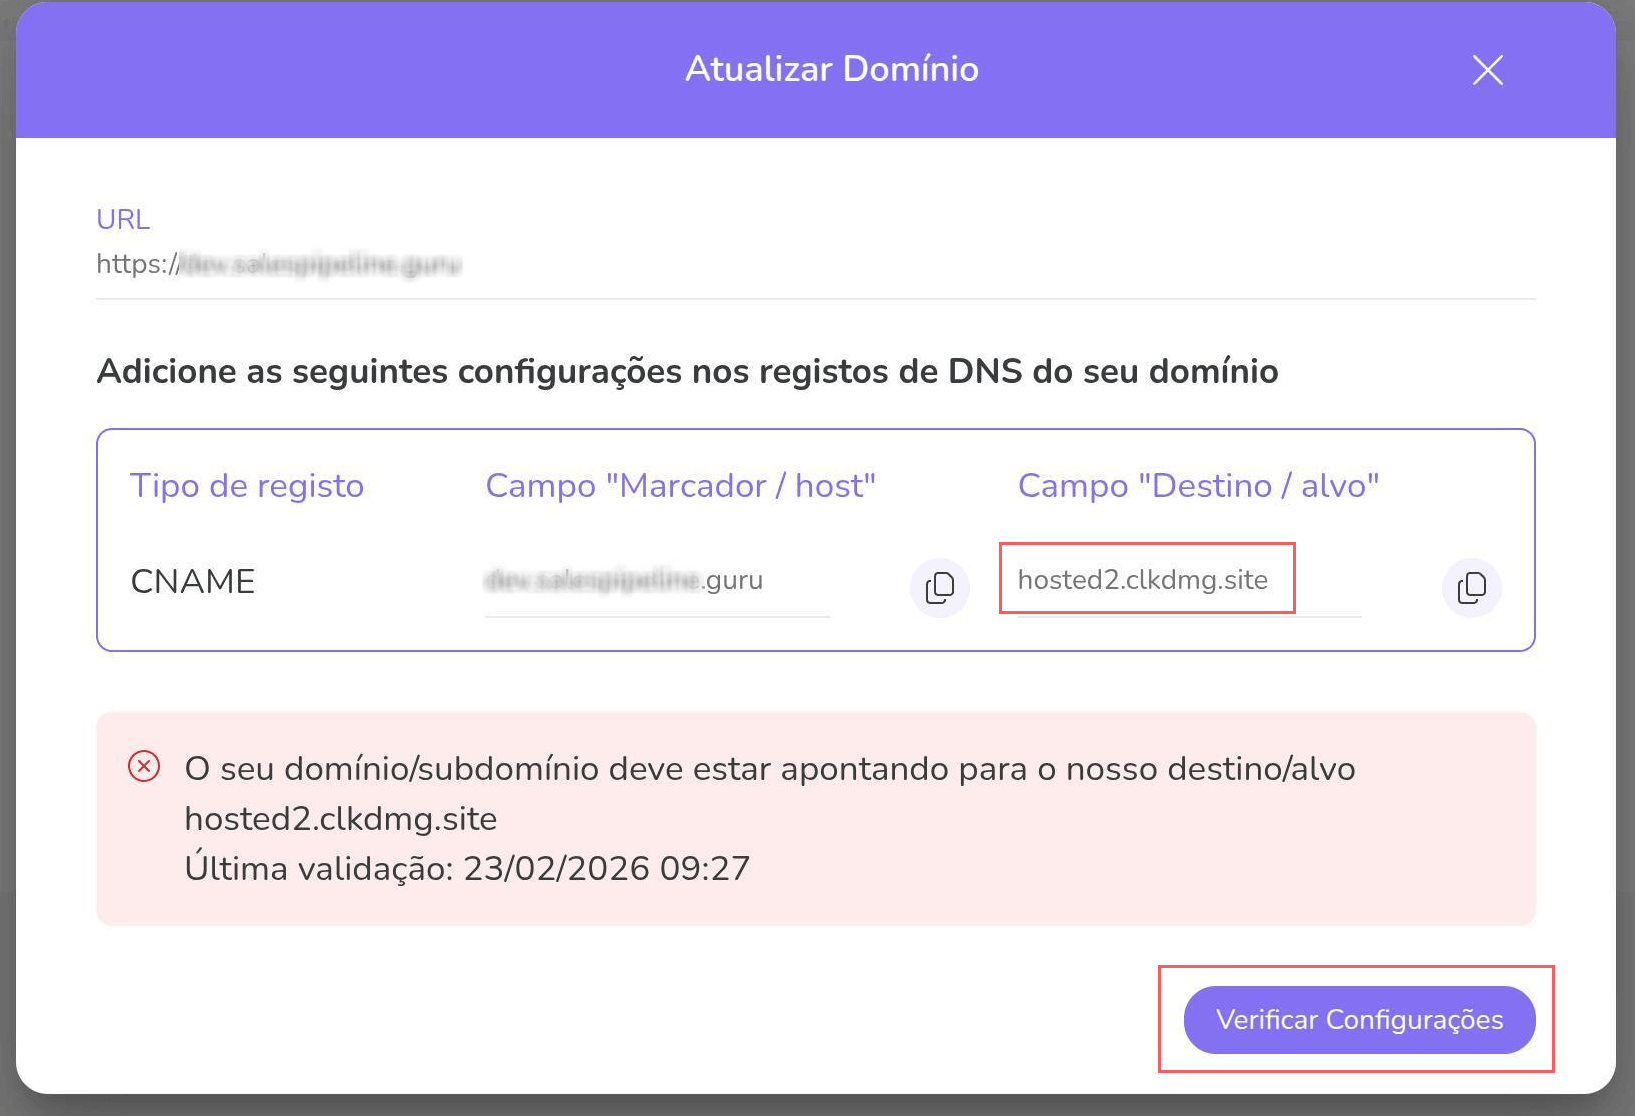
11 - Done! Next, the information will appear that the Domain has been successfully validated!
Dns propagation will occur without interruptions, ensuring that our services continue to process both new and old requests.
Note on Custom Domains:
Some providers (such as Go. Daddy, Google, or AWS) automatically add your domain to the end of the record. To ensure your certificate is successfully validated, when creating the CNAME record, enter only the first part of the code in the "Host/Name" field.
Example:
-
Correct: _acme-challenge.pay
-
Incorrect: _acme-challenge.pay.yourdomain.com
If the full value is entered, your provider may duplicate the domain (e.g., .com.com), preventing site activation. You can use the dns checker tool to search and verify the domain configuration.