
It is possible to configure webhooks to synchronize e-ticket data by defining which events should generate notifications. This feature can be used to send data to your app or proprietary system.
In Guru, you can add webhooks and adjust the sending rules, establishing trigger criteria and ensuring that your e-ticket data is transmitted securely, structured, and according to the needs of your external environment.
On this page:
-
Webhooks for an e-ticket
-
Add e-ticket webhook
Before you start, you need…
-
Be an administrator user or have permission to perform the following actions.
Webhooks for an E-ticket
You can use the e-ticket webhook to receive a notification in the destination system every time the e-ticket is updated and meets the conditions configured in the webhook.
This function is useful when you need to take an action1 according to the e-ticket status in question, for example: if the e-ticket has an open status (unassigned), it can be assigned to a participant.
Below you will find the list of types (triggers) for sending the webhook for e-tickets:
|
Type |
Sent when… |
|---|---|
|
Assigned |
The E-ticket has been updated and has the status |
|
Canceled |
The E-ticket has been updated and has the status |
|
Checked-in |
The E-ticket has been updated and has the status |
|
Invited |
The E-ticket has been updated and has the status |
|
Open |
The E-ticket has been updated and has the status |
Add E-tickets Webhook
You can configure webhooks in the Guru admin through the following operations: add, update, deactivate, and remove. All actions performed are recorded by the platform and can be consulted in the Audit section.
Consult the integration limit1 active (category webhooks) for the contracted plan. If you have reached the available limit, simply upgrade to the Plus 2 or Plus 3 category.
(1) During the testing period, a maximum of 2 active webhooks are allowed.
Steps:
1 - Access the Guru admin with your username and password.
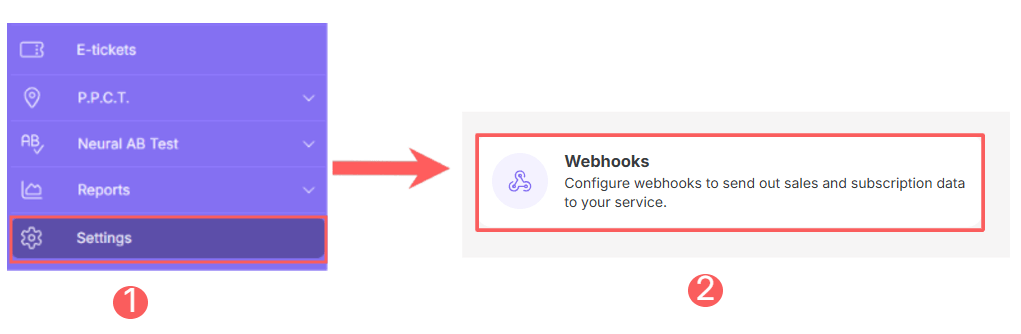
2 - In the side menu, click on Settings and then Webhooks.
3 - In Webhooks, click on E-tickets.
4 - In the upper right corner, click on Add Webhook.
5 - Fill in the information:
Basic Data
-
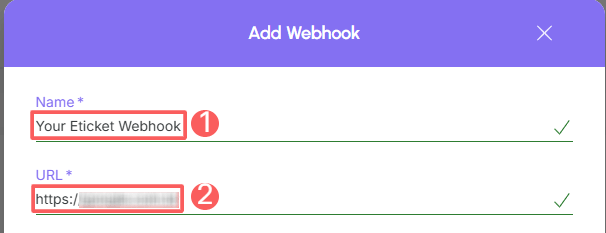
Name: your webhook's name;
-
URL: destination URL obtained from the system in question (or from the responsible developer).
Sending Rules:
-
Concurrent Requests: maximum number of concurrent requests that Guru should perform - indicate an appropriate value to avoid overloading the destination server;
-
Status: for which e-ticket statuses the webhook should be sent - you can select more than one.
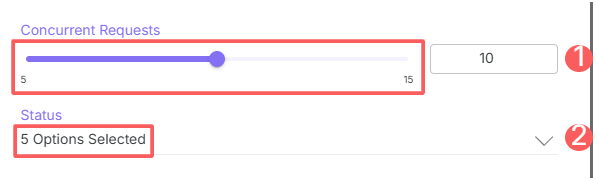
For example: if you configure the webhook for 5 simultaneous sends, if 6 sends are made simultaneously, the sixth send is placed in a waiting queue with a delay (delay) of 10 seconds.
Webhook Sending Funnel:
-
Destination URL + object ID (transaction or subscription) -> maximum of one webhook at a time;
-
Destination URL -> maximum number of simultaneous webhooks configured.
Record Filtering
-
Filter by: check filter by
all,MarketplacesorProducts(1); -
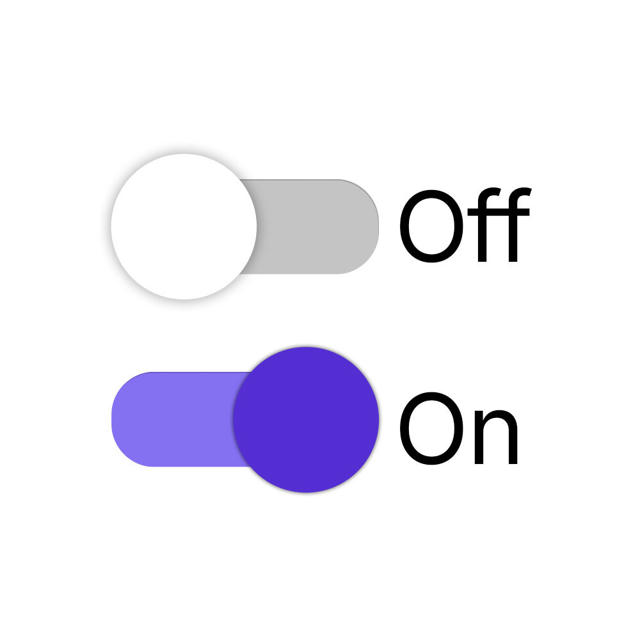
Active: switch the button to the on position.
(1) When choosing to filter by “all” or “marketplaces”, any new product created will be automatically associated with the webhook.
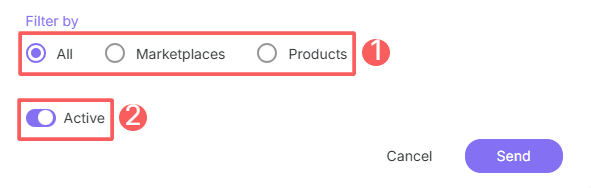
If you filter by Marketplaces or All, whenever you create a new product that meets the requirements, it will be associated with the corresponding webhooks.
Only e-tickets that meet the indicated filtering criteria will be sent by the webhook.
6 - Click on Send.
From this moment on, each updated e-ticket that meets the defined criteria will be sent to the destination URL.
More Resources